How to Install ClipBucket automatically via Softaculous
Updated on Mar 13, 2019
The Clip Bucket application is fully supported by the Softaculous autoinstaller which means that with few clicks you will be able to install it on your hosting package with us. In this tutorial we will review the whole installation process of the Clip Bucket application via the Softaculous autoinstaller.
To install ClipBucket via Softaculous, please:
Step 1 Access the Installation page
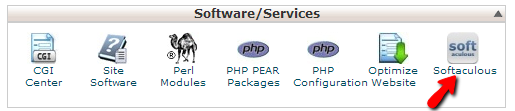
In order to begin with the installation you will need to login into your cPanel service and locate the Softaculous icon.
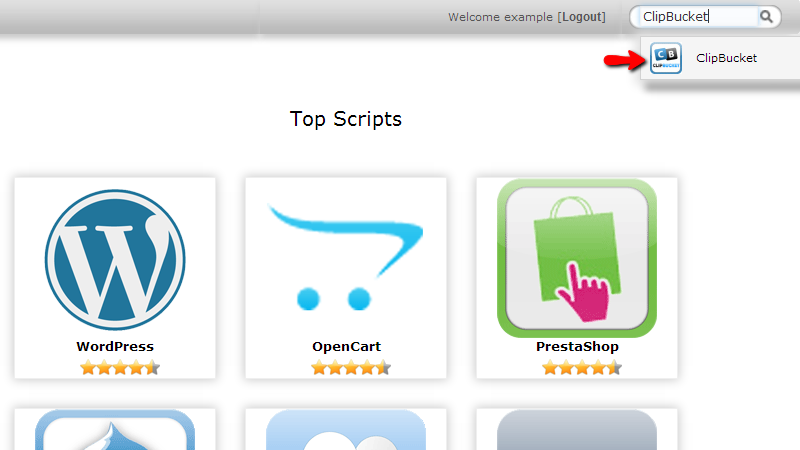
Then you will need to find the Clip Bucket application either by searching for the same in the Search feature locate in the upper right corner of your screen or to locate the application in the Video category included in the left vertical category list.
Once you find it you will need to click on the name of the application and you will be redirected to the Overview page for the script where you will be presented with basic information for the script and the supported version.
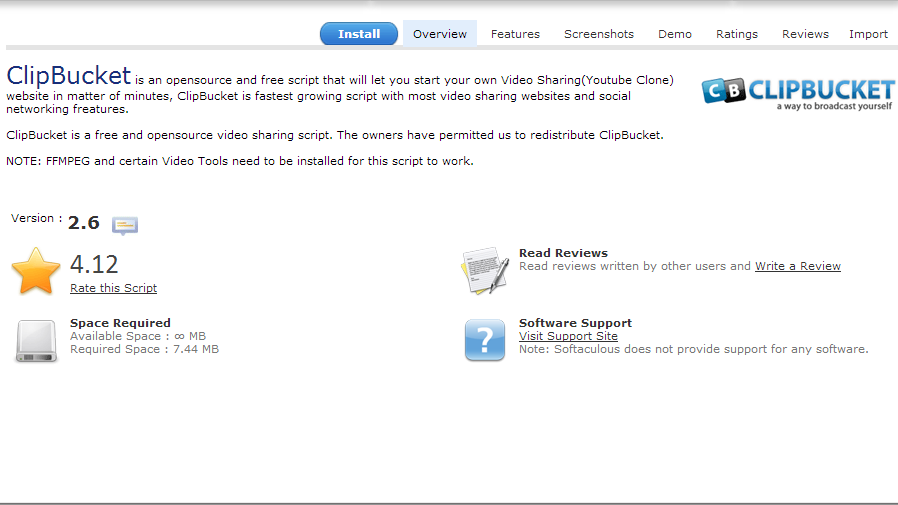
Then you can proceed with the installation by clicking on the“Install tab right next to the Overview tab you are currently at.
Step 2 Configure the Installation
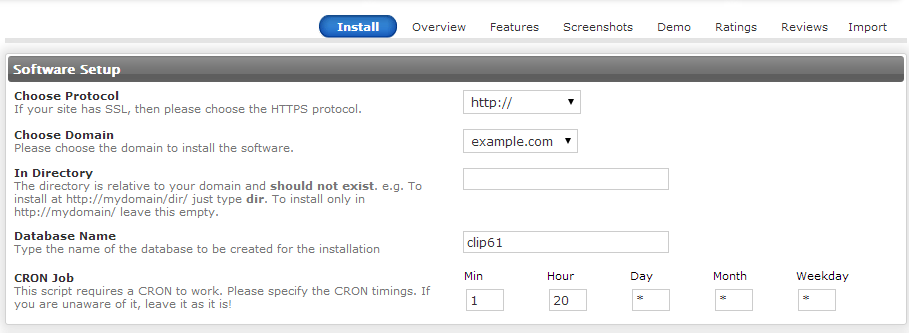
Before the Softaculous autoinstaller can install the application for you there are few settings you will need to configure and all of those will be presented in the tab you have just clicked on – Install.
The settings are conveniently separated on few sections which we will present you with in the next lines of this tutorial.
First you will notice the Software Setup section. The options you will need to configure there are:
- Choose Protocol – The prefix of the URL you will be accessing your Clip Bucket installation.
- Choose Domain - The domain where your Clip Bucket application should be installed. Usually in this drop-down list you will find all of the domains associated with your hosting package with us. These can be subdomains or addon domains.
- Database name - The name of the database which the script will be using. Note that you can completely leave this field as it is due to the fact that the Softaculous autoinstaller will created the database and the user for you.
- Cron job - The cron Job of the application. Please leave it as it is.
The next section is called Site Settings and there you will find the simple settings for your website such as:
- Site name – The name of your website
- Site Description – The description of your website
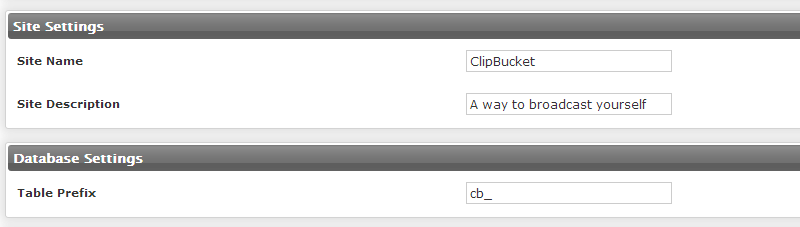
The next section will be the Database Settings section where you will need to configure only the prefix of your database.
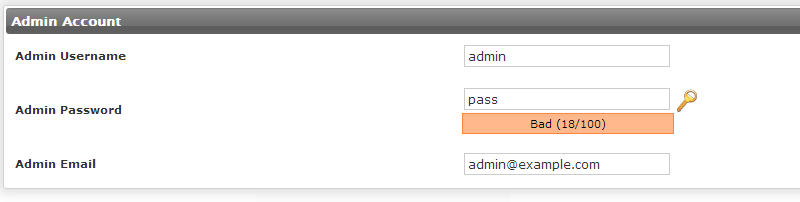
The final section is called Admin Account and there you will be able to configure the information for the admin account which will be created automatically with the setup.
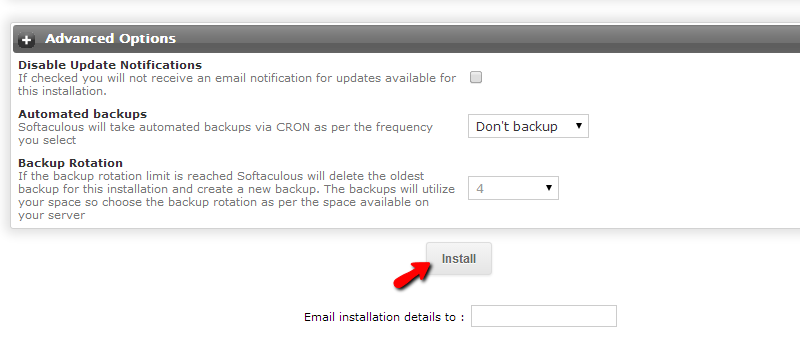
Now, before you can proceed with the installation there is one additional section which is displayed but is closed. In the Advanced options you will be able to configure the backups for the application which will be automatically performed by the Softaculous application.
Finally when you are ready with all of these settings please press the Install button located at the bottom of the page so the installation process can begin.
After few seconds you will have fully functional Clip Bucket installation and you will be presented with the access details for the same on the next page and on your email address.
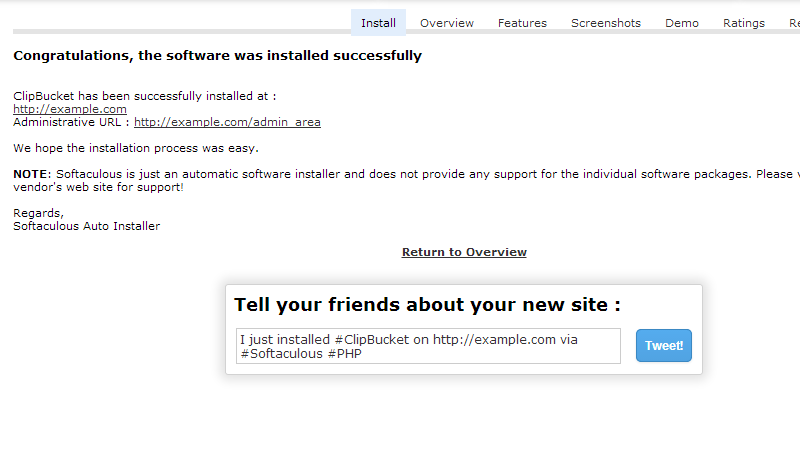
Congratulations! You have successfully installed the Clip Bucket application via the Softaculous autoinstaller!

ClipBucket Hosting
- Free Installation
- 24/7 ClipBucket Support
- Free Domain Transfer
- Hack-free Protection
- Fast SSD Storage
- Free ClipBucket Transfer
- Free Cloudflare CDN
- FFmpeg Support