How to send a Mass Email in ClipBucket
Updated on Mar 13, 2019
In order to inform your users for any scheduled maintenance periods or to let them aware of some new functionality on your website you should usually use a mailing list or the so called Mass Email. Clip Bucket fully supports this feature and in this tutorial we are going to show you how to use the feature in question.
This tutorial assumes that you have already logged into the admin area of your account.
First before you can send the Mass Email you will need to ensure that the registered users on your website are actual users and not spam bots registered with existing email accounts which does not belong to them. This can be easily achieved if you are fully aware of the users registered on your website and if the email verification + captcha features are activated.
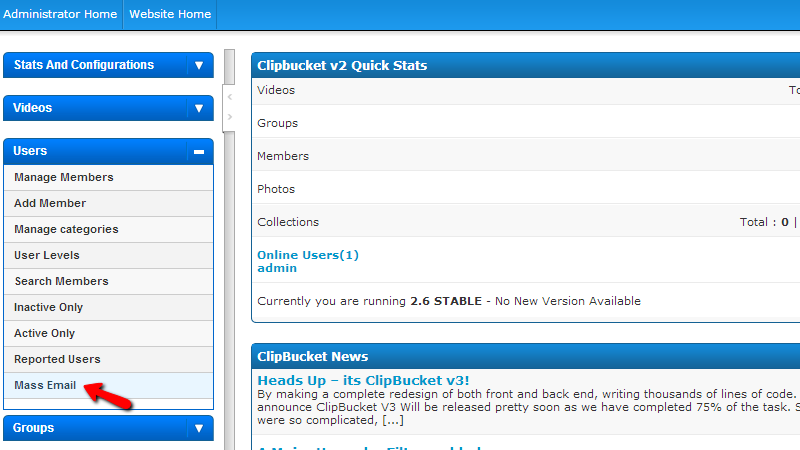
Now that you are sure that the email will be send only to actual existing members of your website it is time to configure the email. You can achieve that if you access the Mass Email page which is located in your admin area > Users > Mass Email.
Once you access the page in question you will notice that there are 2 section of settings you will need to configure before you can start sending your emails and we will discuss the presented options in details so you can be fully aware of what these options are used for.
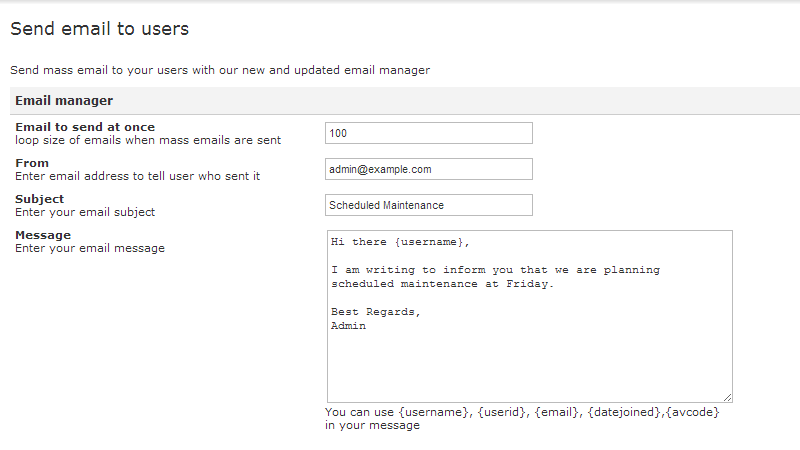
Let’s begin with the first section from top to bottom. The section is called Email manager and there you will be able to find the following settings:
- Email to send at once – The amount of emails which should be send at once. Please set this number to value bellow 100 so the emails can be ensured with 100% delivery rate.
- From – The email address of the sender of these emails – you. Here you should use the admin email account used also for your website.
- Subject – The subject of the email.
- Message – The actual message. Note that here you can use some tags to more easily generate the email and for the same to look more realistic and dedicated to the single user. The tags are shown just below that field.
Once you are ready with these options it is time to move forward to the second section of options called respectively More Options. There you will be able to find the following options:
- Active status – With this option you can configure if the email should be send to only the active users, inactive users or all of the users.
- Banned status – Here you will be able to configure if the email should be sent to the Banned users, not banned users or again to all of the users.
- User level – Here you will be able to choose the user level of the users the email will be send to.
- User category – Here you will be able to choose the user category of the users the email will be sent to.
When you are ready with the configuration of these options it is time for you to create the email by simply pressing of the Create email button.
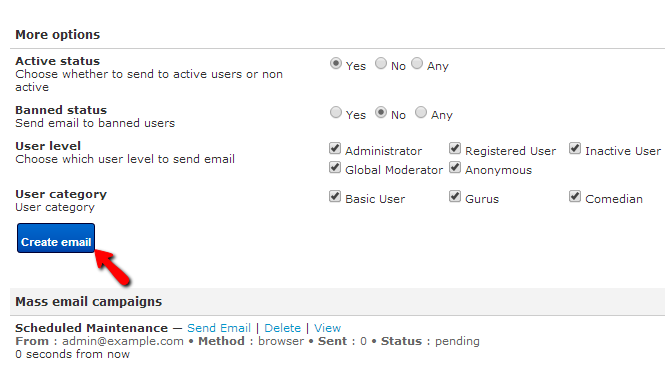
Now that you have created the email you will notice how it will appear in the third section of this page called Mass email Campaigns. Note that the email sending process is still not initiated. In order to initiate it you will need to press the Send Email button which is located next to the email in this section.

Once this is done your script will begin sending the emails to your users as you have configured the same. You will then be provided with a page where you will be able to see to whom the email has been sent.
Congratulations! You can now fully configure and manage the mass emails of your website!

ClipBucket Hosting
- Free Installation
- 24/7 ClipBucket Support
- Free Domain Transfer
- Hack-free Protection
- Fast SSD Storage
- Free ClipBucket Transfer
- Free Cloudflare CDN
- FFmpeg Support