How to perform a Manual Backup of ClipBucket
Updated on Mar 13, 2019
Performing a manual backup of your website is something you should consider to be done on at least weekly basis in order to ensure that you will have an alternative restore point in case of emergency with your website. In this tutorial we are going to show you how to perform a full manual backup of the files/folders and the database of your Clip Bucket website.
To backup your ClipBucket website, you will need to:
Step 1 Backup the Files
The easiest way to backup all of the files for your website on your local computer is to simply download all of them. The download process can take place via the FTP service for your account. If you are not familiar with that service you can check or FTP tutorial series for the concrete FTP client you would like to use.
The FTP login credentials you will need to use for connecting to the FTP service for your account are provided in the welcome email you have received when you have signed up for services with us.
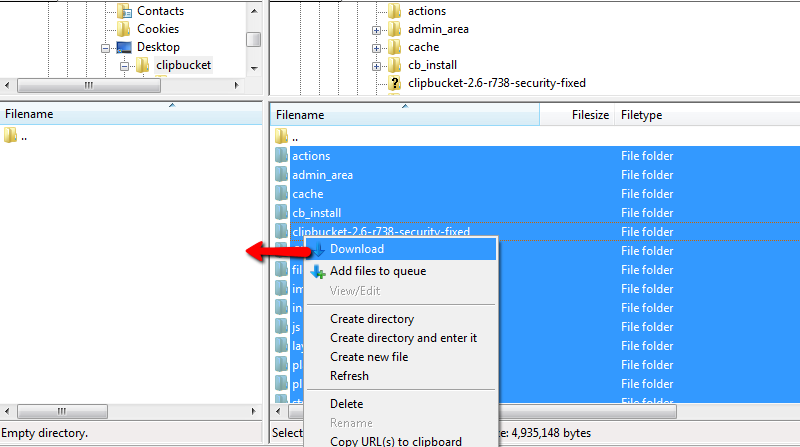
Once you connect to the FTP service please navigate to the folder where your Clip Bucket application is installed in and select all of the files by selecting a single file and then using keyboard combination Ctrl+a. Once this is done please right click on any of the selected files and click the Download option in order for the download process to start.
The process of downloading the files and folders of your website can take from few minutes up to few hours depending on the size of the website and uploaded contents respectively. Please allow some time for this process to finish and in the meantime you can proceed with step 2 of this tutorial.
Step 2 Backup the Database
Now that you have downloaded the files (or while those are still downloading) it is time for you to backup the database of your website which is the second and final backup action you will need to take.
In order to do so you will need to find the name of your database. The name of the database is used in the configuration file for the Clip Bucket application and you will need to open that file for editing in order for the database name to be retrieved.
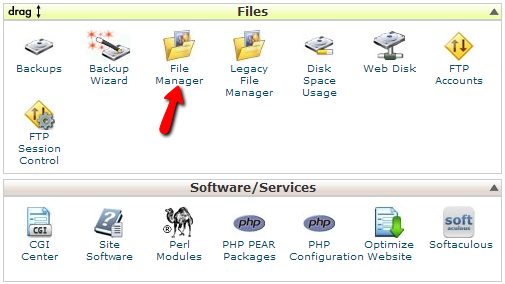
Please login into the cPanel service for your account with us and navigate to the File Manager feature. Right when you access that feature you will be presented with the content of the home folder of your hosting space.
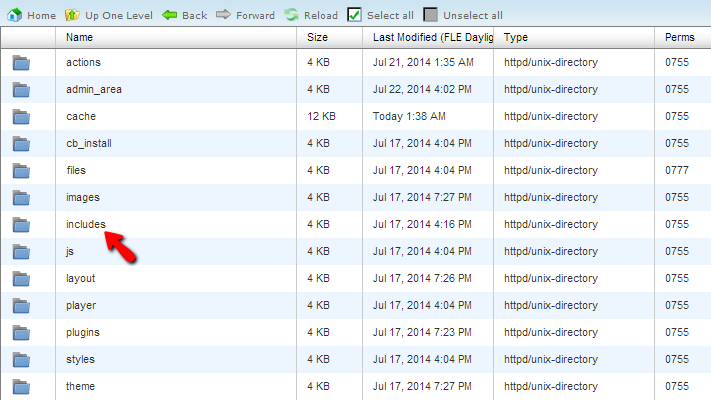
Then you will need to navigate to the folder where you Clip Bucket application is installed in. This is usually the public_html folder of your hosting space but it can be any other folder within that folder depending how the installation has been performed.
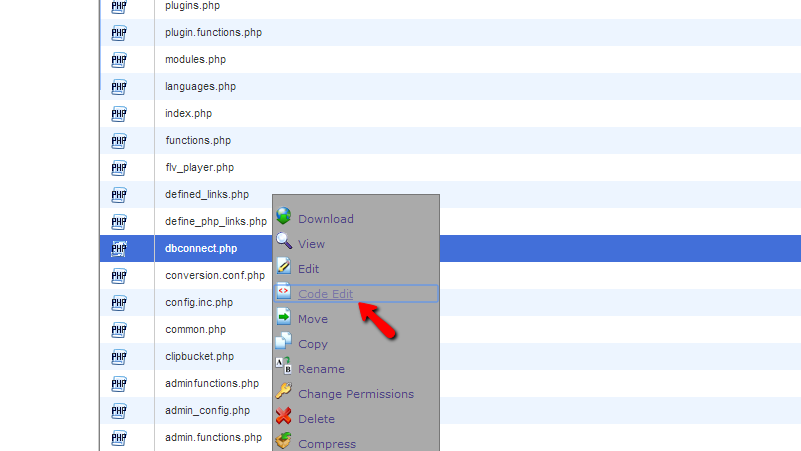
Once you access the installation folder you will be able to find the includes/ folder within. Please access that folder and find the dbconnect.php file which you should open for edit (right click on the file → Code Edit).
There under the 13th line of the file you will find the “$DBNAME” php variable which holds the database name. For example if the 13th line of the file is the following:
$DBNAME = 'example_database'
The database name is “example_database”.
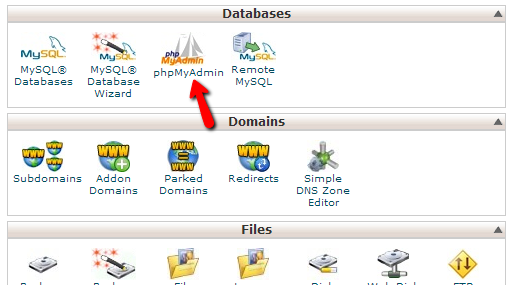
Now that you know the database name it is time to export it. In order to do so you will need to return to the cPanel service for your account and access the phpMyAdmin feature.
Once you access the feature you will need to find the database name you have just retrieved in the list of database presented in the left vertical menu of the phpMyAdmin feature.
As soon as you click on the database you will be presented with the complete list of database tables and there you will need to simply click on the Export button from the top navigation menu in order for you to begin with the backup of your database.
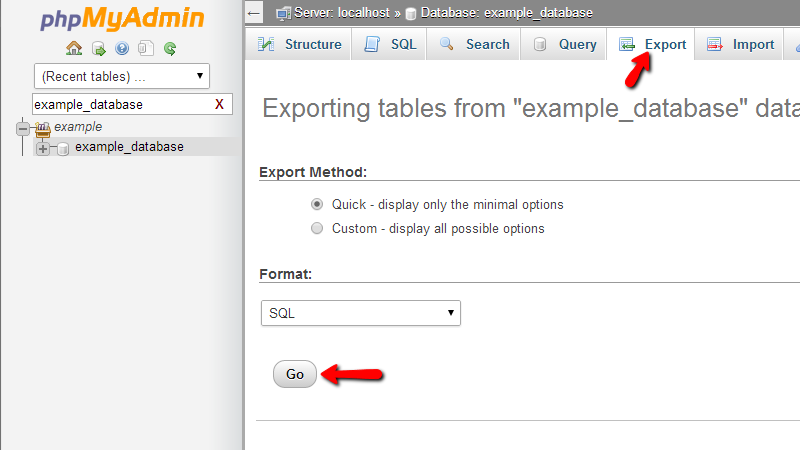
Please simply press the Go button if you would like to have a raw .sql file from the exporting process and the process itself will begin as you will be prompted that a file began downloading.
Once the database is properly exported on your computer and the files are successfully downloaded via the FTP service your full website backup is ready.
Congratulations! You can now generate a full website backup.

ClipBucket Hosting
- Free Installation
- 24/7 ClipBucket Support
- Free Domain Transfer
- Hack-free Protection
- Fast SSD Storage
- Free ClipBucket Transfer
- Free Cloudflare CDN
- FFmpeg Support