How to Manage the Pages in ClipBucket
Updated on Mar 13, 2019
Clip Bucket include introduces a functionality where you will be able to manage the content for all of your static pages such as About Us, Privacy Policy and even the error pages like 403 Error page or 404 Error page. In this tutorial we will show you how to manage the content of the already created pages and also how to create a new static page or to delete old one.
This tutorial assumes that you have already logged into your administration area.
To complete this tutorial, you will need to:
Step 1 Manage the Predefined Static pages
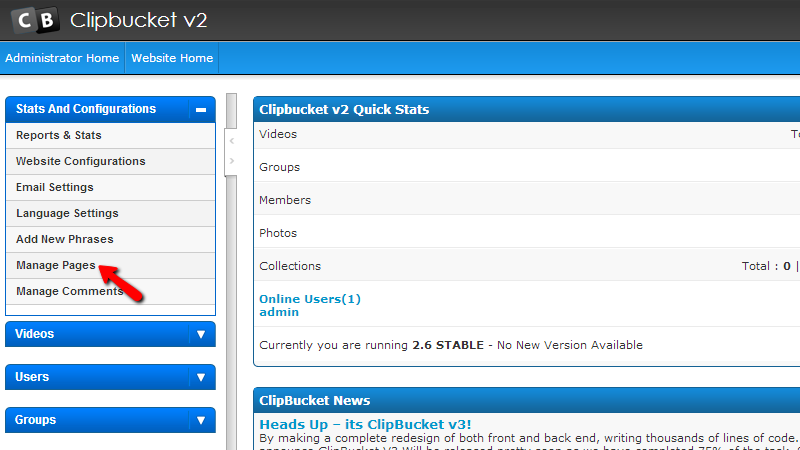
In order to view and manage the already created static pages you will need to navigate to Stats and Configurations > Manage Pages.
Once you access the Manage Pages section you will be presented with a table view for all of the currently existing static pages.
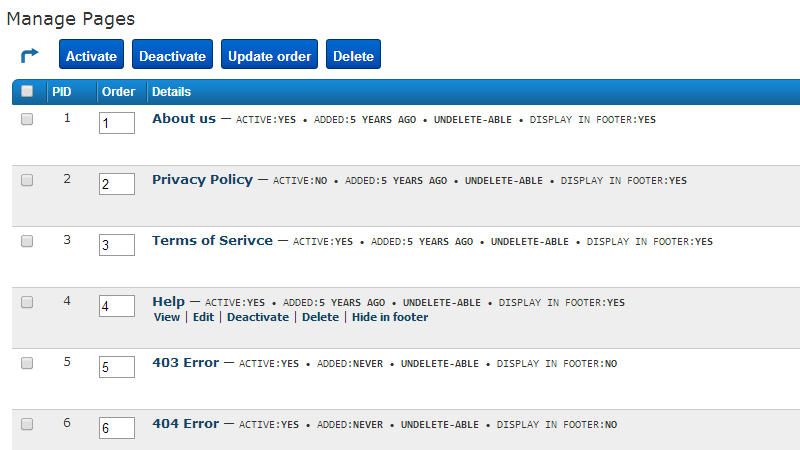
At the top of the table view you will notice four buttons which will allow you to manage the already existing static pages. From left to right the buttons are:
- Activate – This button will allow you to activate any deactivated pages.
- Deactivate – This button will allow you to deactivate any active pages on your website.
- Update Order – This button will allow you to update only the order of the pages which you can managed in the Order column of the table view.
- Delete – This button will allow you to delete any existing page from the list.
No matter which button you will be using you will need to first select a page or pages by clicking on the checkbox before any of the displayed pages.
Step 2 Use the provided Options for every page
Now that you know how the pages are displayed in the table view you can hover over any of the pages and you will notice how few options will appear bellow the page name.
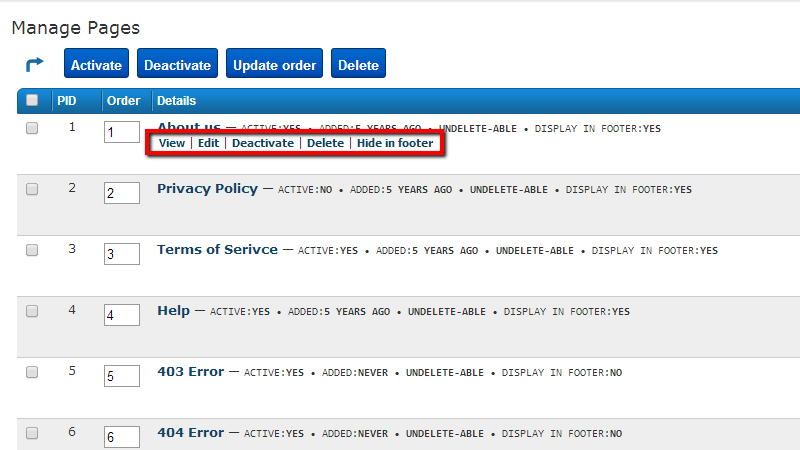
These options are used for fast and easy access to the available actions you can take for every page. The displayed options are similar to the buttons provided above the table view with the pages. The only different options are:
- Edit – This option will allow you to actually edit the page you are choosing this option for. The editing interface is fairly simple and you will be able to easily edit the Page Name, Page Title and also the Page Content.
- Hide In Footer – This option will cause for the page you are adding to be hidden from the footer of your website as usually all of the static pages are displayed there.
Step 3 Create a New Page
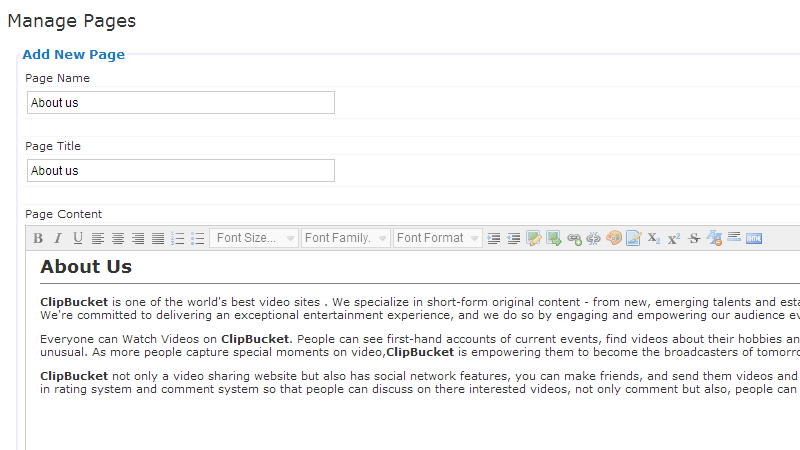
Finally let’s learn how to add a new static page. If you go back to the Manage Pages section you will notice how at the upper right corner of the page there is a separate button called Create New Page.
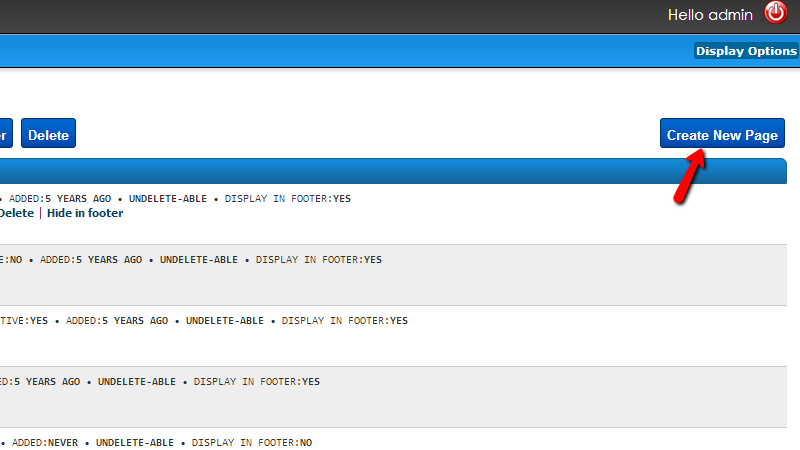
If you click on that button you will be presented with the same form as the editing page feature, however the fields will be empty as you are creating a new page. Thus you will need to fill the Page Name, Page Title and also the Page Content.
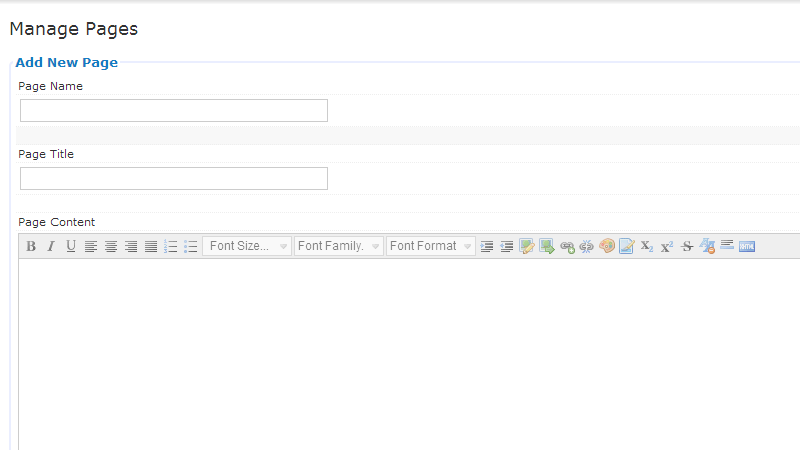
Once you are ready with these fields you should scroll down to the bottom of the page and there you will be able to find the Create new page button which should be pressed in order for the new page to be created on your website.
Congratulations! You now know how to fully manage the Static pages of your website!

ClipBucket Hosting
- Free Installation
- 24/7 ClipBucket Support
- Free Domain Transfer
- Hack-free Protection
- Fast SSD Storage
- Free ClipBucket Transfer
- Free Cloudflare CDN
- FFmpeg Support