How to manage the User Levels in ClipBucket
Updated on Mar 13, 2019
In order to provide your users with access to different features of your website Clip Bucket provides with the option to fully manage as much as user levels you would like to. In the next lines of this tutorial we are going to show you how to manage the existing users levels of your website and also how to add new user levels.
This tutorial assumes that you have already logged into the admin area of your website.
To manage the User Levels in ClipBucket, you will need to:
Step 1 Add a New User Level
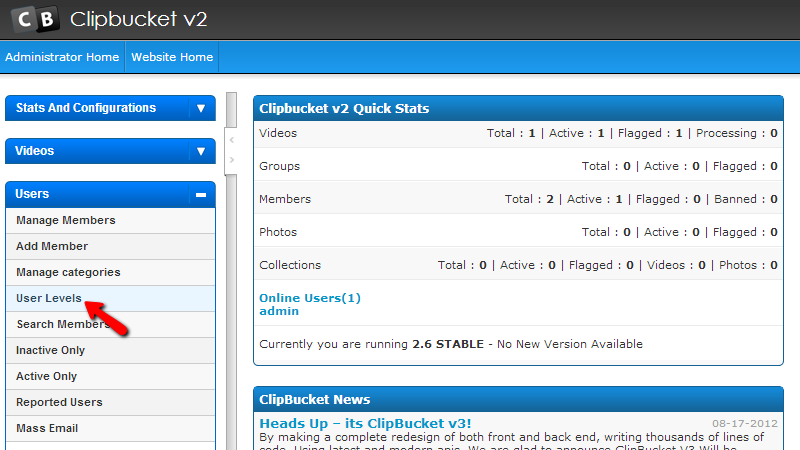
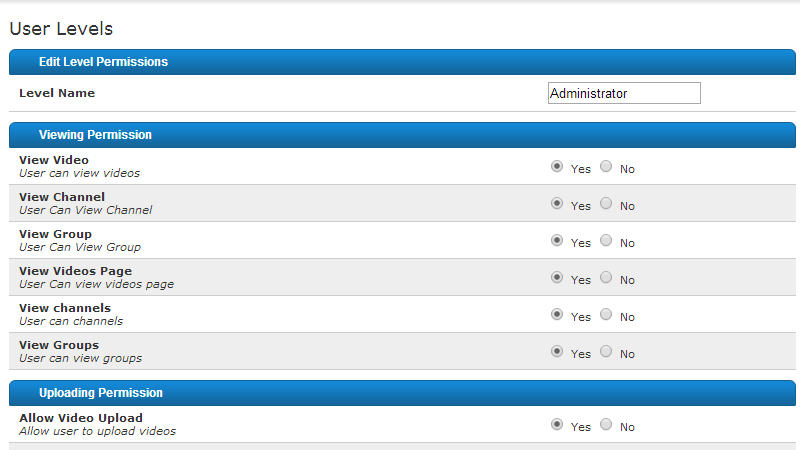
In order to manage the user levels of your website you are provided with a dedicated page within the admin area of your website. In order to access that page you will need to navigate to Users>User Levels.
When you are landed on the User Levels page you will be presented with the currently configured user levels. By default there are 6 user levels.
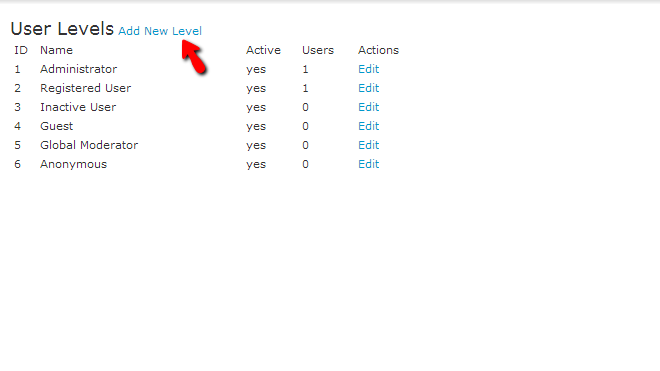
If you would like to add a new user level you should simply use the Add New Level link at the top of the listed user levels. This link will take you to an additional page where you will be able to configure the newly added user level.
At the top of that new page you will be able to configure the User Level Name and the limitations of the user level are listed as options on the rest of the page. There are quite a lot of options there to configure and all of them are pretty much self-explanatory so we will not comment them.

Once you are ready with the configuration of the new user level you will need to scroll down to the bottom of the page and use the Add Level button.
Step 2 Delete/Edit User Level
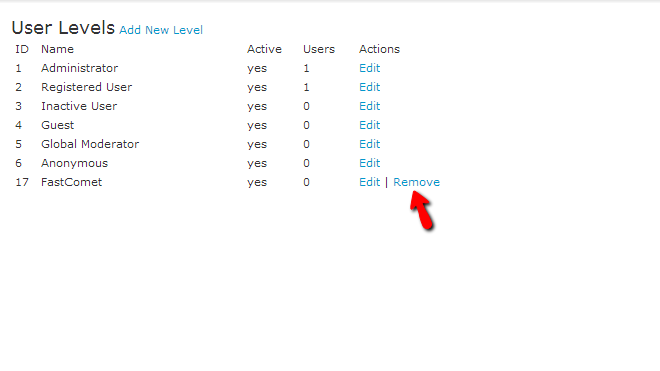
In order to delete a User level you will need to go back to the User Levels page and use the Remove action next to the user level you would like to be deleted. Note that you are able to delete only custom added user levels apart from the initial six.
Once the user level is deleted you will be redirected back to the user levels list and you will notice that the deleted user level will no longer be presented there.
In order to edit a user level you should simply use the Edit action.
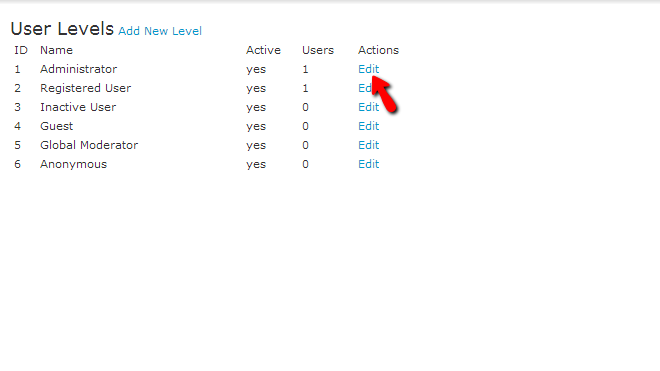
This action will be available for all of the listed user levels there and once you choose this action you will be redirected to the same page you have used for creating a user level previously, however with most of the options filled out already since the user level already exists.
You will need to edit the options you would like to and once you are ready you should simply click on the “Update” button at the bottom of the page.
Step 3 Change the User Level of your users
Now that you know how to manage the existing user levels it is time for you to learn how to change the user level of a user.
In order to achieve that you will need to access the members management page (Users>Manage Members) and to choose the Edit option which is displayed upon hovering of the user you would like to edit.
This will present you with the profile edit page for that user and there you will be able to find the User Level option which is the one you should use for changing the user level of a user.
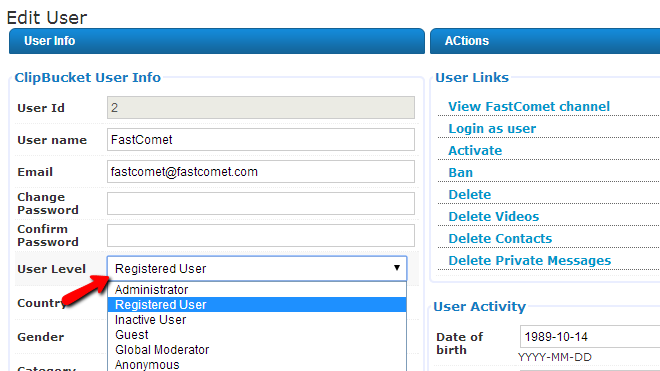
Once you change the user level for the concrete user please scroll down to the bottom of the Edit User page and press the Submit button in order for you to update the profile of the user with the new access level.
Congratulations! You now know how to manage the access levels of your website and how to assign access level to particular user!

ClipBucket Hosting
- Free Installation
- 24/7 ClipBucket Support
- Free Domain Transfer
- Hack-free Protection
- Fast SSD Storage
- Free ClipBucket Transfer
- Free Cloudflare CDN
- FFmpeg Support