Create and Configure Product Filters
Updated on Dec 10, 2015
Adding filters to your categories and products will make it faster for customers to navigate through your catalog. Using filters can narrow down certain product specifications which the customer is looking for. Stores with filters have overall better conversion rate than stores without thus making it a good practice to set up filters for your products.
To add Filters to your Products in Arastta, please follow these steps:
- Step 1: Create Filter Groups in Arastta
- Step 2: Add Filters to Categories and Products
- Step 3: Enable and Assign the Filter Module in Arastta
Step 1 Create Filter Groups in Arastta
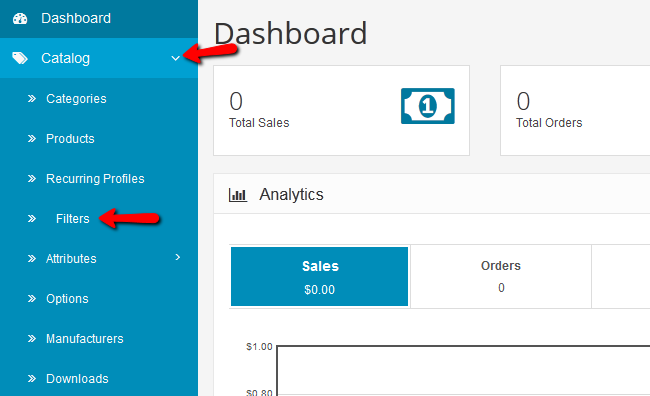
To create a filter group, access your Arastta store’s admin dashboard and navigate to Catalog>Filters.
Click on the Add New button to create a new filter group. For the sake of this tutorial, let us create a filter group with filters for Keyboards.
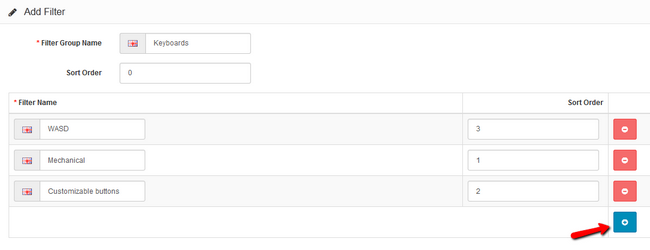
You can add additional Filters to this Filter Group by clicking on the blue Add filter button. Respectively, you can remove filters by hitting the red Remove button corresponding to the already created Filter.
Step 2 Add Filters to Categories and Products
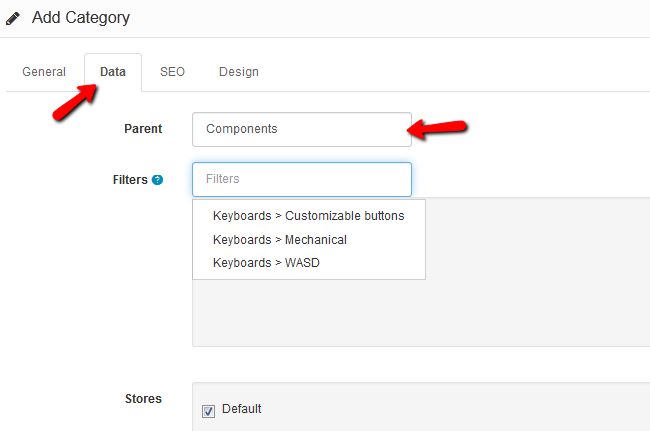
To add filters to a category, you must click the Edit button for that category.

Navigate to that category’s data tab menu and start typing the filter group to get a list of all filters available.
To add a filter to a product, edit that product and access the Links tab.
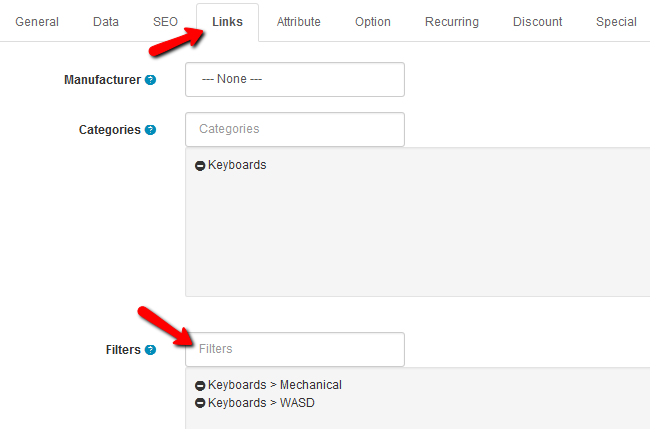
If you want to remove a filter, click on the - button in front of the filter.
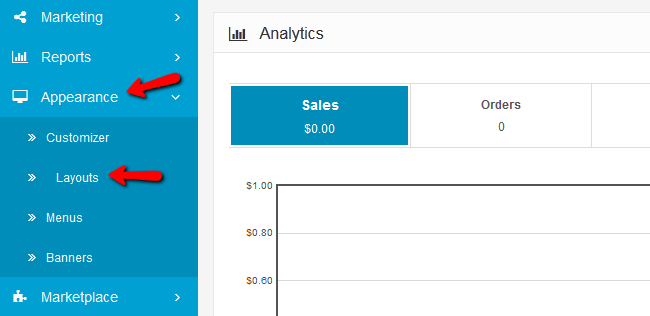
Step 3 Enable and Assign the Filter Module in Arastta
In order for your customers to be able to see the filter module, you will need to first enable it and then assign it to the layout of your website. The module will be visible only on Category or Product pages, so even if you add it to the layout of the home page it will not be visible there.
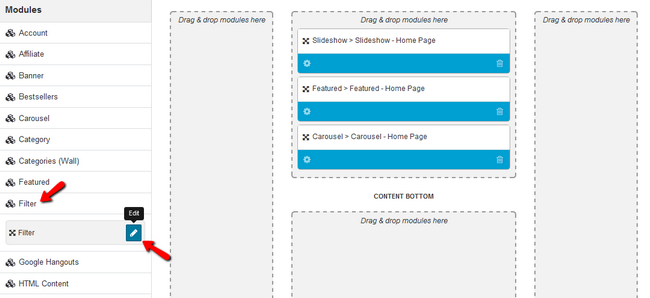
Now click on the Filter module and then hit the blue Edit button.
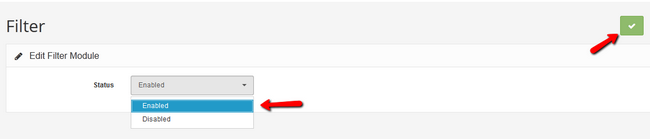
From the drop down menu select Enable and click the Save option.
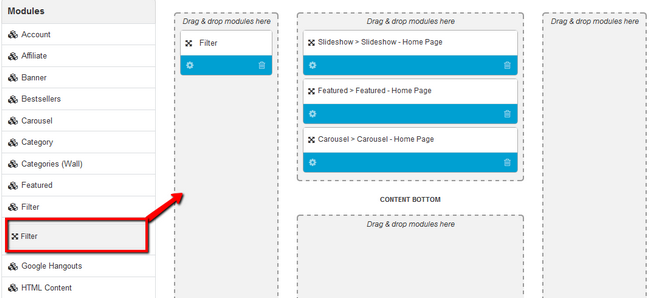
Now drag and drop the Filter module from the Module section to the website layout.
Congratulations, you have created, enabled and added filters to your products. Well done!

Arastta Hosting
- Free Installation
- 24/7 Arastta Support
- Free Domain Transfer
- Hack-free Protection
- Fast SSD Storage
- Free Cloudflare CDN
- Free Arastta Transfer