Arastta Options
Updated on Dec 10, 2015
Arastta offers a lot of customization when it comes to store options. You will be able to change anything, from displayed results per page to order statuses.
To customize your Arastta Store Options, please follow these steps:
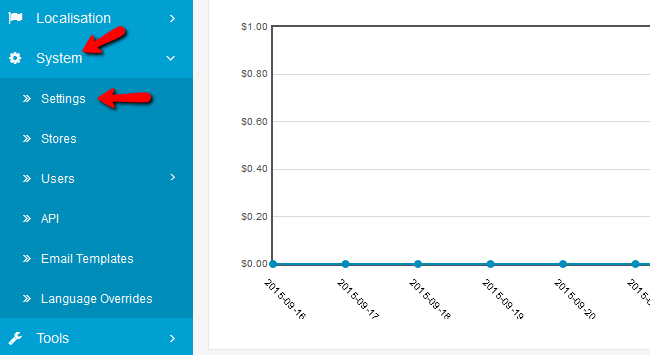
To enter the Options tab you will firstly have to navigate to your account’s admin dashboard and click on the System>Settings section of your main admin panel.
On this page you will see around 40 different options that you can modify. We are going to explain every single one of them, so you will know exactly how much power you have with Arastta.
Step 1 Setup Common, Product and Review options
Common:
- Text Editor (Admin) -These 2 text editors are for editing textarea fields. Textarea is an integration technique that uses a textarea tag and results in a raw text formatted as markup language. Both editors can get the job done and it is a matter of personal taste which to use.
Products:
- Category Product Count - This will show the amount of product s in each category/subcategory (this will lower performance if you have a lot of categories)
- Default Items Per Page (Catalog) - The default amount of items shown per page
- List Description Limit (Catalog) - This sets character limit on the description of a product while being viewed in the list
- Default Items Per Page (Admin) - The amount of Admin items shown per page
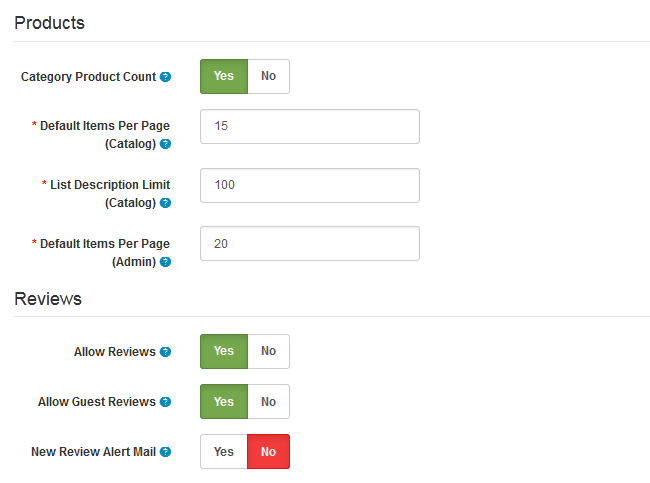
Reviews:
- Allow Reviews - Disabling new reviews will also hide existing reviews
- Allow Guest Reviews - With this you can enable guests to post reviews
- New Review Alert Mail - Sends mail to the store owner’s email address notifying him about a new review
Step 2 Configure Vouchers and Taxes
Vouchers:
- Voucher Min - The minimum amount of money a client can enter in order to purchase a gift voucher
- Voucher Min - The maximum amount of money a client can enter in order to purchase a gift voucher
(both in default currency)
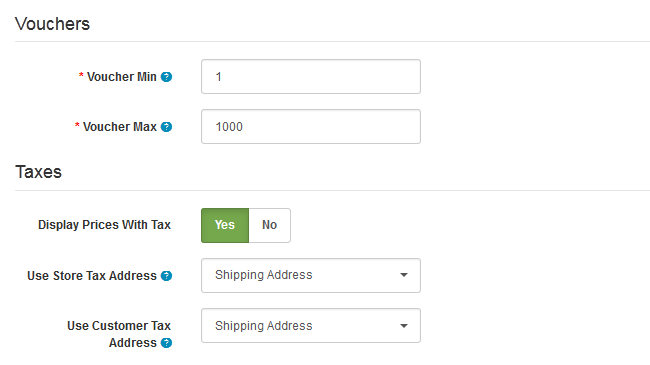
Taxes:
- Display Prices with Tax - If you disable this, the client will still see the tax for the product but it will be during the checkout.
- Use Store Tax Address - The tax will be estimated based on the user’s shipping or payment address (if the user is not logged in his account)
- Use Customer Tax Address - The tax will be estimated based on the user’s shipping or payment address (if the user is logged in his account)
Step 3 Configure Account Options
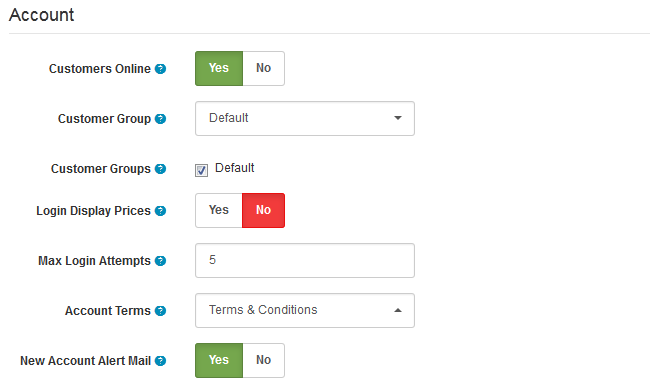
Account:
- Customers Online - Tracks online customers via customer report
- Customer Group - The default group to which new users are assigned
- Customer Groups - The customer groups from which users can choose from when signing
- Login Display Prices - If enabled, this will make prices visible only to logged in users
- Max Login Attempts - The maximum amount of failed login attempts a user can make in row before he is locked for 1 hour from the website
- Account Terms - Here you can choose if new users should first agree to certain terms before their accounts are created
- New Account Alert Mail - This will send you a new email for each registered user on your website(good for keeping track of your client base when you first open a store)
Step 4 Setup Checkout procedure
Checkout:
- Invoice Prefix - Sets the invoice prefix which will be followed by invoice IDs when a user purchases a product
- API User - The default API the admin should use.
- Display Weight on Cart Page - Enabling this will display the weight of products in the cart (very important when you use Weight Based Shipping)
- Guest Checkout - If enabled, this will allow customers to checkout without having an account (not applicable to digital products)
- Checkout Terms - This will force the customer to agree to certain terms before he can checkout
- Order Status - The order status marking that an order is processed
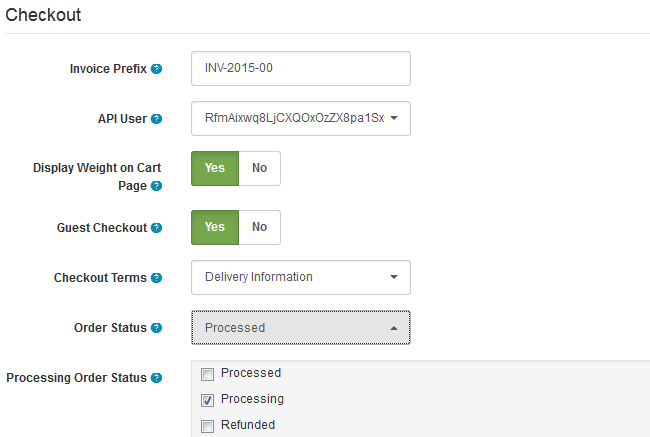
- Processing Order Status - The order status for a processing order (this is when discount coupons and vouchers take effect)
- Complete Order Status - The order status for a completed order (after this moment clients will be able to download their digital product or use the voucher they purchased)
- New Order Alert Mail - This will send you a new email for each new order created on your website
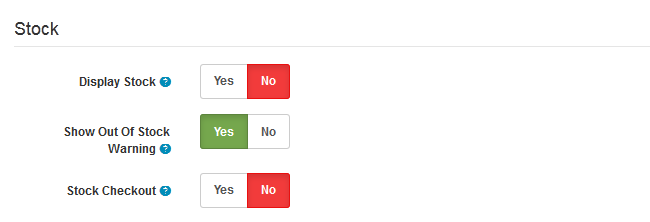
Step 5 Stock Options
Stock:
- Display Stock - Displays stock amount on product page
- Show Out Of Stock Warning - If a user wants to checkout with an item that is out of stock enabling this will prompt the user a warning (disabling this will still give the user a warning if Stock Checkout is set to No)
- Stock Checkout - Allows the user to still checkout even if he has a product in his cart that is currently out of stock (good way to hide out of stock items if your stocking times are very small)
Step 6 Setup Affiliates and Return Terms
Affiliates:
- Affiliate Requires Approval - Enabling this will automatically approve any new Afiiliates
- Automatic Commission - Enabling this will automatically apply the affiliate commission on a complete order status
- Affiliate Commission (%) - The default affiliate commission rate in percentages
- Affiliate Terms: This will force the customer to agree to certain terms before he can create an affiliate account
- New Affiliate Alert Mail - This will send you a new email for each registered affiliate
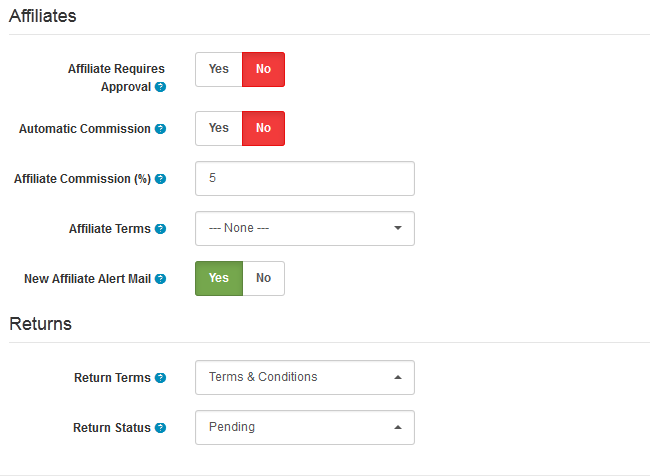
Returns:
- Return Terms - This will force the customer to agree to certain terms before he can return a product
- Return Status - The default status after a return request is submitted
On this page...

Arastta Hosting
- Free Installation
- 24/7 Arastta Support
- Free Domain Transfer
- Hack-free Protection
- Fast SSD Storage
- Free Cloudflare CDN
- Free Arastta Transfer