Set up a POP email account in ThunderBird
Updated on Mar 13, 2019
In this tutorial we are going to show you how to configure your email account in Mozilla Thunderbird using the POP3 protocol for incoming emails.
This tutorial assumes you've already downloaded and opened ThunderBird.
To finish this tutorial, you will need to learn to:
step
Access the Mail Account Setup Feature
In order to begin with the configuration of your email account you will need to click on File → New → Existing Email Account.
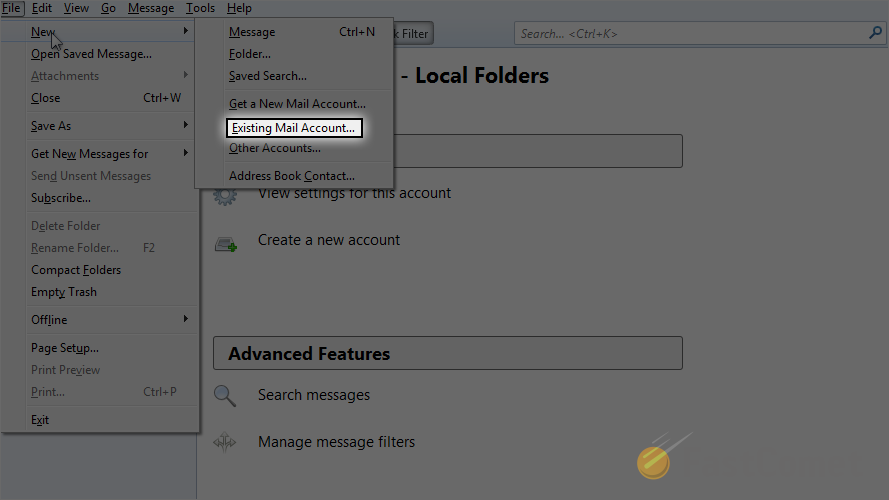
This menu item will bring the Mail Account Setup feature where you should fill the following options:
- Your name
- Email address
- Password
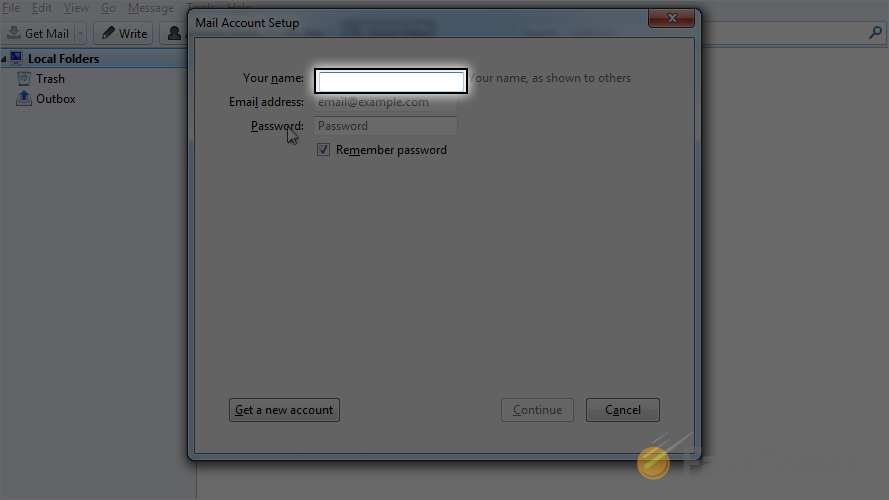
Once you are done with these options please click on the Continue button so Thunderbird can try to fetch automatically the email settings for your email account.
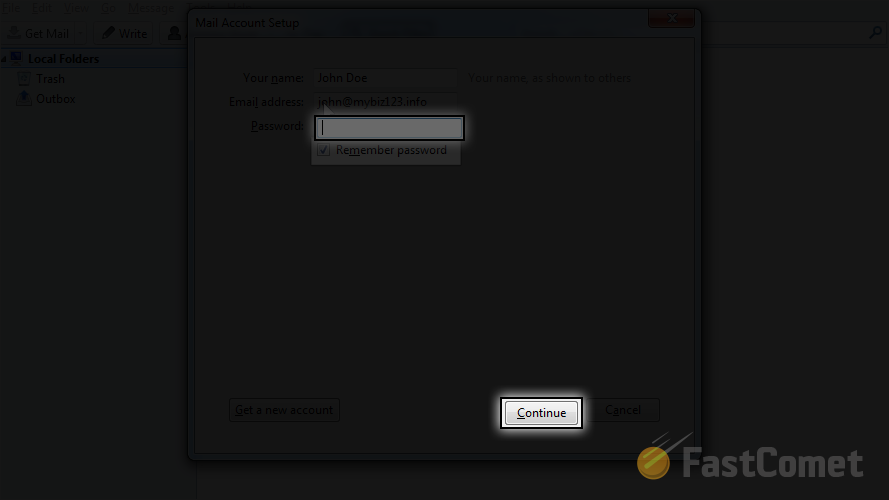
Once the settings are fetched you will be presented with these and you will be able to verify them.
step
Configure the POP3 Protocol
Now that the settings for your email account are automatically fetched you will notice how the Manual config button will appear at the bottom of this window. Please click on that button so you can proceed with the manual configuration of the account.
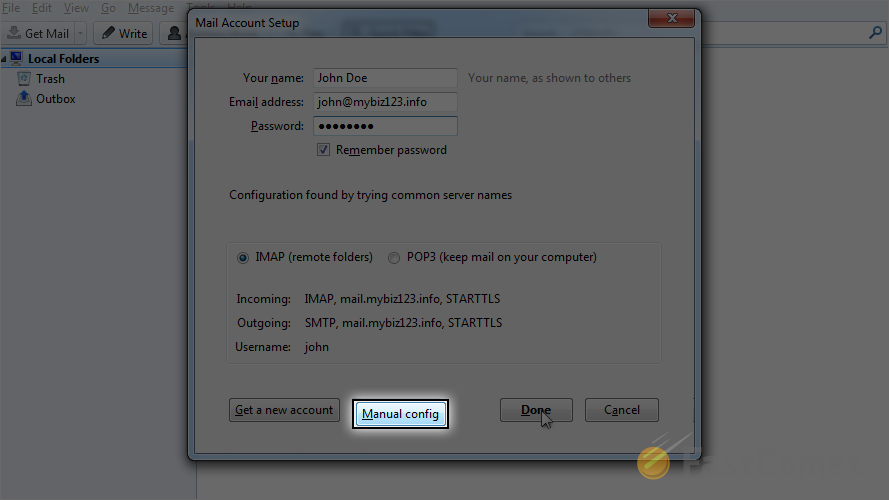
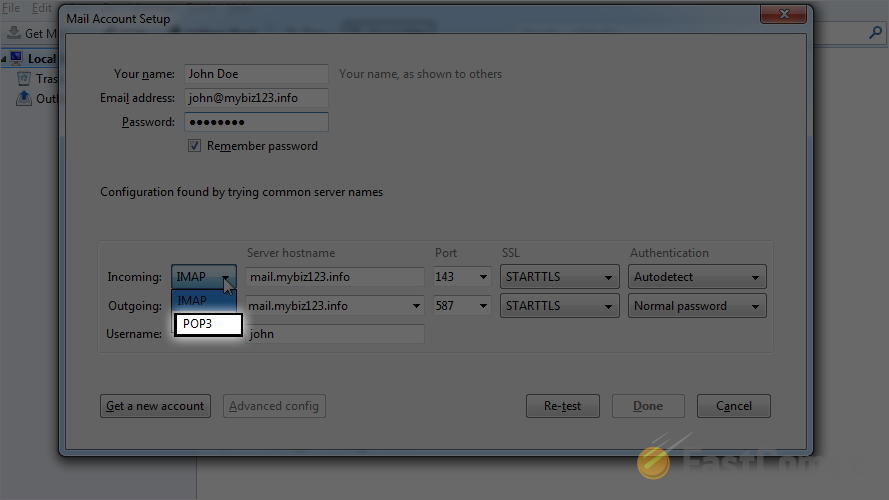
You will be presented with the settings for Incoming and Outgoing emails along with the username that should be used for authentication in front of the mail server. Since the POP3 protocol is a incoming mail protocol you will need to modify the settings for the Incoming emails.
Please click on the first drop-down right next to the Incoming label and choose the POP3 item.
Now that you have selected the correct protocol you will need to ensure that the Server hostname is the correct one. In order to do that you will need to understand how that hostname is related to your domain.
Hostname
It is relatively simple - the hostname is mail.yourdomain.com where the substitution yourdomain.com should be replaced with your actual domain name. If your domain is for example mybiz123.info the hostname you will need to use is mail.mybiz123.info.
Once you enter the correct hostname it is time to choose the correct port. The POP3 port is 110 and it should be automatically filled when you have chosen the POP3 protocol earlier. If it is not please choose it from the Port drop-down list.
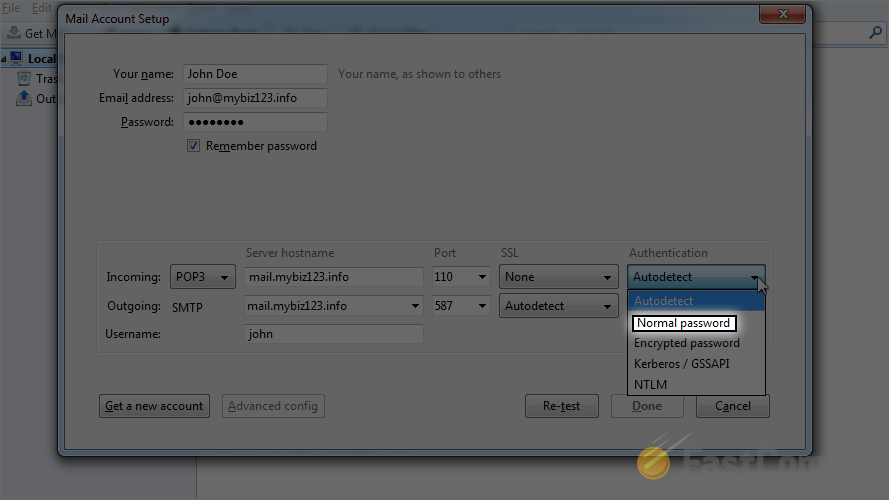
The next item in the configuration is the SSL drop-down list. There you should choose None and last but not least you should configure the Authentication method which should be set to Normal Password.
Once you are done with the POP3 settings it is time to proceed with the SMTP settings.
step
Configure the SMTP Settings
On the second line of the displayed options you will find the Outgoing mail configuration.
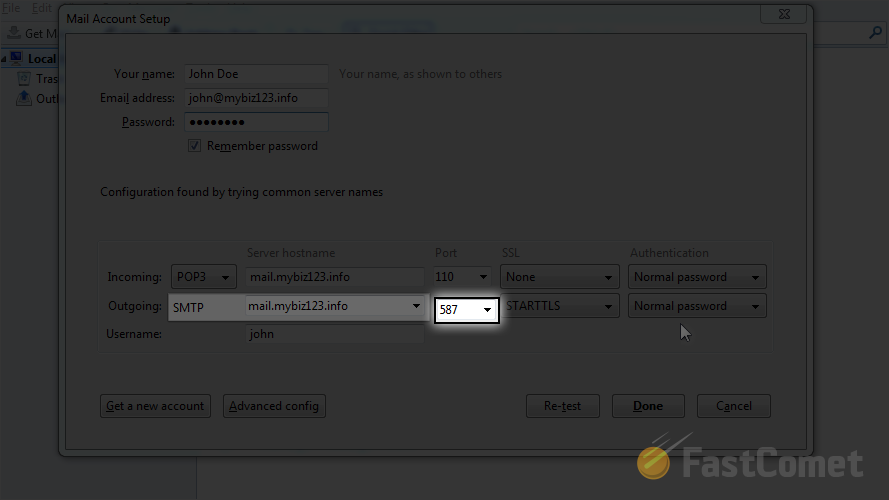
To begin configuring that option you will need to set the Server Hostname first.
Hostname
It is relatively simple - the hostname is mail.yourdomain.comwhere the substitutionyourdomain.com should be replaced with your actual domain name. If your domain is for example mybiz123.info the hostname you will need to use is mail.mybiz123.info.
Once you are done with the hostname, please configure the Port of the service. By default the SMTP service is using port 25 and you should be able to select it from the Port drop-down.
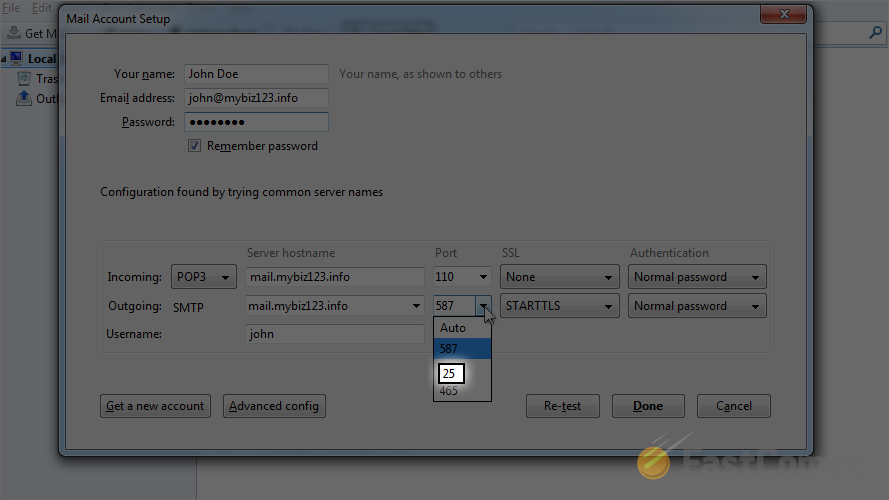
Then you will need to choose the SSL encryption for that protocol. Please choose the None option as there is no SSL encryption on the defaultSMTPport.
Last but not least is the Authentication method that should be used by the client when authenticating in front of the SMTP protocol. Please choose the Normal Password authentication method from the last drop-down list of the Outgoing configuration group.
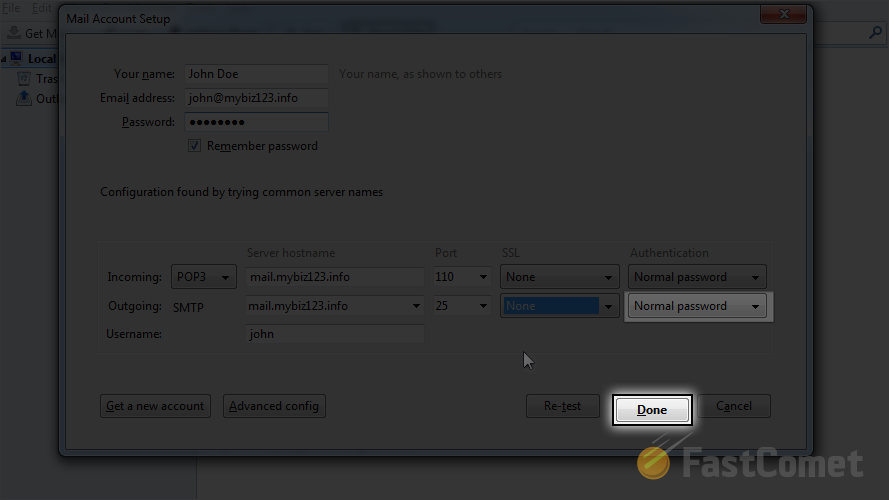
The last thing you need to do is to simple press the Done button so the changes can be saved.
It is possible that you will be prompted with a security warning concerning the fact that your incoming/outgoing settings does not use encryption and here you should check the I understand the risks check box and then click on the Done button.

Congratulations! You have successfully configured your email account for the use of POP3 incoming mails protocol!
On this page...

Mail Hosting
- Free Domain Transfer
- Unlimited Email Accounts
- 24/7 Technical Support
- Fast SSD Storage
- Hack-free Protection
- Free Cloudflare CDN
- Immediate Activation
