How to Setup Product Attributes
Updated on Dec 10, 2015
The product attributes of your application are used to describe the product features and to present your customers with information regarding the product you are selling.
To be able to configure Attributes, you will need to:
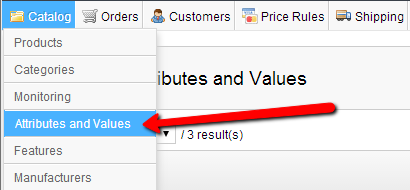
Access the Attributes and Values page
In order for an attribute to be created you will need to access the Attributes and Values page which is located inside your Store's admin backed → Catalog → Attributes and Values.
The Attributes and Values page will display by default all of the Attributes and Values you have already created or those which are added by default with the PrestaShop Sample data.
Add a New Attribute
In order for a new Attribute the be created simply click on the Add New Attribute button located at the top horizontal menu and you will be redirected to the attribute creation page.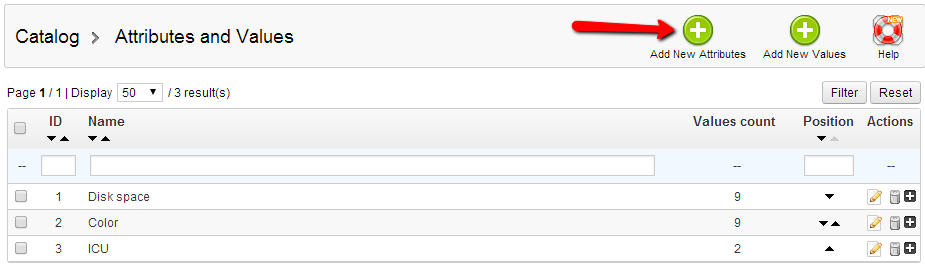
The Add New Attributes page provides 3 fields you will need to fill.
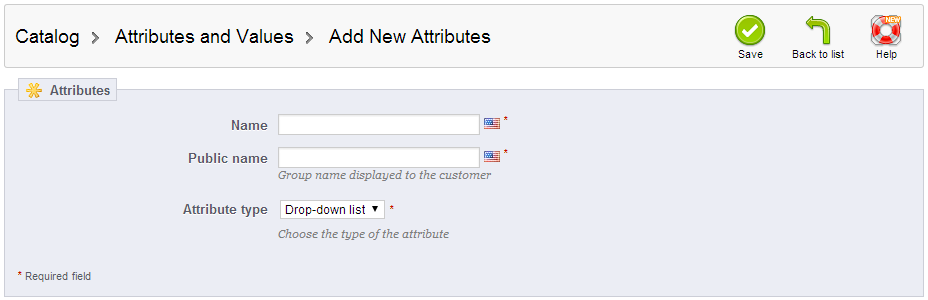
- Name -- The actual name of the attribute. It will not be visible to the customers.
- Public Name - The name of the attribute which will be visible for all of the customers.
- Attribute Type - The physical type of the attribute.
Assign an Attribute to a Product
Once the attribute is created you can assign it to each and every product you would like to by simply opening the product edit page via your Store's admin backend → Catalog → Products and click on the desired product. Under the top action bar there is a button called New Combination. By pressing this button you will be able to create a new combination of attributes.
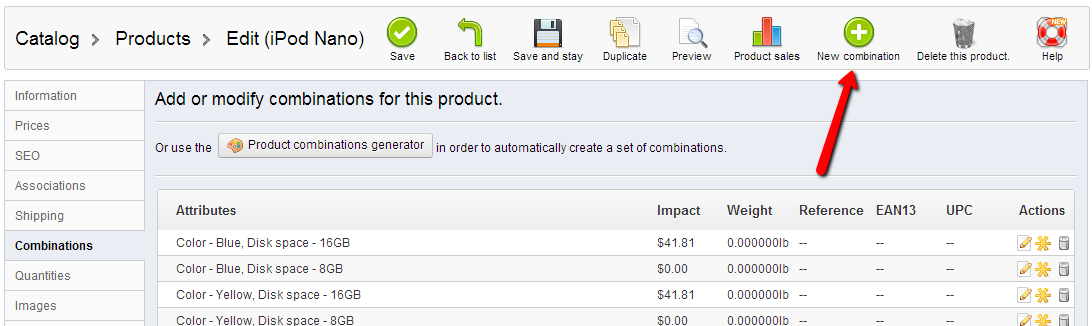
The desired attributes should be selected from the drop-down menu Attribute , their value should be also selected from the drop-down menu called Value and finally the Add button should be pressed in order for an attribute to be added to the product view.

Once you are done adding the attributes please press the Save button located at the top action bar in order for the changes to be saved to the product you were editing.
Congratulations! You have successfully added an attribute to your Product!

PrestaShop Hosting
- Free Installation
- 24/7 Tech Support
- Free Domain Transfer
- Hack-free Protection
- Fast SSD Storage
- Free CloudFlare CDN
- Free Website Transfer
- Immediate Activation