Adding Downloadable Products
Updated on Dec 10, 2015
Many of the products over the web these days, such as movies, images, games, e-books are provided in a digital copy formats allowing you to download the product after you pay for it. These types of products are called Downloadable Products and PrestaShop allows the use of such products in your Store.
To offer downloadable products in your PrestaShop, you need to:
Add a new Downloadable Product
Since this is a product, you will need to add a product to your Store. If you are not quite sure that you are well aware how this process goes you can check our tutorial How to add products to your store in PrestaShop.
In order to add a product you should go to your Store's admin backend → Catalog → Products where all of the products are listed and where you have the option to add a new products.
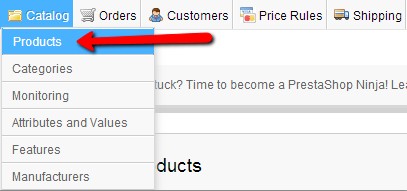
By pressing the Add new you will be able to bring the product adding interface where you will be able to add a Downloadable product. PrestaShop categorizes the Downloadable Products as Virtual Products.
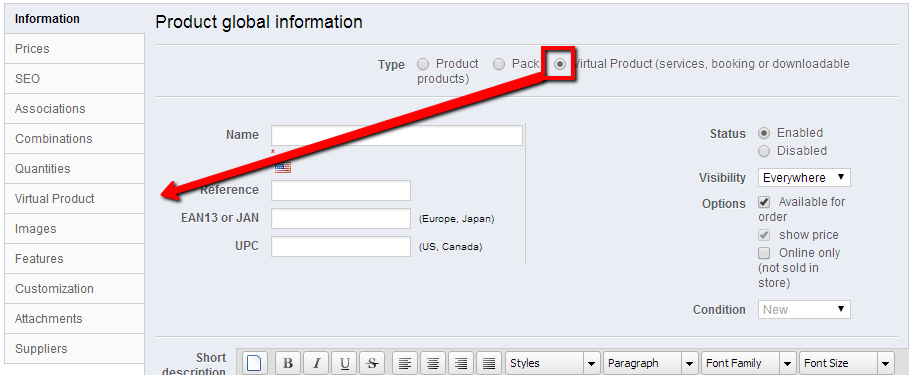
In order for a product to become a virtual one you will need to select a different from the default product type - Virtual Product. This can be easily done via the Virtual Product radio button under the Type product option. Once you click on the Virtual Product radio button you will be moved to directly to the Virtual Product tab from the left tab list of product options.
Configure the Downloadable Product
On this table you will need to configure few fields in order for the product to be properly created. Of course all other product tabs should be also properly filled in order for the product to be successfully created.

- Does this product have an associated file? - If you would like your downloadable product to be an actual file you should set this option to yes.
- Upload a file - This fields is for a standard upload action for the file you would like to be downloaded from your users. You should select the file from your local computer and upload it on your Store using this field.
- Filename - This field is for the exact file name. Usually this field will be automatically filled with the actual name of the uploaded file, however if you would like to change it for client convenience you are free to do so by changing the value of this field.
- Number of allowed downloads - You should fill this field with certain number so you can limit the number of downloads allowed for a single customer. If you would like the customers to have an unlimited number of downloads available for this product simply set the number to 0.
- Expiration Date - The expiration date of the download availability for this product exclusively.
- Number of days - The number of days which the file should remain accessible for the customers purchased it. If you would like your customers to have unlimited time of access to this file please set the value of this field to 0.
Once all of these fields are properly filled you should be able to save the product by pressing the Save button from the top action bar so your product can be saved.
As soon as the product is properly added you will be able to see it in the product list presented in the table view located at the home page of your products. Congratulations! You have successfully created your first downloadable Product!

PrestaShop Hosting
- Free Installation
- 24/7 Tech Support
- Free Domain Transfer
- Hack-free Protection
- Fast SSD Storage
- Free CloudFlare CDN
- Free Website Transfer
- Immediate Activation