Editing the "Contacts" and "Our Store" pages
Updated on Dec 10, 2015
With the default installation of your store there will be a contact information automatically created by the application installer. Most probably you will need to edit that information or you will need to add additional information to the already existing.
In this tutorial we will not only show you how you should edit the contact information but also we will show you how to edit also the Our Store information.
To complete this tutorial, you need to:
Access and Configure the Store Contacts
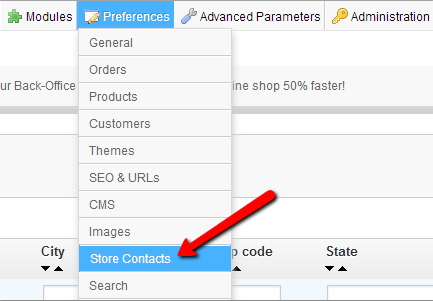
We will begin with the contact information for your Store. In order to edit that piece of information plese login into your Store's admin backend and navigate to Preferences → Store Contacts.
Once you access the Store Contacts page you will need to scroll down a bit and to find the Contact Details interface where all of the contact details should be managed.
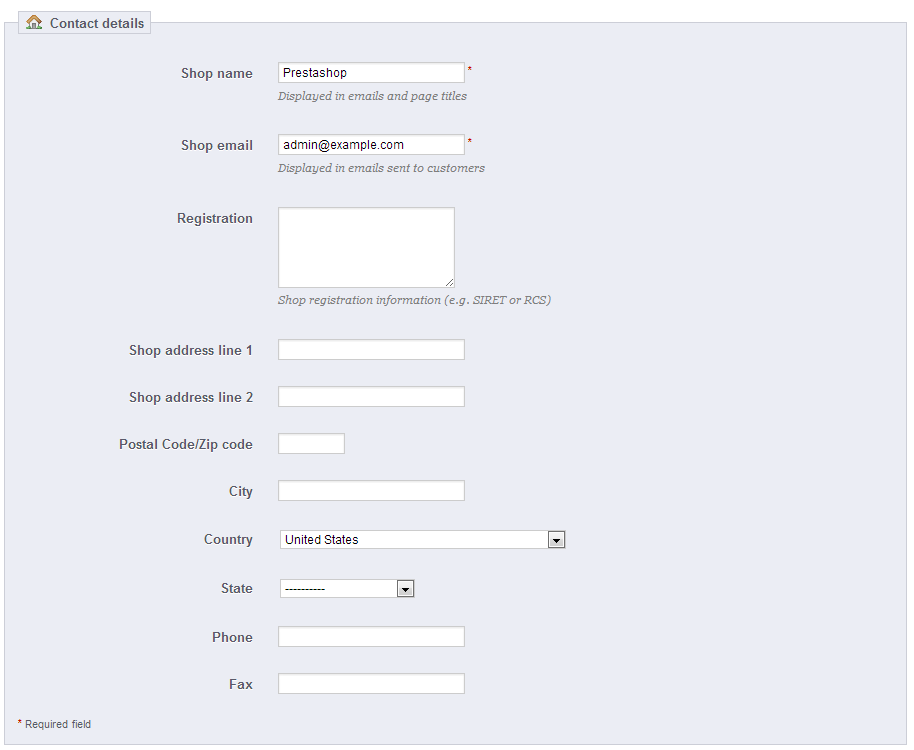
By default the fields Shop Name and Shop email should be filled by the installation wizard of the application. You will need to fill the other fields which are quite self-explanatory. Once you are done with your edits please use the Save button from the top action bar above the Parameters interface to save your changes.
Modify the Information for Our Stores block
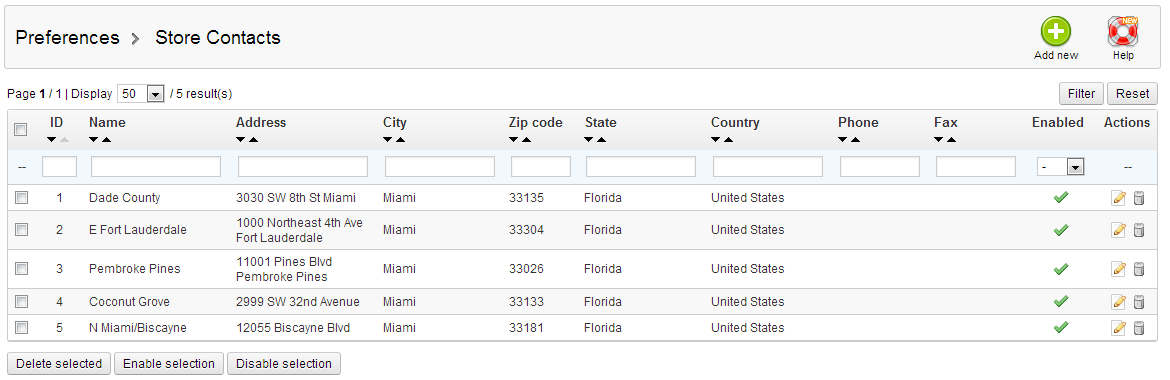
The second part of this tutorial will be for how to change the information displayed under the Our Stores block. For this purpose you will need to navigate again to the Preferences → Store Contacts page. At the top table view you will see few stores already added. These are the default stores added by the installation wizard for your convenience as sample contents.
In order to add a new store information please use the Add New button located at the top action bar. Once you press it you will be redirected to an interface where you will need to input the required information for your new Store.
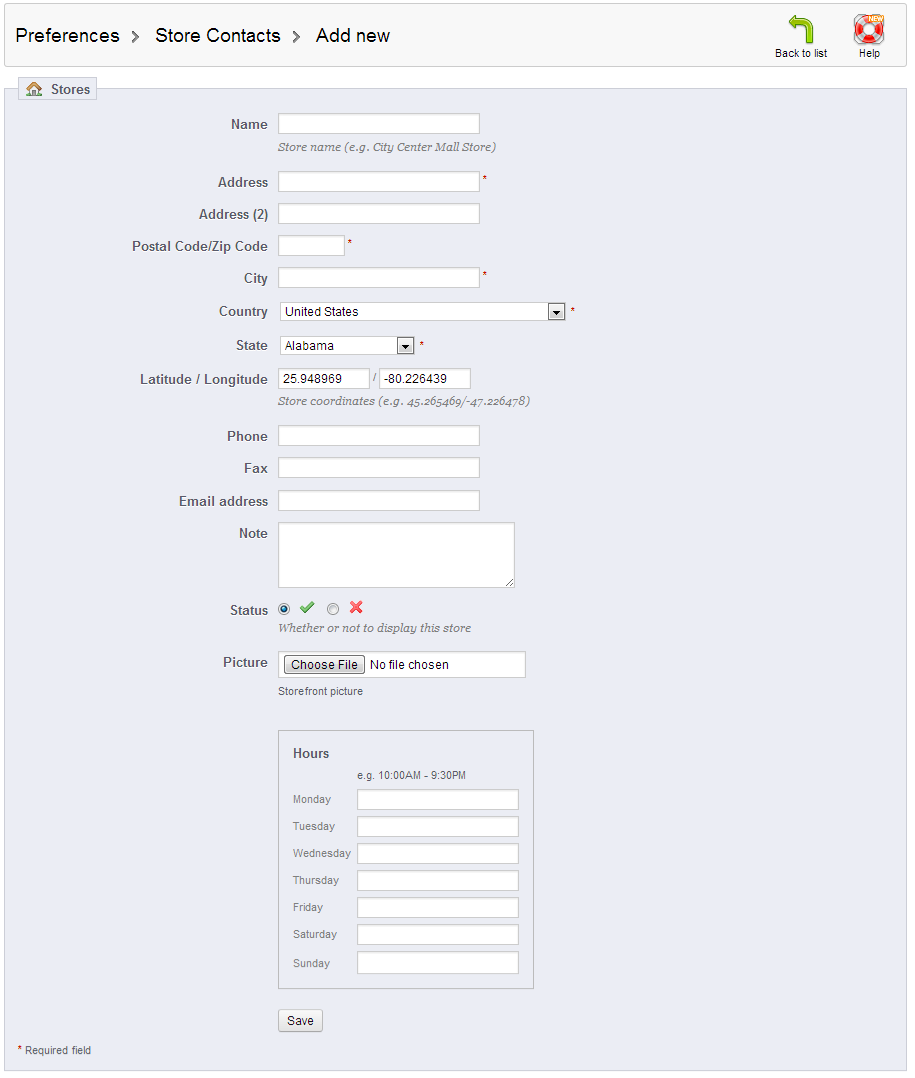
All of the fields are like the fields of the Contact Details interface - self-explanatory and as soon as you fill them with the required information you will simply need to press the Save button located at the bottom of the interface.

PrestaShop Hosting
- Free Installation
- 24/7 Tech Support
- Free Domain Transfer
- Hack-free Protection
- Fast SSD Storage
- Free CloudFlare CDN
- Free Website Transfer
- Immediate Activation