Optimizing the loading speed of your Store
Updated on Dec 10, 2015
Optimizing the speed your Store is loading with is quite a great idea especially if you are receiving complaints from your clients that the loading speed of your website is slow. Usually reason for the slow loading speed are the large amount of images loaded on the pages of your application or any custom installed additional modules or templates.
This tutorial will provide you with full description of the Performance page of your application and how you should optimize the performance of your Store using the features presented on that page. Note however that some of the features used by PrestaShop for optimizing the performance of your store might require dedicated or semi-dedicated (VPS) environment.
To optimize your PrestaShop 1.5, you can:
Access the Performance page
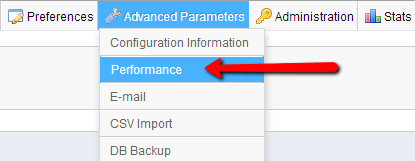
In order to begin optimizing the performance of your Store you will need to login into your Store's backend and navigate to the Advanced Parameters → Performance submenu.
Once you are located at the Performance page the first thing you will probably notice is the large amount of configuration interfaces and options. We will be covering all of them so you can determinate which combination will be the best for your Store.
Confgure the Performance
The first interface is called Smarty and as the name suggest this interface manipulate the configuration of the Smaty template engine.
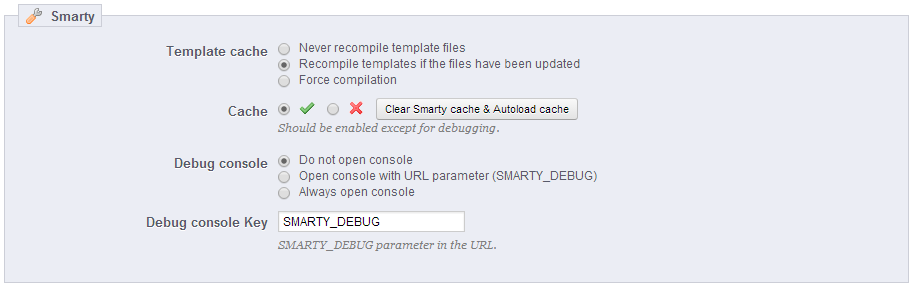
- Template cache - As the name of the setting suggest it is exactly for the cache of your template. Usually you will need this option enabled only when you are installing a new template so the cache files can be updated with the design of your new template. However if you feel inconvenient each time when you are installing a new template to enable this option simply leave it as it is. The default value "Recompile templates if the files have been updated" will allow only if you change the template of your application or the code of its template for the cahe to be rebuilt.
- Cache - The global cache of your application. Please use the default value Enabled if your store is in production mode and if of course you are not using the debug feature.
- Debug Console - This setting is if the debug console should be shown when your web-site is accessed. Again the default option of this field should remain selected if you are not debugging.
- Debug console Key - The Sting that will be shown in the URL if the debug console is activated.
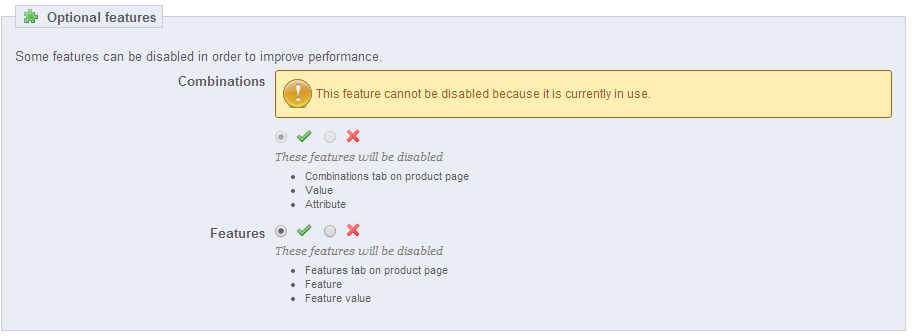
The second interface of this page is called Optional features and as the name suggest it is presenting the optional features displayed on your store. Feel free to select if these features should be enabled based on your personal likes.
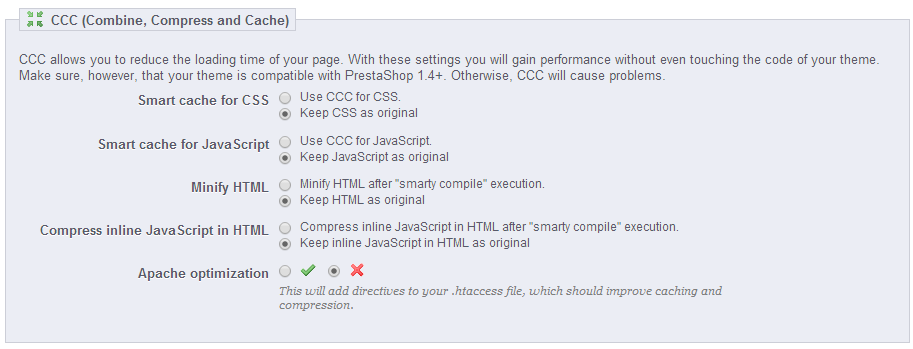
The third interface is called CCC (Combine, Compress and Cache). This interface will present you with options for optimizing the loading speed of your static elements - usually CSS, HTML and JavaScript.
- Smart Cache for CSS If this setting remains as original the changes you are performing to your CSS files will be applied to your live Store immediately. However if this setting is changed to "Use CCC for CSS" it will cause your CSS files to be combined, compressed and cached for sending to the user accessing your web-site. If you are convinced that you will perform no changes on the design of your Store most probably you would like this option enabled. The same goes for the next setting "Smart cache for JavaScript".
- Compress inline JavaScript in HTML - This feature will compress the JavaScript code on your pages as part of the HTML structure of your web-site and not as separate file. Use this option only if you are using heavy JavaScript functions.
- Apache optimization - This setting will add some additional lines into the .htaccess file of your Store so it can benefit from the installed apache web server modules. Using this option can cause issues with your Store if the required modules for that optimization are not presented on the server.
The next interface is called "Media servers (use only with CCC)" and it should be used only if you have a separate server where the static content of your Store are hosted. You should check the official documentation for the application for more information on this interface.
The last and maybe the most important interface is the Caching Interface. This interface is used for the activation of various cache engines running on the server hosting your Store. This is the reason why most of the cache engines provided in the list will be unavailable as they are not supported on our shared hosting environment. If you would like to use these cache engines you should consider using at least a VPS plan so these can be installed for you.
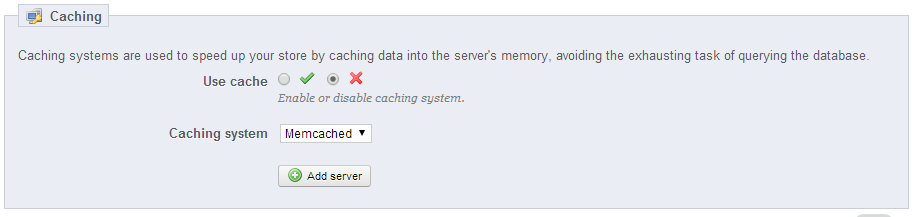
- Use cache - If your application should use one of the bellow listed caching systems
- Caching System - The set of caching engines supported by PrestaShop
Once you have performed all of the changes in the settings based on your needs you should use the Save button usually located at the top of the page so you can save and activate the new settings.
Congratulations! You can now optimize the performance of your PrestaShop!

PrestaShop Hosting
- Free Installation
- 24/7 Tech Support
- Free Domain Transfer
- Hack-free Protection
- Fast SSD Storage
- Free CloudFlare CDN
- Free Website Transfer
- Immediate Activation