How to Add and Manage Tags
Updated on Dec 10, 2015
Tags are usually used for the customers of your web-site to easily find products categorized by certain tag. A single tag can be supported by large amount of products.
To manage your PrestaShop Tags, you need to be able to:
Add a new Tag
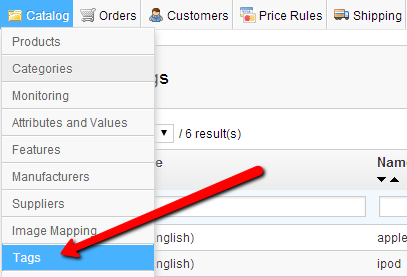
In order to create Tags for your Store you should login in the admin backed for your Store and then navigate to Catalog → Tags.</p >
Once you reach the home page for the Tags you will be able to see all of the currently added Tags listed in a table view and of course the mandatory action buttons. One of these buttons is the Add New button which s used for adding new Tags to your application.
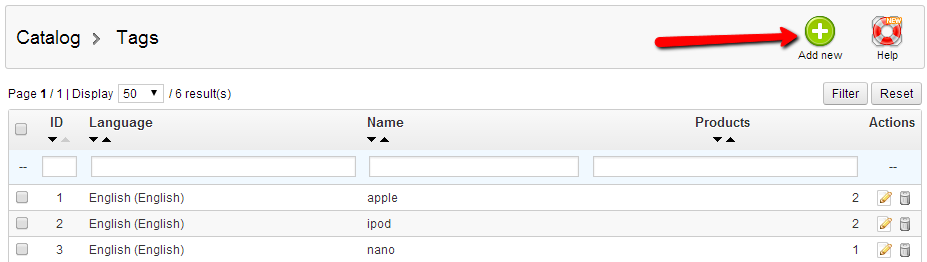
Once you press the Add New”button you will be redirected to a page where all of the required information regarding a Tag should be filled.
Configure the new Tag
On that page you should input the Name of the Tag, Select the language and last but not least add the desired products to the Tag.
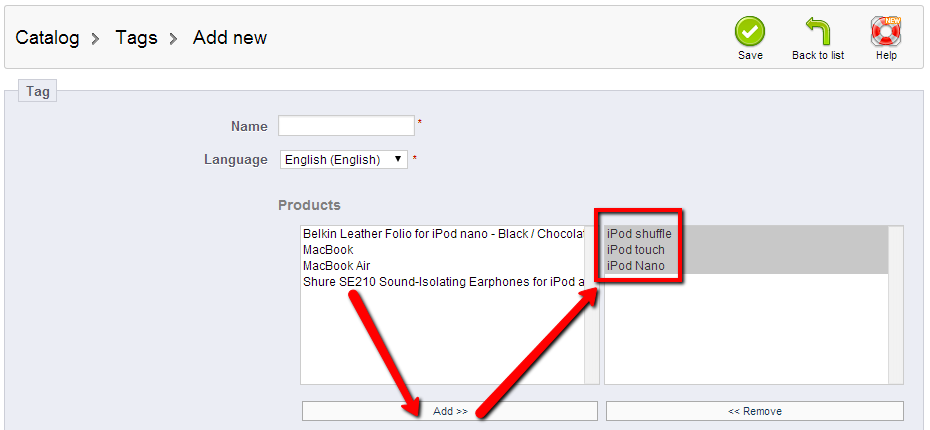
Now that you are ready configuring your new Tag simply press the Save button so you can save the Tag.
Congratulations! You now know how to add Tags for your products!

PrestaShop Hosting
- Free Installation
- 24/7 Tech Support
- Free Domain Transfer
- Hack-free Protection
- Fast SSD Storage
- Free CloudFlare CDN
- Free Website Transfer
- Immediate Activation