How to Install new Language in OpenCart
Updated on Dec 10, 2015
In this tutorial we will show you how to install and configure a new language for your OpenCart store. By default, OpenCart comes with the English language pack pre-installed. For any additional language you will need to download and install an additional language pack. OpenCart language packs can be downloaded via the official OpenCart Marketplace.
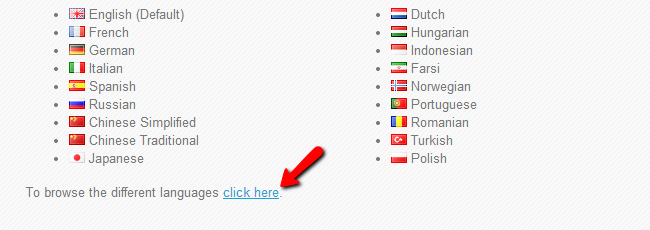
From the OpenCart Language page click on the link to browse the different languages available.
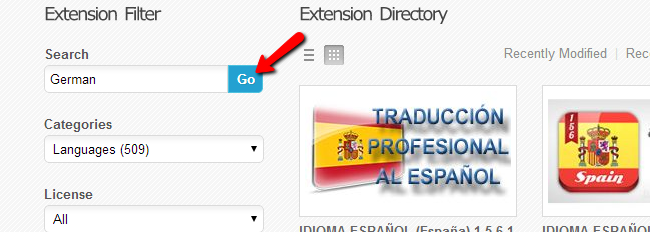
In the search field input the desired language name and click on the Go button.
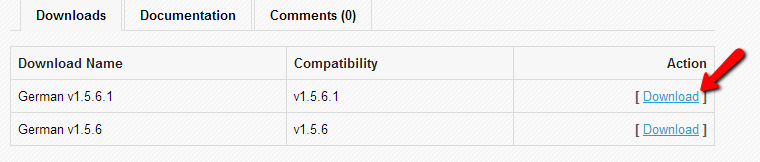
From the search results on the next page review all the available packages and make sure you select the package suitable for your OpenCart version. On the language pack page you will find additional instructions on how to activate your language pack in OpenCart and a download link to obtain the installation package of the desired language.
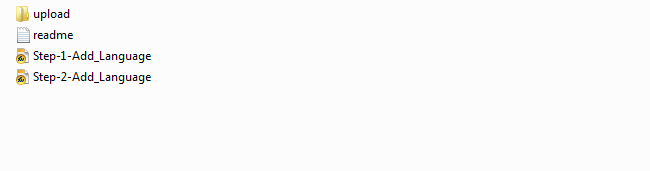
After you download and unzip the language pack you should see a folder called upload which contains the language pack files. Under the upload/ directory there should be two folders called admin and catalog. To make the desired language pack available to your OpenCart you should upload these folders using your favorite FTP client.
You need to upload the admin/ and catalog/ directories to the installation directory of your OpenCart store. If your website is accessible via www.example.com, where example.com is your actual domain, this means that your OpenCart installation is located within the public_html/ directory of your account. If your website is accessible via a subdomain or a subdirectory such as www.example.com/store/, this means that you will find your OpenCart installation within public_html/store/ folder of your account.
The upload of the language pack contents will not overwrite any of your existing files so you do not need to worry about that. Simply drag and drop the files from your local computer into your OpenCart folder under your hosting account. This will place all the necessary files to setup your language pack.
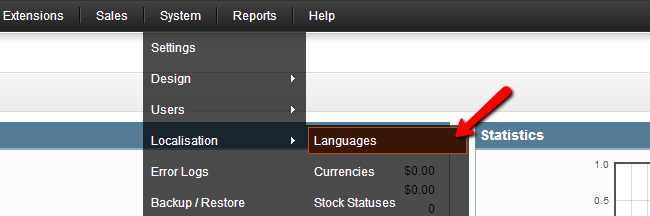
When the upload process is completed you will need to activate the newly uploaded language pack via your OpenCart administrative dashboard. This can be done via the System → Localization → Languages.
Click on the Insert button to add the newly uploaded language pack to your OpenCart store. Fill in all the information required considering the installation instructions provided on the language pack download page. For the purpose of this tutorial we are using the German Language pack which details are:
- Language Name: Deutsch
- Code: de
- Locale: de_DE.UTF-8,de_DE,de-de,german
- Image: de.png
- Directory: de_DE
- Filename: de_DE
- Status: Enabled
- SortOrder: 1
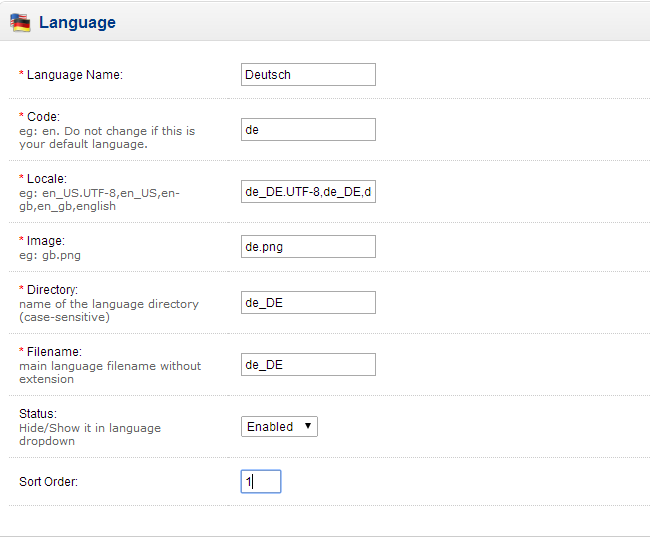
Save your settings to complete the configuration of the new language for your OpenCart store.
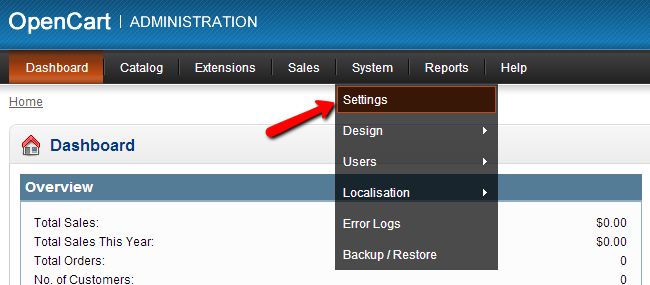
Now when we have the new language added let's activate the new language. To achieve this, please refer to System → Settings tab from the main navigation menu.
From the Settings page click on the Edit link for your store and navigate to the Local tab on the new page.
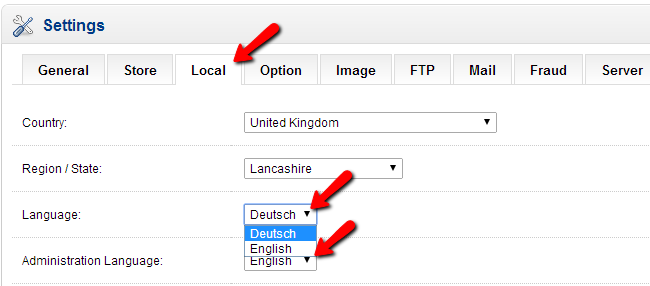
From the Language drop down menu you can select the desired language for your OpenCart store. In case you would like to translate the OpenCart admin dashboard as well, you can select the new language via the Administration Language drop down.
Remember that despite your default language settings your visitors will still be able to change the store language if any additional languages are enabled for your store. All enabled languages are displayed on your OpenCart front end.

If you would like to disable or enable any additional language you can do this in your OpenCart admin dashboard via the System → Localization → Languages menu.

OpenCart Hosting
- Free Installation
- 24/7 OpenCart Support
- Free Domain Transfer
- Hack-free Protection
- Fast SSD Storage
- Free OpenCart Themes
- Free OpenCart Transfer
- Free CloudFlare CDN