How to add products to your store in OpenCart
Updated on Dec 10, 2015
In this tutorial we will show you how to add new products in your OpenCart store. We assume you already followed our previous tutorials and you have already created your product categories and attributes.
To begin, please login into your OpenCart admin dashboard and refer to the Catalog → Products link.
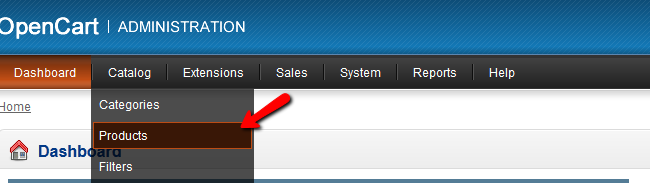
On the next page you can view all of your existing products with their price, quantity and status. To add a new product, please click on the Insert button from the upper right corner of your screen.
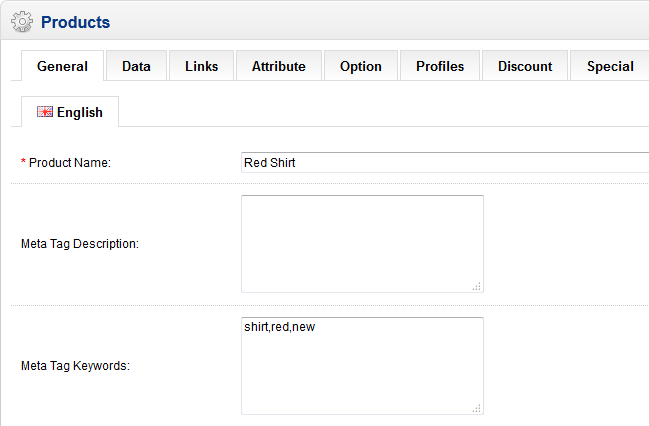
This will redirect you to the product configuration page where we can input all the characteristics of our new product. Let's add a new product, a red shirt, for which we will use our newly created category called New Products and the attribute "Red" we created in the previous tutorial.
On the first tab page we need to input the product name, some meta data for the search engines, product description and optionally some tags.
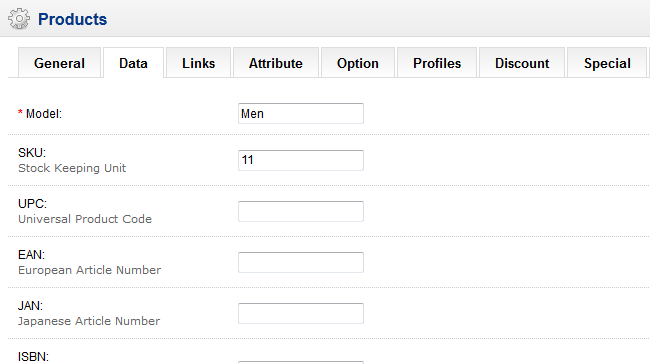
Next, please click on the Data tab. Here you have a few options to configure related to your product. First, let's input our product model. For the purpose of this tutorial we will simply use "Men". You can also input your SKU number to help you track your inventory as well as other product codes depending on your inventory tracking methods.
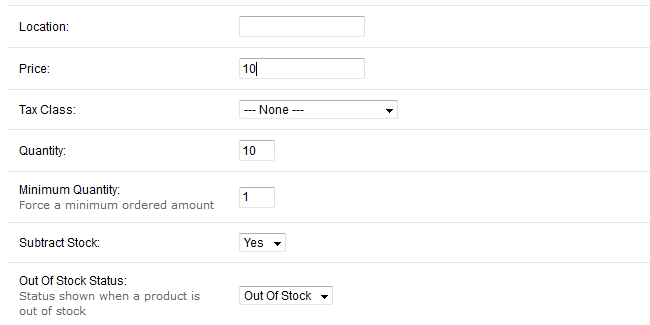
Another important option is the price tag of our product. Additionally, please select the number of available units and the minimum order amount for this product. Let's say we have 10 red shirts so we will set 10 for the quantity number and set the minimum order quantity to 1. We will set the Require Shipping to Yes as this is a physical product and we will provide order delivery for our customers.
Next, lets upload an image for this product by clicking on the Browse button and click on the Upload icon from the popup.
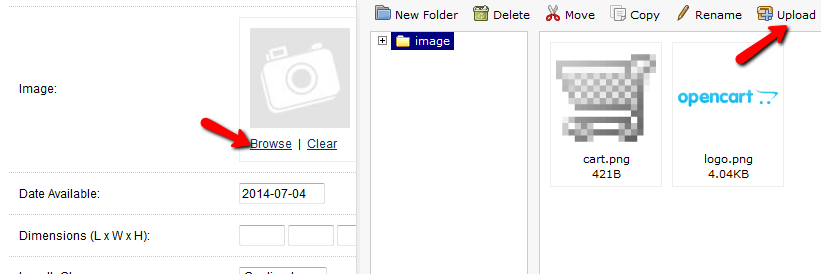
Double click on your product image when it is uploaded from your local computer. Now you should have your image selected for this product. You may add additional images for your product via the Image tab on the same page. You may add some dimensions for your product as well if this is applicable for your product and set the status to Enabled.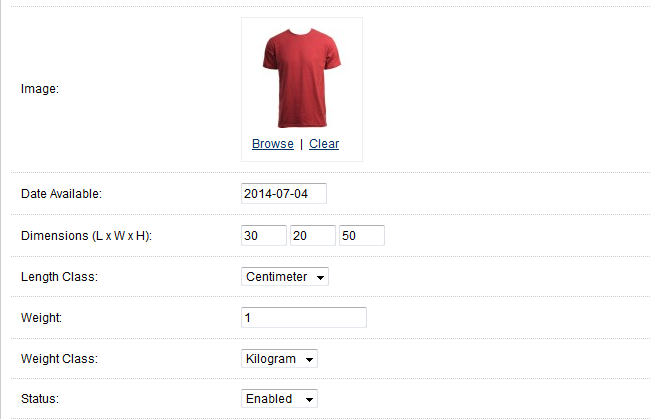
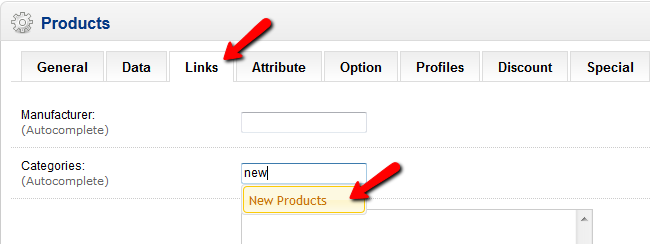
When you are done, please refer to the Links tab to add the product into the appropriate category. You can select the category by start typing its name and click on the desired category from the drop down.
Now we should add the product attributes. This can be done via the Attribute tab by clicking on the Add Attribute button. To select the desired attribute start typing its name and click on the desired attribute from the drop down list.
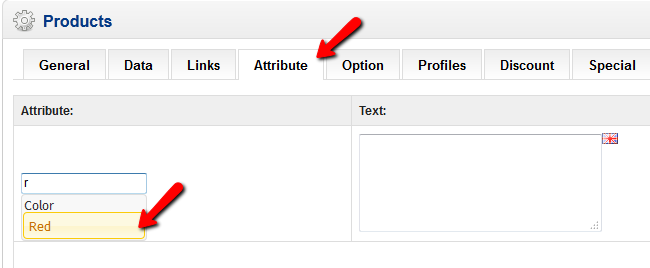
You may input some description for the attribute as well.
If you would like to apply any other specific options for this product you may review the rest of the tabs on the page. When you are ready, please click on the Save button from the upper right corner of your screen to complete the new product creation process.
Now you should be able to locate your product on your store front end.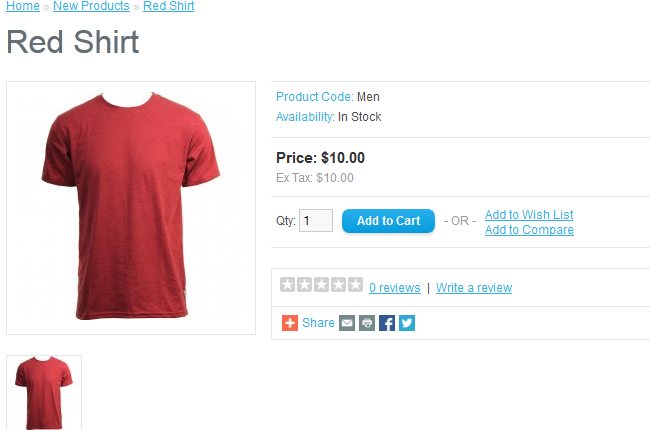

OpenCart Hosting
- Free Installation
- 24/7 OpenCart Support
- Free Domain Transfer
- Hack-free Protection
- Fast SSD Storage
- Free OpenCart Themes
- Free OpenCart Transfer
- Free CloudFlare CDN