How to configure NitroPack in OpenCart 2
Updated on Sep 8, 2016
Filling up your OpenCart 2 store with more and more products will surely at some point start to take its toll on performance. Uncached pages, not well optimized images, JavaScript and CSS that need Minification all add to the load time of your store. It is rare for a company to create an entire framework when trying to provide its customers with a solution to a problem. However, iSenseLabs spared no efforts when it came to customer satisfaction and creating a great product. NitroPack is very powerful performance optimization module that will cut your store's loading times significantly.
To use NitroPack to its full potential, you will need to configure the:
step
Install and Access
The installation process of NitroPack is similar to the one of other extensions for OpenCart 2. We have covered this step in our Extension Management tutorial. However, as NitroPack is an entire framework, after the installation, you will have to take additional steps in order to access its settings.
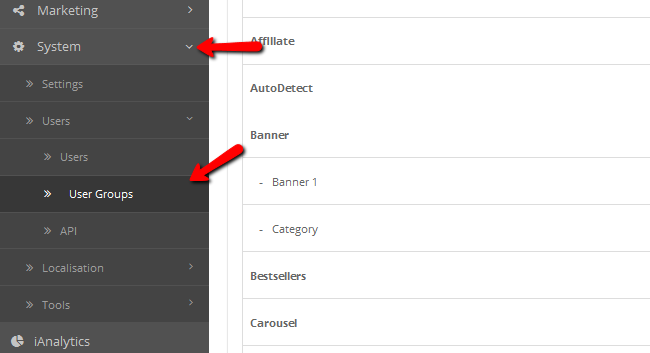
Firstly, you will have to navigate to the System → Users → User Groups menu.
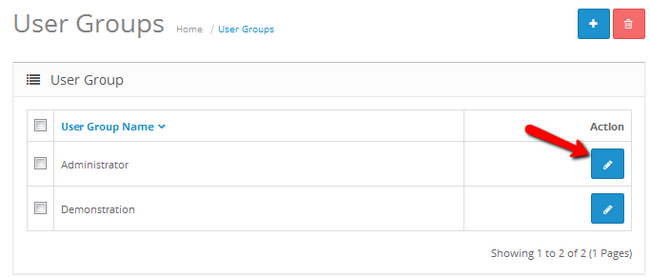
Here you will have to click on the blue edit button corresponding to the Administrator group in order to enter its settings page.
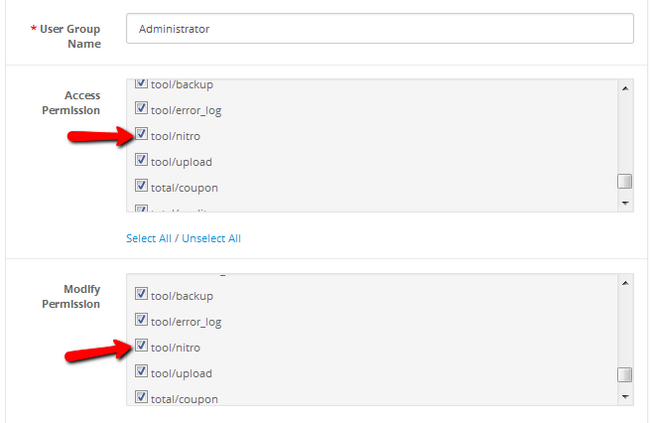
In the Access and Modify Permission lists, find the tool/nitro option and put a checkmark on it. Click the Save button at the top right corner of the page when you are done.
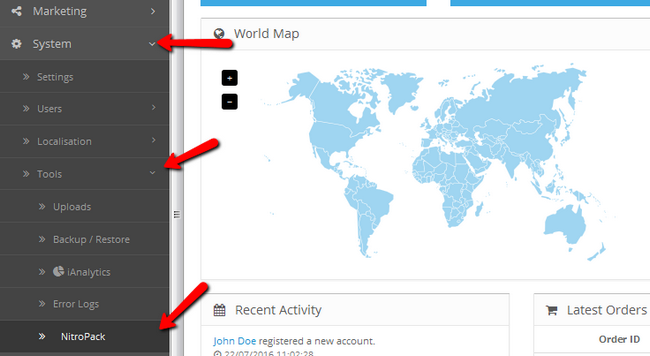
Now you will be able to see and enter NitroPack. The framework has been added as a tool and can be accessed via System → Tools → NitroPack.
step
Settings
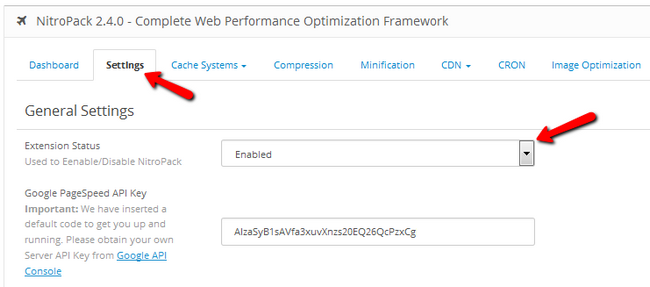
Once you have entered NitroPack, go to the Settings tab and enable the extension. You can also paste your Google API Key in the appropriate field here. This API key will allow you to use the Google PageSpeed Insights that will provide a score for your website based on its speed. The top ranking websites have an average score of 80.78. Above that value a website is considered as well optimized.
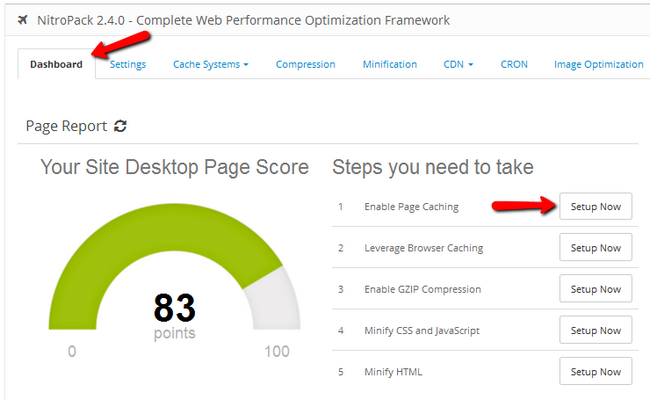
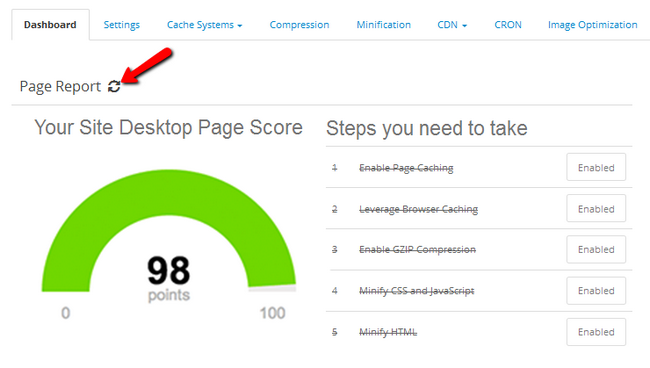
Returning to the dashboard you will see a list of 5 steps you need to take in order to optimize your store. By using the Setup Now button you can access the options in these steps.
step
Page Cache
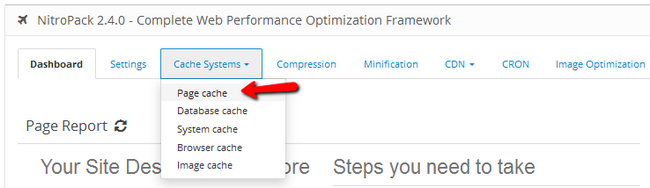
Another way to access the same settings is to simply open the appropriate tab and select the feature you want to configure. For example let us enter the Page Cache settings. This caching method is used for serving already processed content to the visitor of your store. This means that after the initial load every page will load way faster for that visitor. It is advisable to disable other third party caching methods before enabling Nitro's Page Caching. Note that in some cases Page Caching will be deliberately disabled. For more information on that you can read up in the documentation file of the extension.
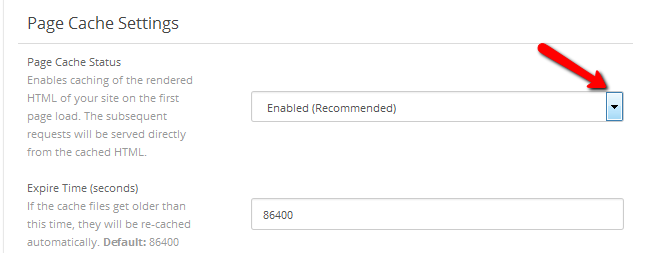
As you can see every option is well explained in its tooltip so we will only provide a quick overview in this tutorial.
- Page Cache Status - Enable/Disable the Page Caching for your store
- Expire Time (seconds) - The amount of seconds the cache will be kept before the pages are re-cached. The default time period is 1 day.
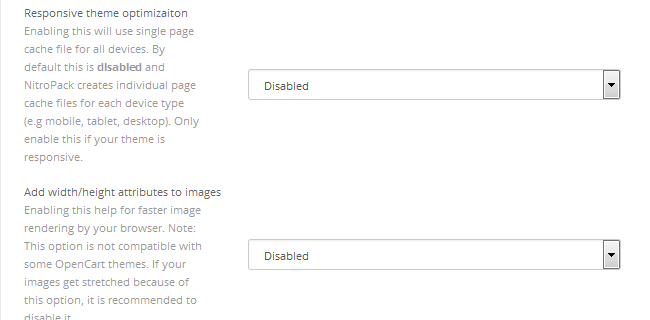
- Responsive theme optimization - If you are using a responsive theme, you can enable this option to serve cached content to all devices instead of just desktop.
- Add width/height attributes to images - Enabling this will add a dimension tag to your images which will help browsers to load them faster. We have already covered how this impacts performance in our GTmetrix tutorial on the matter.
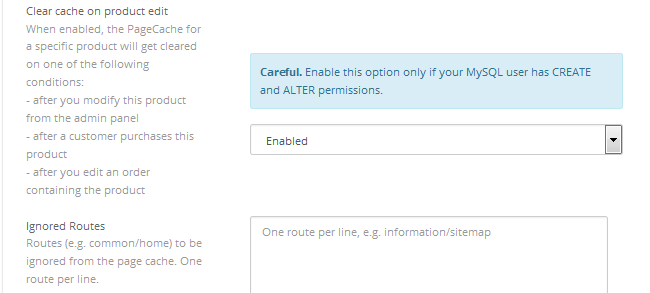
- Clear cache on product edit - If you enable this, the cache for a specific product will be cleared when one of the given conditions are met: after you modify this product from the admin panel; after a customer purchases this product; after you edit an order containing the product
- Ignored Routes - If you have pages that you don't want to be cached (dynamic content pages) you can specify the route to those pages here.
- Supported cookies - Cookie caching can cause issues that are hard to troubleshoot. However if you have a certain cookie you want to cache, you can specify it in this field.
- Store Front Widget - This will add a strip at the bottom of every page in the front-end which will give you information about the loading speed and will provide a clear cache button.
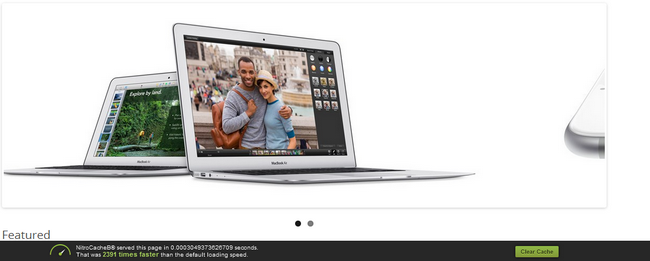
- You can choose if you want this strip visible for everyone, no one or only the admin (recommended).

step
Database Cache
If you have some heavy database queries which are frequently requested you can enable NitroPack's database cache for increasing the delivery time. This caching type is disabled by default as it can interfere with the other caching types.
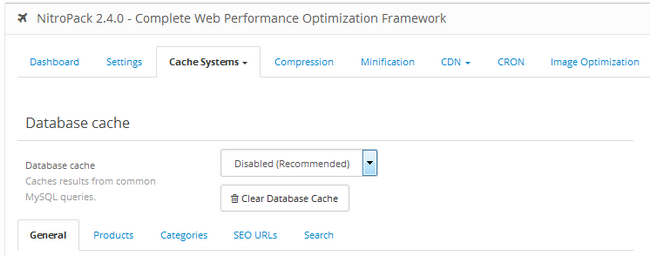
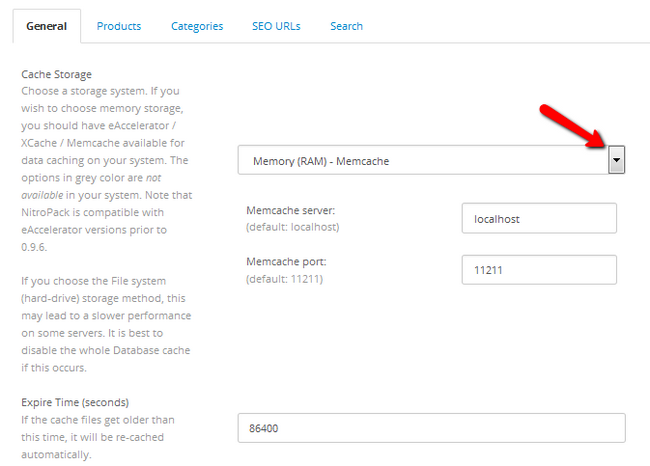
In the General tab you will be able to select the storage system and expire time:
- Cache Storage - Choose between 4 different caching types.
- The hard-drive storage method is the slowest as it utilizes the speed of the storage disk of the server. This option will still be much faster on FastComet servers as they are equipped with SSDs.
- The second method is by using eAccelerator. However, this PHP accelerator is not available on our Shared Hosting Servers due to the Apache configuration on them. To put it simply, as there are different PHP handlers and we are using suPHP which offers stronger security, it will interfere with the way eAccelerator creates cache. While NitroPack has the option to course correct this when the eAccelerator is selected in this option, running other applications on the same plain field would be littered with issues. If you explicitly want to use eAccelerator as storage method, you can do so on our VPS and DS hosting plans.
- XCache can be used in PHP versions prior to 5.5 which introduced build in opcode cache that removes the need of caching types like XCache and APC.
- Memcache is one of the most used memory caching types and can be enabled via the PHP selector in your cPanel → Select PHP Version. For the purpose of this tutorial, we will use this option with the default server and port values (localhost & 11211)
- Expire Time (seconds) - The time period during which the cached content will be preserved (1 day by default)
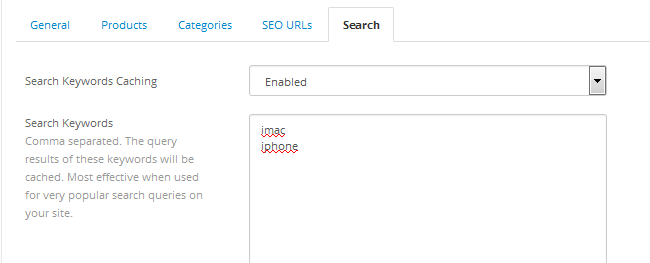
In the other tabs you will have the options to cache product count queries, category queries, SEO URLs and popular search terms. The last is very useful when you see certain keywords are being constantly searched by your visitors.
step
System, Browser and Image Cache
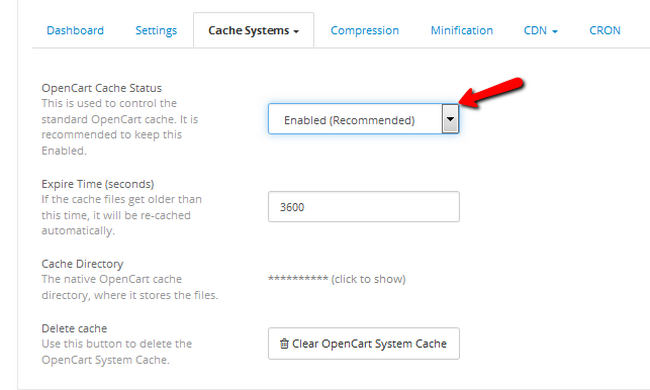
In the System Cache menu, you will be able to modify the behavior of the standard OpenCart cache. If there are issues with your other caching methods, you can disable it, but the chance of that is very slim and it is recommended to keep this enabled. You also have the standard Expire Time and Delete Cache options at your disposal.
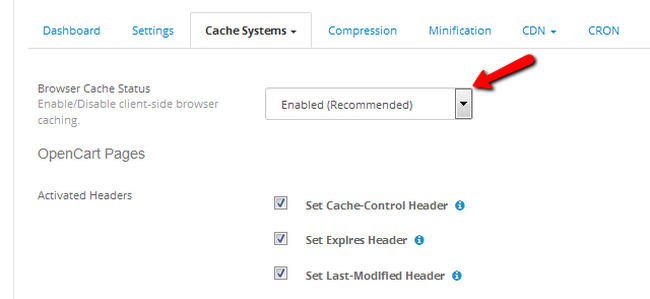
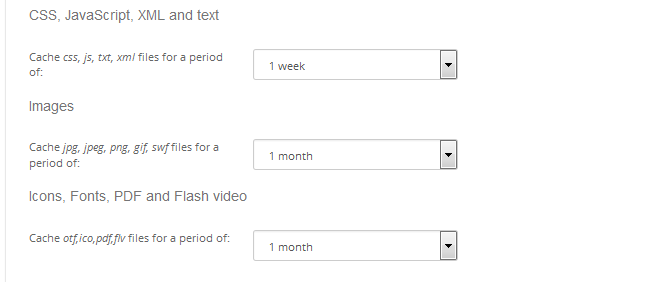
The browser caching is responsible for how the visitor's browser cache HTML, CSS, JavaScript images and fonts.
- Browser Cache Status - Enable/Disable client side browser caching.
- Activated Headers - Headers are very useful when specifying the cache behavior of the content that you want to deliver fast to your customers. There are 3 headers which you can enable here and each provides some performance boost. For more information on how browser caching and headers work, you can check our Leverage Browser Caching tutorial.
You can select for how long to cache the different elements of your website which includes xml, txt, css, js, jpg, jpeg, png, gif, swf, svg, otf, ico, pdf, flv, woff and ttf file formats.
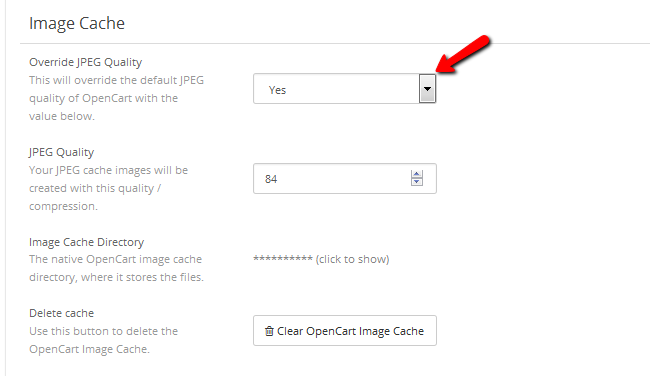
The last option in the Cache Systems drop-down menu is the Image Cache. Here you can choose to Overwrite the image quality of all the jpeg images on your website with a % based compression. This is useful for bulk optimizing the cache for the images of your products.
step
Compression
In the Compression tab, the settings are very straightforward. You can enable GZIP compression and configure if you want your CSS, JavaScript and HTML files to be compressed as well as the level of compression. However, we at FastComet offer GZIP compression by default on all of our Shared Hosting Servers, so you can leave it disabled in NitroPack. If you want to learn more about GZIP compression, you can visit our GZIP Compression tutorial which is part of our GTmetrix related tutorials.

step
Minification
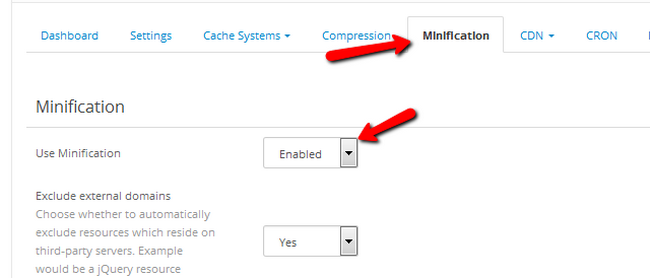
The next tab we are going to visit is the Minification tab. In a few words, Minification is the removing of all unnecessary characters from the code without changing the way it is executed. This makes the file size smaller which eases the delivery and speeds the website. Enable Minification by changing the status of the Use Minification option.
Now, instead of having to manually access your files and minify them using 3rd party software for Minification, you can do all of this by simply selecting Yes for the desired file type (CSS, JavaScript and HTML) in NitroPack. The CSS and JavaScript options are similar so we will cover them as one:
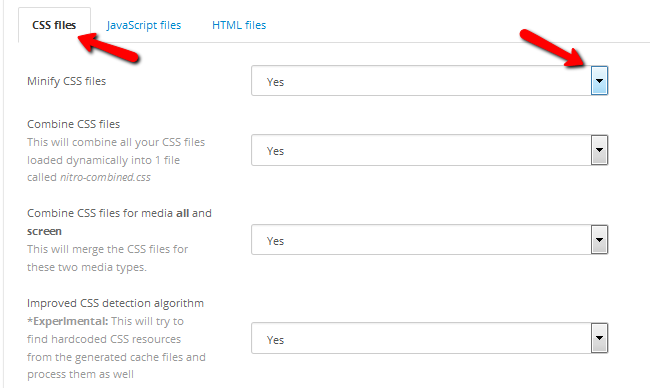
- Minify CSS files - Enables/Disables Minification of Cascading Style Sheets (CSS)
- Combine CSS files - Usually you will have a few CSS files corresponding to different parts of your website. Loading them separately is more time consuming than loading one file that is a combination of all your CSS
- Combine CSS files for media all and screen - This will combine the CSS for the two media types
- Improved CSS detection algorithm - This feature will try to find hard-coded CSS resources in the generated from the page cache files and process it. Note that Page Cache must be enabled for this to work
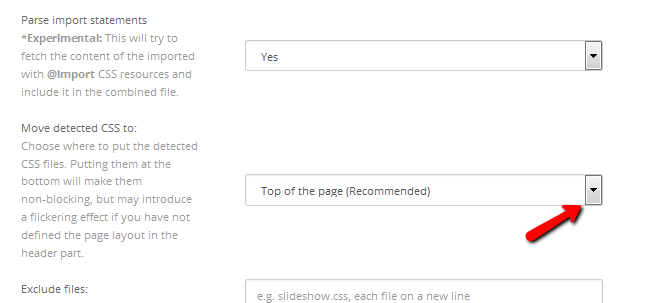
- Parse import statements - This will try to fetch @import CSS resources and include them in the combination of CSS files. Generally, you should avoid @import as it has a negative impact on your store's speed. More about CSS @import can be found in our tutorial section.
- Move detected CCS to - You can move your CSS files to the top or bottom of the page. Check out our Put CSS in the Document Head tutorial for more details on why it is better to move the CSS to the top of the page.
- Exclude files - To exclude a file from the Minification process, please add the file name in this field.
In the HTML section you have only two options:
- Minify HTML files - Enable/disable HTML file Minification. This will create a page cache files that are minified
- Keep HTML comments - Enable this to keep HTML comments
step
CDN
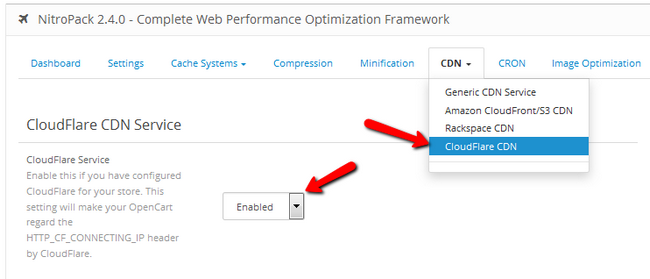
Content Delivery Networks (CDNs) improve delivery speeds by a lot and are generally recommended when running an e-commerce store, as your server location does not matter if the CDN provider has a lot of edge nodes. FastComet is officially partnered with CloudFlare CDN and we can help you in integrating your website with the CDN. You can check our Cloudflare tutorial section for more relevant information.
In NitroPack you can configure your OpenCart to take into consideration the HTTP_CF_CONNECTING_IP header and show the IP addresses of your visitors instead of the default CloudFlare IP.
step
CRON
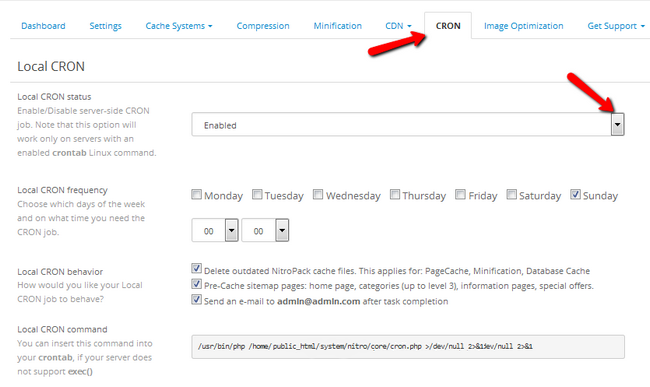
Next on the list is the CRON tab. Cron is software for executing scheduled tasks and as such is very handy to any website owner. Usually a custom cron job can be set via your cPanel → Cron jobs, but NitroPack offers an easy to use cron configurator to help you with certain extension related taks.
- Local CRON status - Enable/Disable CRON job
- Local CRON frequency - Set for which day(s) of the week the CRON job should be executed
- Local CRON behavior - Select which tasks should the CRON job complete on execution
- Local CRON command - You can always manually add the CRON job by using this command via SSH
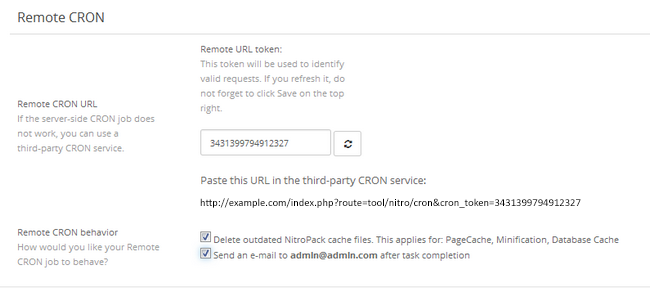
If you wish to setup a remote CRON scroll past the local CRON fields and you will see:
- Remote CRON URL - If you wish to use a 3rd party CRON service you can do so via a CRON URL which you can paste into set service
- Remote CRON behavior - Choose which tasks to be completed upon execution
step
Image Optimization
The last tab in NitroPack is called Image Optimization. Here you can optimize the images on your store in bulk.
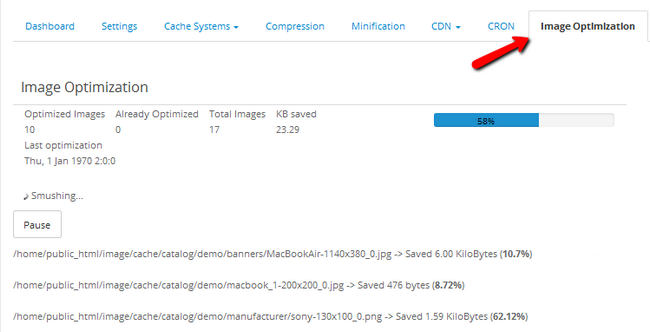
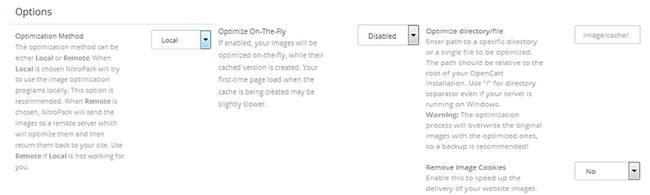
Before hitting the Start new optimization process button you will have to configure:
- Optimization Method - Choose between the local and remote methods. If local is not working for you, use remote, but remember that the Optimize On-The-Fly feature will not be available in that case
- Optimize On-The-Fly - With this enabled images will be optimized on the fly as their cache is being created
- Optimize directory/file - You can enter a path to a directory or a file that you wish to optimize
- Remove Image Cookies - Enabling this option will make your Domains cookie free by removing HTTP requests from your images. For more information on the matter, you can check our Cookie Free Domains tutorial.
Now you can re-evaluate your website's speed by clicking on the refresh button for the speed module located in the dashboard tab.
During our tests, we managed to get the loading time of a product heavy website from 2.9 to 1.7 seconds by using most of NitroPack's features. The connection was between our datacenter located in Dallas, Texas and a request from Stockholm, Sweden.
This extension has proven its worth and is something we can recommend to anyone who wants to increase the loading speed of his OpenCart store.
On this page...

OpenCart 2 Hosting
- Free Installation
- 24/7 OpenCart Support
- Free Domain Transfer
- Hack-free Protection
- Fast SSD Storage
- Free OpenCart Transfer
- Free Cloudflare CDN