How to Manage Orders in WooCommerce
Updated on Dec 8, 2022
In order to manage all the orders on your Online Store WooCommerce provides you with a dedicated page where all the orders will be listed. In the next few lines of this tutorial we will show you how to fully manage the orders submitted for products purchse on your Online Store.
To manage the orders on your Online Store, you need to complete these steps:
Add a New Order
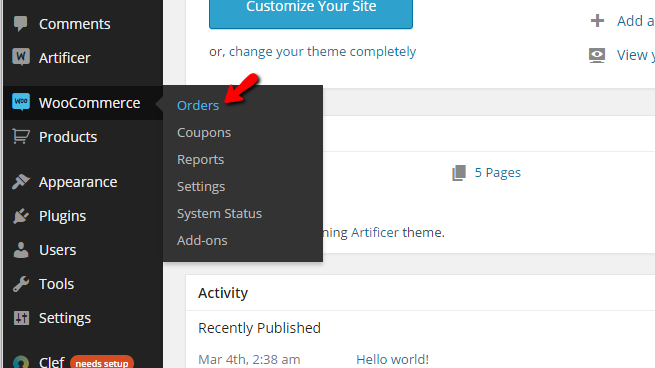
In order to access the page where you will be able to manage all of the Orders you will need to first login into the admin area of your WordPress website. From there, you will need to navigate to WooCommerce > Orders.
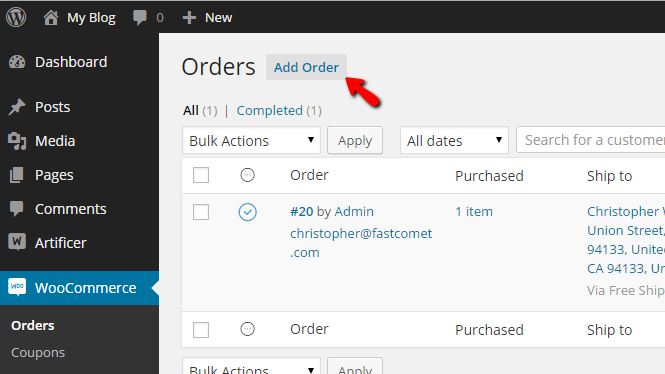
Once there you will notice a table view containing all the orders currently submitted on your website. In order to add a new order manually to your website you will need to use the Add Order button located at the top of the page.
By clicking on that button, you will be redirected to a page where you will see a few sections with options you will need to configure in order for the new order to be added. Let's review that one by one.
The first section is called Order Details and there you will be able to configure the basic details about the order you are adding such as Order Date, Order Status, and of course the Customer to you will be adding this order.
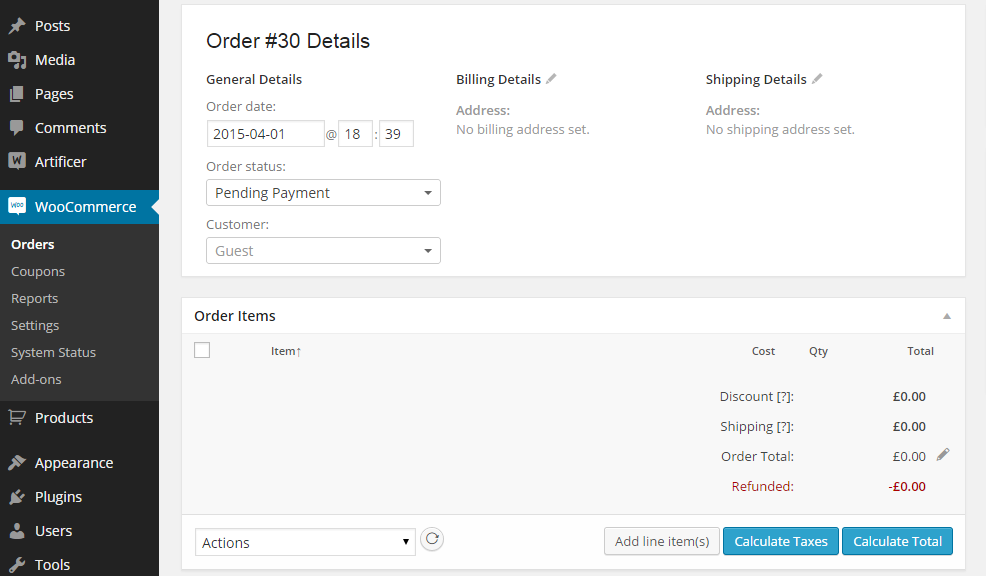
The second section is called Order Items, and there you will be able to add products to the order.
The third section is called Custom Fields, and as the name suggests there, you will be able to add different custom fields to the order.
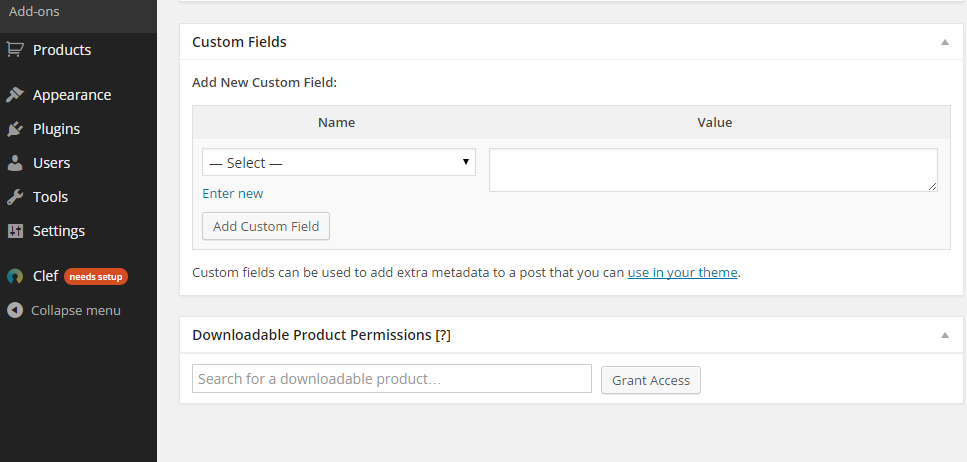
The fourth section is called Downloadable Product Permissions. There you will be able to add some downloadable products to the order, and once the status of the order is changed they will be available for download by the customer.
In the sidebar of the page, you will find the additional sections called Order Actions and Order notes. There you will be able to add respectively configure some actions for the order like sending emails for example and respectively to add some notes if you would need to.
Handle Existing Orders
Once an order has been submitted to your WooCommerce Online Store you will need to process it and then potentially complete it after successful payment. You can only edit orders which are not paid and are in Pending Payment status. Once logged into the admin area of your WordPress application please navigate to WooCommerce> Orders. Once there you will be able to see all the orders submitted on your website.
The orders you are looking for most probably are those in Pending Payment status as these are the new orders. You can easily sort the Pending Payment orders by clicking on the Pending Payment link located above the table view with your currently existing orders.
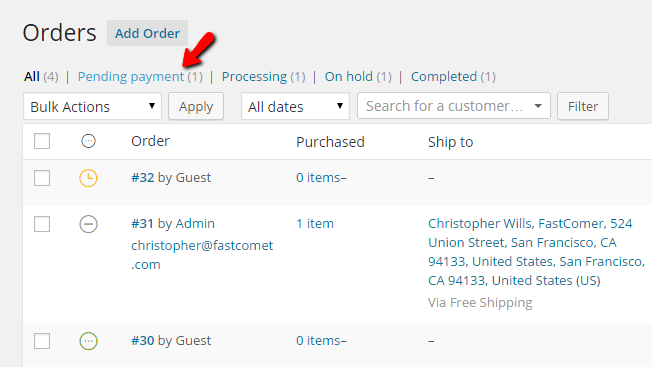
Then you will be presented with a list of the submitted but unpaid orders. If you would like to edit an order, please click on the eye-like button located in the Actions column of the table view.
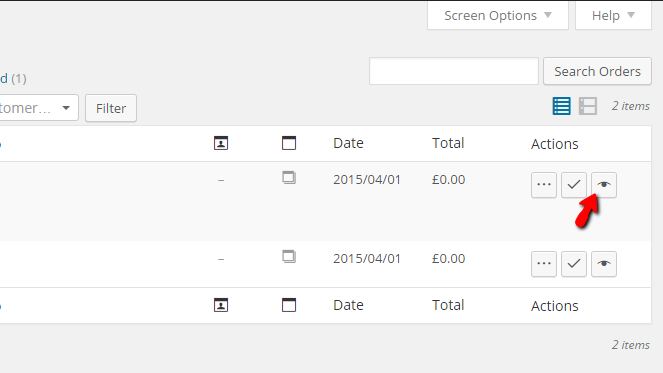
This will enable you to view the order and edit it just in case you will need to.
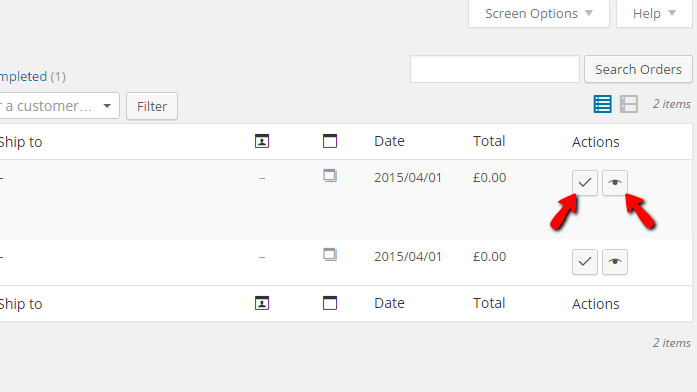
What you will need to do next is to wait for the order to get paid by the customer. Once this is done, the order will be moved to a Processing status. In this status, the order should be reviewed by the admin, and if everything is ok with the same it should be Completed. In order to review the Processing orders you will need to simply click on the Processing link from the top horizontal menu of the Orders page.

This will present you only with a list of the orders which have been paid, and you will need to process them. In order to process an order, you will need to first review the order and evaluate if the same should be accepted. This can be easily done by clicking on the little eye-like button in the Actions column of the table view. If everything is ok with the order, you should return to the Processing orders view and click the other button in the Actions column called "Complete".
Once an order has been completed, it will be changed status, and you will be able to view it on the Orders page.
The last action we will discuss is the order deleting action and as the name suggests you will be able to delete an order. In order to delete an order, you will need to select the order, and from the Bulk Actions drop-down, you will need to select "Move to trash" and then hit the Apply button.
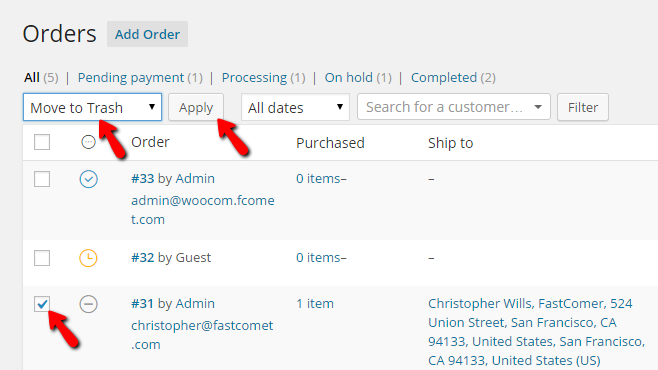
Once this is done, the order will be moved to the trash and will be removed from the list of orders on your website.
That is all you will need to manage all the orders on your WooCommerce website!

WooCommerce Hosting
- Free Installation
- 24/7 WooCommerce Support
- Free Domain Transfer
- Hack-free Protection
- Fast SSD Storage
- Free WooCommerce Transfer
- Free Cloudflare CDN