How to Configure the Inventory Options
Updated on Dec 8, 2022
The amount and type of products you will be selling on your website depending on your physical product disposal. On your Online store, however, this is managed by the Inventory feature, and in the following few lines of this tutorial, we will show you how to configure the settings for your Inventory.
To be able to configure the Inventory Options, you need to:
Access the Inventory options page
As this is one of the WooCommerce option settings pages you will be able to find it under WooCommerce>Settings >Products>Inventory.
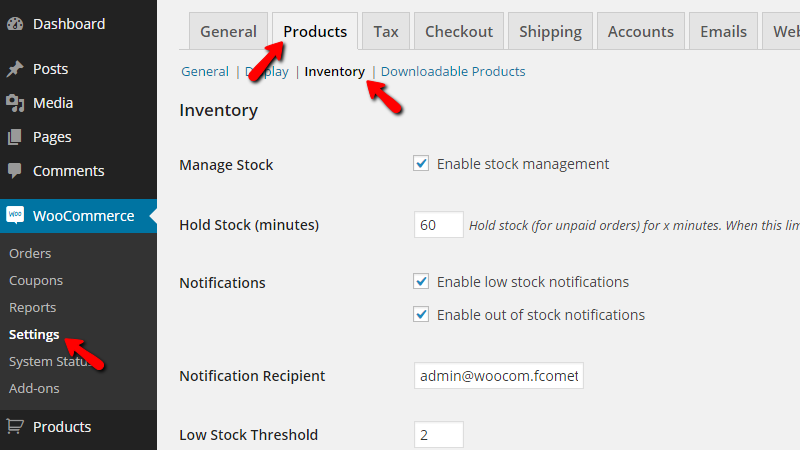
Keep in mind that the Inventory is a small menu link that you can find under the Products tab once you access the WooCommerce Settings page. It’s a bit tricky to find.
Configure the Inventory Options
There are several available options when it comes to the configuration of your Inventory, and below we will provide more information on each one of those:
- Manage Stock – This will enable the global Stock management feature so you can manage the entire stock of your Store. Keep in mind that the feature will be enabled by default.
- Hold Stock (minutes) – The amount of time in which the pending orders will be preserved.
- Notifications – Here, you can enable notifications that will be fired when certain stock is close to 0.
- Notification Recipient – The email address of the person who should be notified about the ending stock of a certain product. This is pretty useful if you have a distributor and if you would like to automate the process.
- Low Stock Threshold – The amount of stock when the notification for the low stock is triggered.
- Out-Of-Stock Threshold – The amount of stock when the notification for Out of Stock should be triggered.
- Out-Of-Stock Visibility – If the products are Out of Stock should be displayed in the Catalog.
- Stock Display Format – If the number of stock products should be shown entirely on every product’s page.
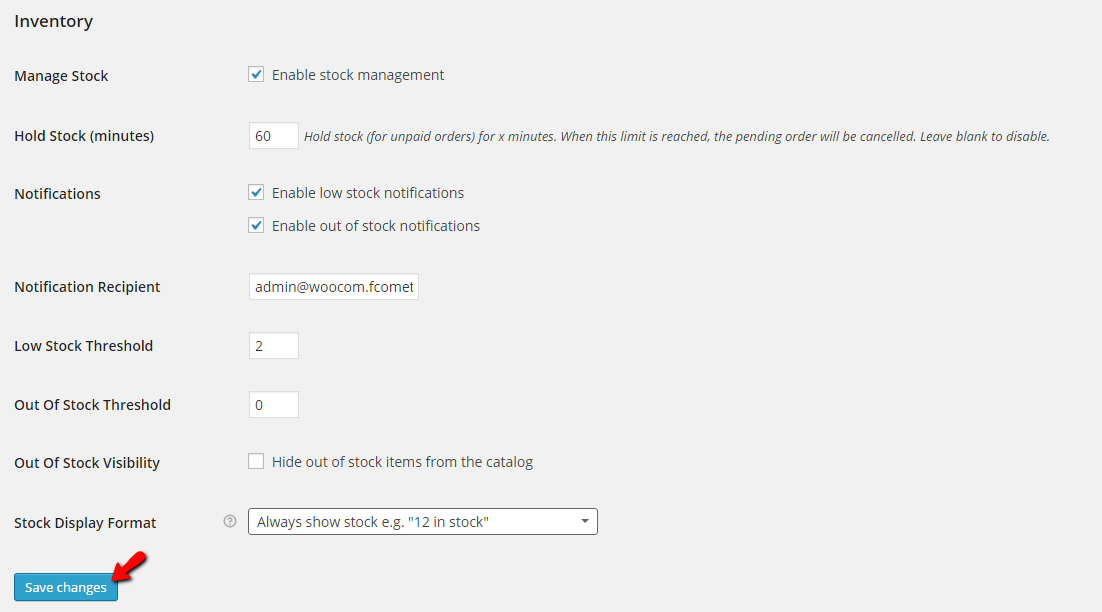
Once you are done with the changes, please use the Save Changes button so all of the performed configurations can be saved.
Congratulations! You are now able to configure the options for Inventory Management on your WooCommerce Online Store!

WooCommerce Hosting
- Free Installation
- 24/7 WooCommerce Support
- Free Domain Transfer
- Hack-free Protection
- Fast SSD Storage
- Free WooCommerce Transfer
- Free Cloudflare CDN