How to Configure WooCommerce Checkout Options
Updated on Dec 8, 2022
The checkout Options of WooCommerce will allow you to configure the use of coupons, define the pages and URLs used by the concrete Checkout process components, and, most importantly, a way to manage the existing payment methods. In the following few lines of this tutorial, we will review all the options related to the Checkout Process you are provided with.
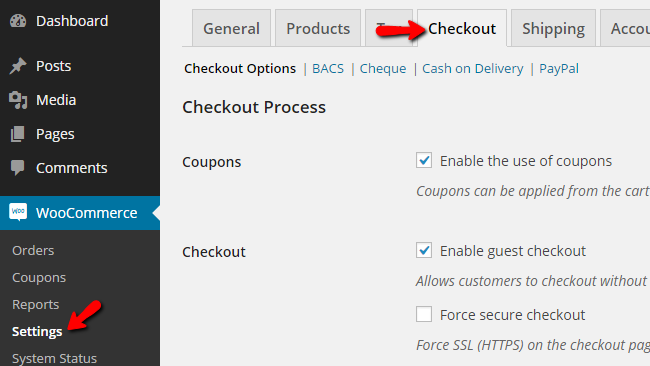
Before you can start configuring the concrete payment method, you must first configure the Checkout Options supported by your Store. This can be easily achieved if you access the admin area of your WordPress application and then by navigating to the WooCommerce > Settings > Checkout page.
There you will be able to find two sections of settings, and below we will discuss each one of those.
The first section is called Checkout Process, and there you will be able to find the following options:
- Coupons – This will enable the use of coupons on the checkout pages.
- Checkout – Here, you can enable options for guest checkout or force the https:// secure connection on that page.
The second section of settings is called Checkout Pages, and as the name suggests here, you will be able to configure the pages for the different components involved in the checkout process:
- Cart Page – Define a page from your website where the customers can view their shopping Cart.
- Checkout Page – Define the page where the user can complete the Checkout process.
- Terms and Conditions – Define the page used for the Terms and Conditions texts.
The third and final section is called Checkout Endpoints, where you can configure the URLs for handling specific actions during the checkout process. Keep in mind that these URLs should be unique, and they should not be repeated.
The option you have available here for configuration are:
- Pay – The URL that should be used for the payments page.
- Order Received – The URL that should be used for the received order page.
- Add Payment Method – The URL that should be used for adding the payment method.
The final section is called Payment Gateways, and there you will be able to receive more information on the already configured payment methods. And of course to set them as per your needs.

WooCommerce Hosting
- Free Installation
- 24/7 WooCommerce Support
- Free Domain Transfer
- Hack-free Protection
- Fast SSD Storage
- Free WooCommerce Transfer
- Free Cloudflare CDN