How to add a new Product on your Store
Updated on Dec 8, 2022
In the process of building your Store, you will reach a point when you will need to add some products. Actually, this should be one of the main activities in your checklist after you perform the basic configuration of your store or after you implement some design. In the next few lines, we will provide you with more information on how to add products to your Store.
To complete this tutorial, you will need to:
Add a New Product
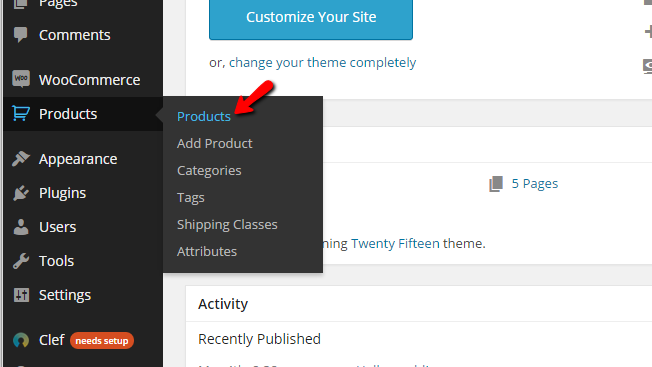
For your convenience and for the ease of Store management WooCommerce provides you with a separate link in your admin menu called Products. In order to access it you will need to simply login into your Wordpress admin area and navigate to Products>Products.
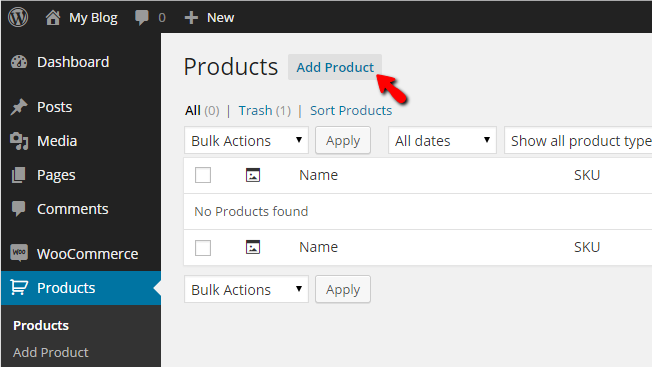
On the next page, you will see a conveniently structured table view for all of the currently added products on your Online Store. Of course, if you are accessing that location for your first time, most probably it will be empty as there will be no products added to your Online Store.
In order to add a new product, you will need to simply click on the Add Product button located at the top of the page.
This action will send you to the Add New Product page where you will be able to configure all of the product options which we will review in the second step of this tutorial.
Configure the Product Data
Most probably the interface for adding a new product will look familiar to you and this is because it is indeed similar to the one used for adding posts in Wordpress. All of the options usually used for adding posts are also available here and you should be able to use those freely.
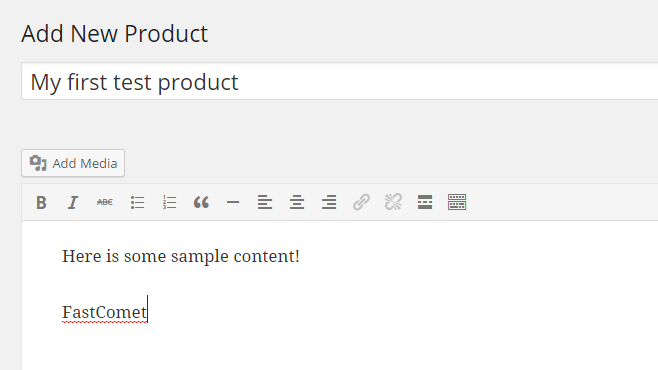
The available options on that page are separated into few sections. The main section is related to the name of the product and of course some content which can be inserted in the large content box bellow the name of the product and used as the long description text displayed on the dedicated product page.
The next section of options is called Product Data and there you will be able to configure quite a lot of additional options for your product. The options are stored in a form of vertical tabs. By default, you will be presented with the option to make your product Virtual or Downloadable due to the presentation of these options at the top of the section.
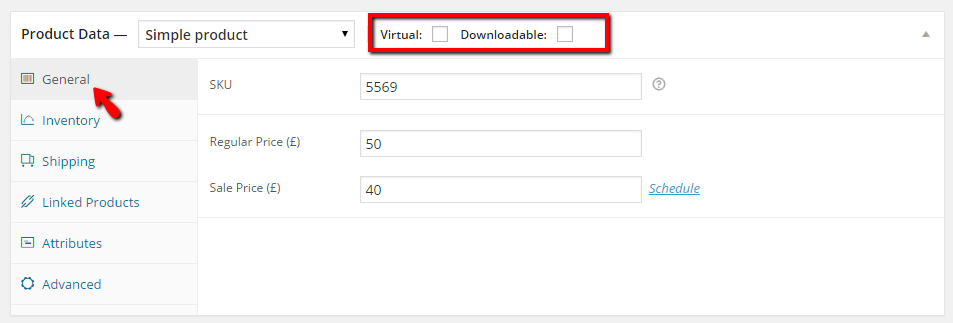
In the General tab you will be able to find the following settings:
- SKU – This is simply unique identifier which will help you to track easily your product in the products management sessions (moved to inventory tab since ver.2.6.0 )
- Regular Price – The regular price of the product
- Sale Price – The price when the product is marked as Sale
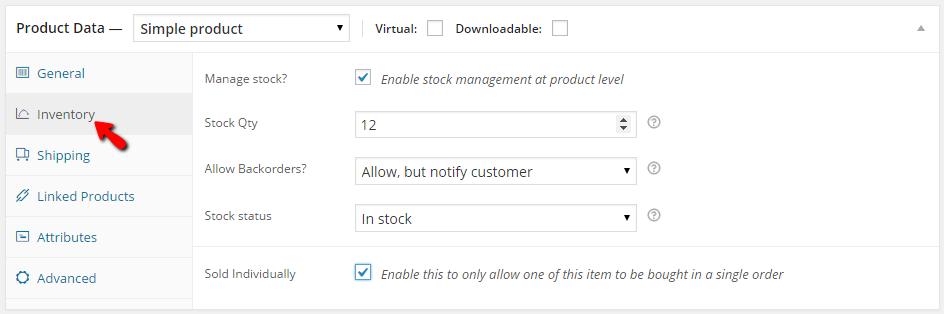
When you are done with these simple settings you can move forward to the next tab called Inventory. There you will be able to find few options related to the inventory of the product you are adding:
- Manage Stock – Here you can enable the stock management for this product. Keep in mind that this will bring some additional option you will need for the Stock management
- Stock Status – The status of the stock for this product
- Sold Individually – This will allow you to restrict your users to purchase a single product at a time
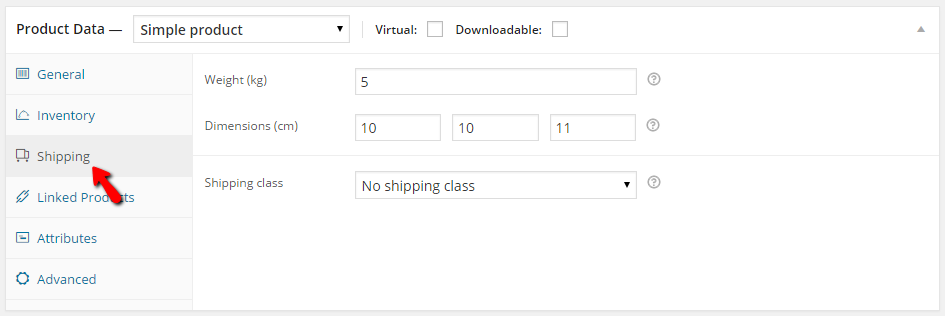
The next tab you should move forward with is called Shipping and here you should be able to define the Weight, Dimensions and of course the Shipping class for this product. The options are relatively simple and you should be able to configure them intuitively.
Once you are done with these settings you can click on the next tab called Linked Products. These type of products which can be grouped on Sale. The available options you can configure on this tab are:
- Up-Sells – The actual products which can be a subject of Up-Sell along with this product
- Cross-Sells – The products which can be a subject of Cross-Sell along with this product
- Grouping – Here you can choose among the grouped products so you can make this product part of another group of products
The next tab with settings is called Attributes and as the name suggests here you will be able to add some Attributes to the product.
The last tab from this section is called Advanced, and there you will be able to configure some additional options about this product.
- Purchase Note – Any notes you would like to send to the customer right after purchase.
- Menu Order – Here, you will be able to set a custom ordering position for this product.
- Enable Reviews – You can enable or disable the review about this product.

Once you are done with this final tab you can move forward to the next section of options.
Add a Product Short Description sections
The final section of the settings is called Product Short Description and there you will be able to input some short description about your product.
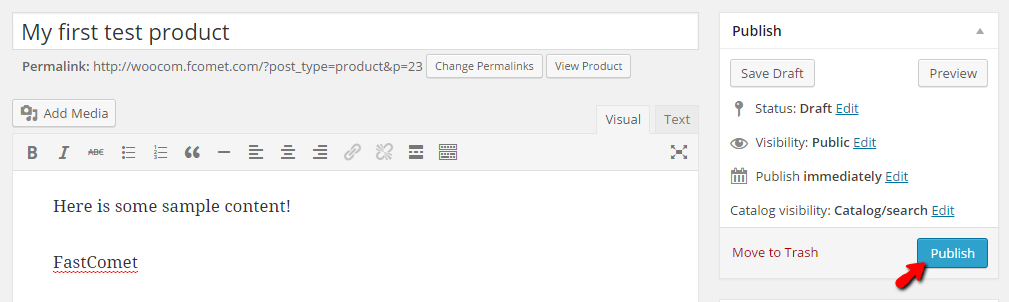
Once you are done with all these sections of options you should scroll up to the top of the page and click on the Publish button so the new product can be published immediately.
Of course in the sidebar you will find also few smaller sections which can be used for adding the product to certain category, adding some tags to the product, setting featured image and of course making a product gallery.
In fact, the only option to upload images for your product is to create a gallery via that last section in the Sidebar.

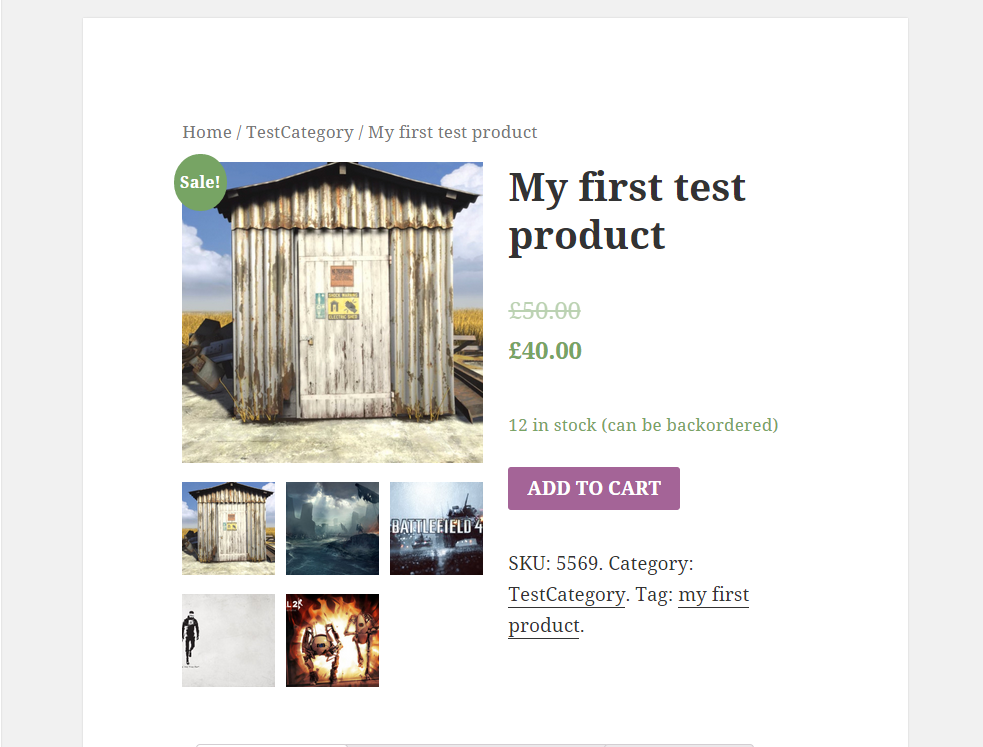
When you publish your product you will have the option to review it right away and you will notice how even with the default Wordpress theme the product page looks incredibly.
Congratulations! You now know how to add products to your WooCommerce based Online Store!

WooCommerce Hosting
- Free Installation
- 24/7 WooCommerce Support
- Free Domain Transfer
- Hack-free Protection
- Fast SSD Storage
- Free WooCommerce Transfer
- Free Cloudflare CDN