How to use the Quickinstall package for Jomres
Updated on Mar 13, 2019
Jomres Quickstart contains a bundle of Joomla and Jomres with a preset website layout, ready for customization and booking requests.
Please note that if you try to install this into an existing directory containing Joomla you will corrupt the file system of that Joomla installation.
To install Jomres by using Quickstart, you need to:
Download and Prepare the Files
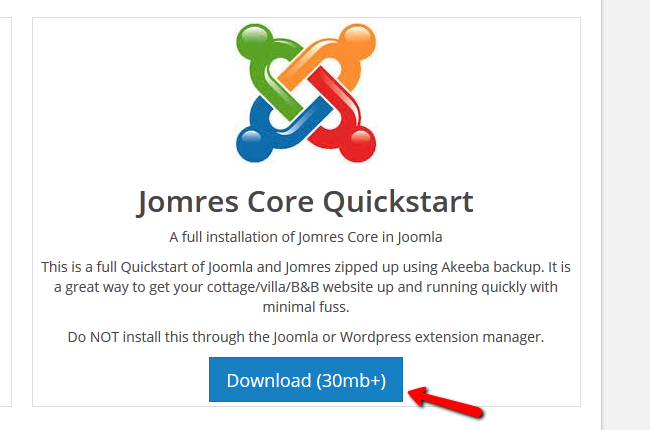
The first thing, you will need to do is to download the Jomres Quickstart package. You can do so by visiting the official Jomres website find the Jomres Quickstart and hit the Download button.
Next you will need to unzip the content of the file on your computer.

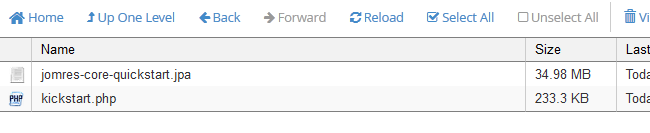
You can upload the two files on the server by using your preferred FTP client or directly via the File Manager accessible on your cPanel.
There are two ways of uploading your files to the server - using an FTP client, following our FTP tutorial, or uploading directly through your cPanel account > File Manager, following our cPanel tutorial.
Restore the Installation
Since the file jomres-core-quickstart.jpa is an archived AkeebaBackup of an already installed and configured Joomla/Jomres, you will need to extract and restore the installation from it. To do so we will use the kickstart.php file.
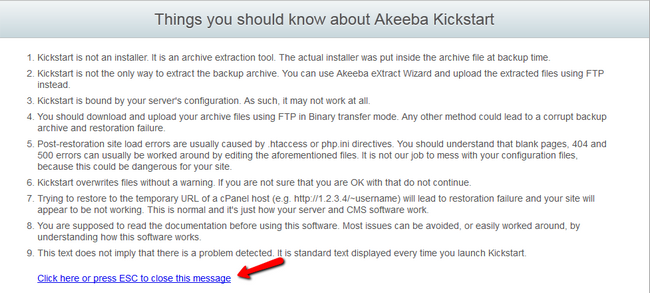
Open a web browser and Navigate to the location of the files you uploaded to your account and access the kickstart.php file. For example if you uploaded the two files to your public_html you will need to navigate to domain.com/kickstart.php. If the files are in a folder, let us say public_html /booking you will need to navigate to domain.com/ booking/kickstart.php. You will see a little guide to what Kickstart is. Hit the Click here or press ESC to close this message to continue
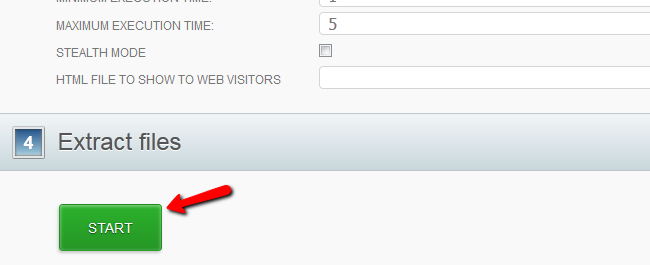
You should not change the predefined settings so please scroll to the end of the page and click the Start button.
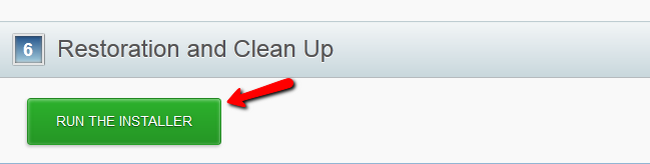
You will need to wait 15-30 seconds until the extraction is completed. After that, hit the Run the installer button.
You will see the page being analized, that is ANGIE – Akeeba Next Generation Installer Engine checking the configuration of the page relative to the backup you are restoring from. Since the backup was made on another website you will receive a warning:
IMPORTANT! You are restoring to a different site.
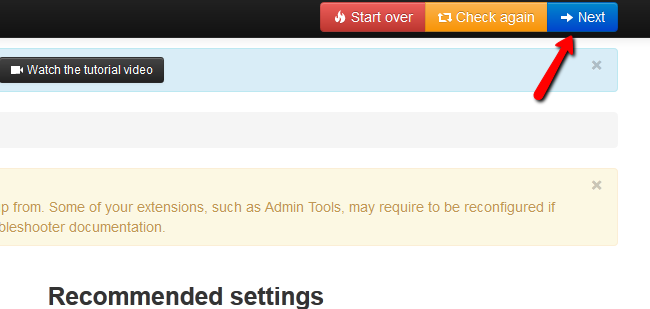
This is normal, so you can ignore it. Below it you will see the configuration of the application as well as some information about the backup and the recommended settings. Do not worry if there are 2-3 recommended settings marked with yellow, Joomla will still function as intended.
Click on the Next button located in the right top corner of the page.
Create a Database
As the restored installation once had a database from which it operated, you will need to create a new, empty database and fill the fields in this page corresponding to your database's details.
MySQL Configuration
You can create a new database and a user assigned to it via cPanel. Simply follow our MySQL Wizard tutorial for more information on the process.
- Database type -MySQL
- Database server host name - localhost
- Username - Enter the name of your user
- Password - Enter the password
- Database name - Enter the name of your database
- Database Prefix - vj4yt_ (by default)
Leave the rest of the options as they are and hit the Next button at the top right corner of the page.
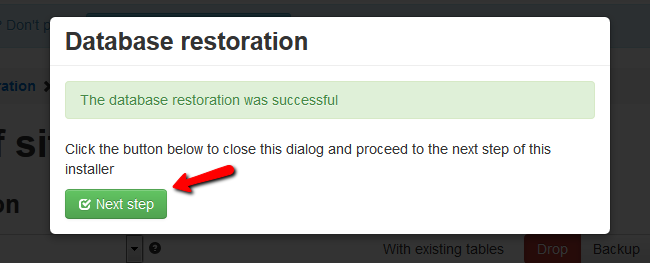
After the restoration is completed you will have to click the green Next Step button.
Configure the Site Parameters and create an Admin Account
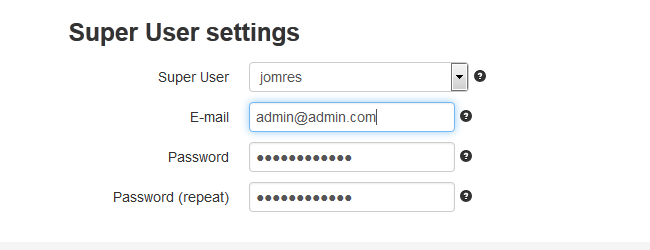
Now you will have the options to setup your site parameters, FTP options and Super User settings.
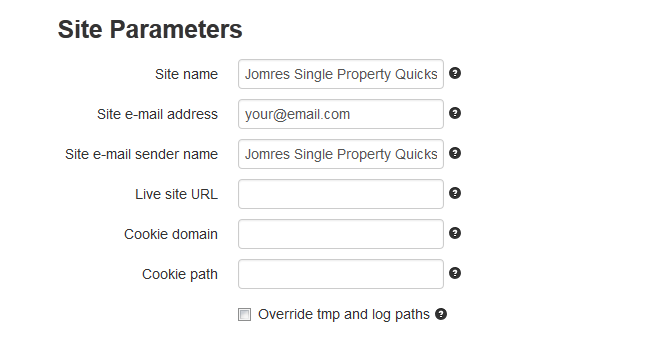
Note that the Super User settings are the administrator credentials you will later use to log in the back-end of your website and will give you additional configuring options in the front-end. Make sure you use a valid email. In case you forget your password you will be unable to restore it if you have setup an incorrect email address.
Click the Next button at the top right corner of the page to finish the installation.
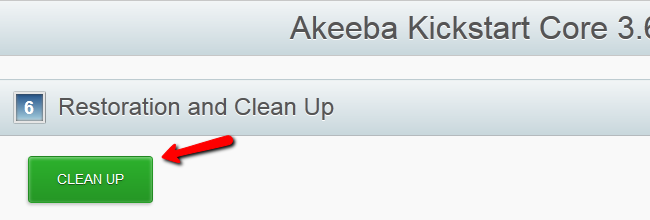
Remove the Installation Files
Now you will need to delete the installation file as it is no longer needed and might become a security issue in the future. Just click on the Clean Up button located on the tab where you started the kickstart.php.
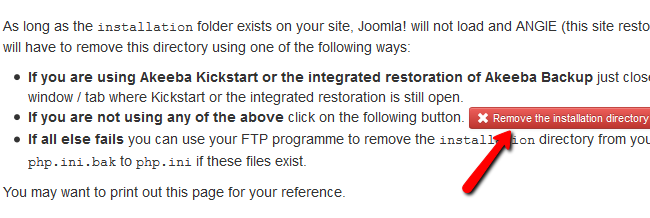
Alternatively you can click on the red button Remove the installation directory and Jomres will remove the installation files for you.
Now you can access you website's front-end and back-end by clicking on the corresponding sections.
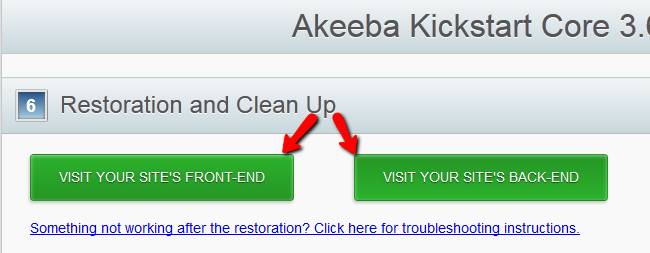
You will now need the Super User credentials you have previously set up to enter both your frontend and back-end.
Congratulations, you have successfully completed the Quickstart installation of Joomla/Jomres.

Jomres Hosting
- Free Installation
- 24/7 Jomres Support
- Free Domain Transfer
- Hack-free Protection
- Fast SSD Storage
- Free Cloudflare CDN
- Free Jomres Transfer