How to Set Company Details in vTiger
Updated on Dec 10, 2015
One of the first tasks, when developing a vTiger website, is to enter the correct details for your organization. vTiger has a core feature in the administrative area for this purpose and you do not need any development knowledge to complete the process. The actual feature will allow you to set the name of your company as well as to upload a logo on your website. This will look more professional for your website’s users and also provide a better atmosphere. To achieve that, you need to:
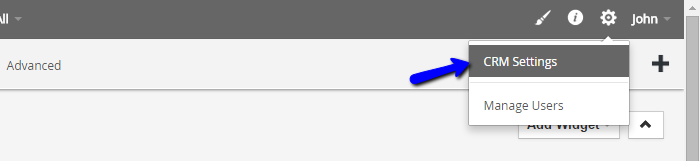
To configure the company details, you first need to log into your website as administrator. Click on the Settings icon at the top-right corner of the screen and then CRM Settings.
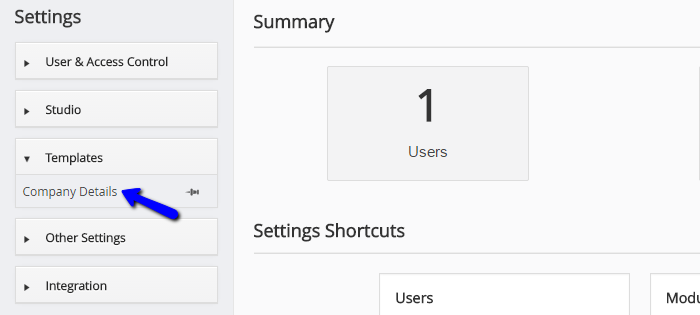
Scroll down to the Templates section and select Company Details.
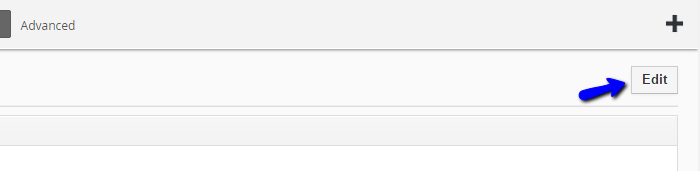
Click on Edit button to edit the information.
Edit the data for the following fields:
- Company Name: The name of your company.
- Company Logo: Select a logo image from your personal computer by clicking on the Choose File button.
- Address: Enter the address of your company.
- City: Enter the city, where your company is based.
- State: Enter the state, where your company is based.
- Postal Code: Enter the postal code for the location of your company.
- Country: Enter the country, where your company is based.
- Phone: Enter the phone number of your company.
- Fax: Enter the fax of your company.
- Website: Enter your company’s website.
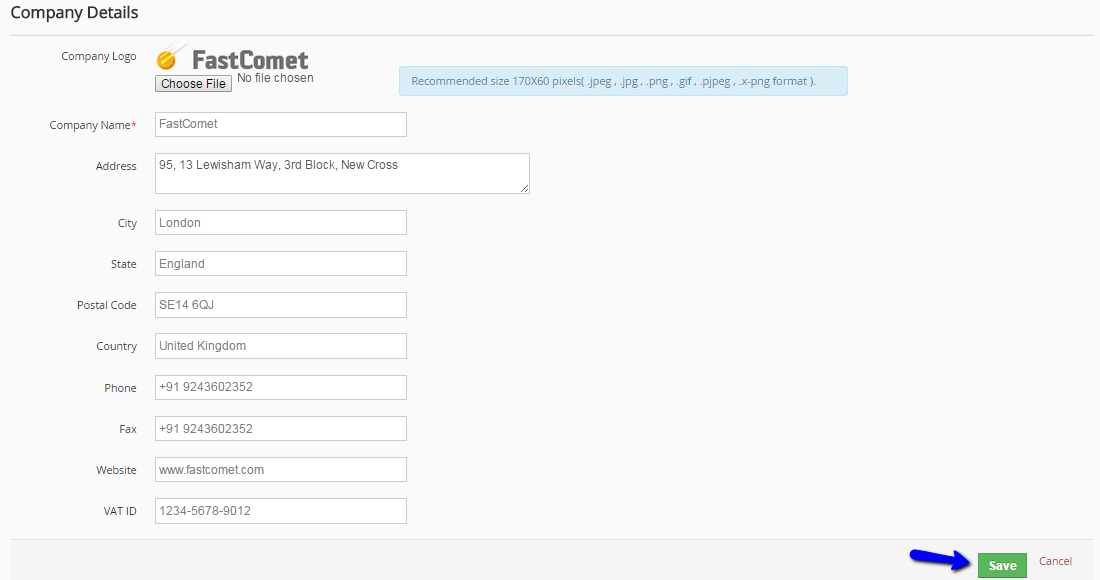
Click on the Save button to keep the changes. The system will automatically update the details of your organization and display them for your employees and customers.

vTiger Hosting
- Free Installation
- 24/7 Support
- Free Domain Transfer
- Hack-free Protection
- Fast SSD Storage
- Free Transfer
- Free Cloudflare CDN
- Immediate Activation