How to Restore an Oxwall Backup
Updated on Dec 10, 2015
To restore the backup of your Oxwall website, you will need two things – the files of the website and the database the website was working with.
In order to Restore your Oxwall data you will need to:
You need to move the backup of your Oxwall files to the location, where you wish to restore it. This can be done by using an FTP client or directly via the File Manager service within your cPanel account. Carefully choose the directory, where you would like your Oxwall website to appear and make sure that you have removed all contents previously located there.
Step 2 Restore the Database
In order to restore the database you will need a new, empty database to start with.
MariaDB Configuration
You can create a new database and a user assigned to it via cPanel. Simply follow our Database Wizard tutorial for information on that.
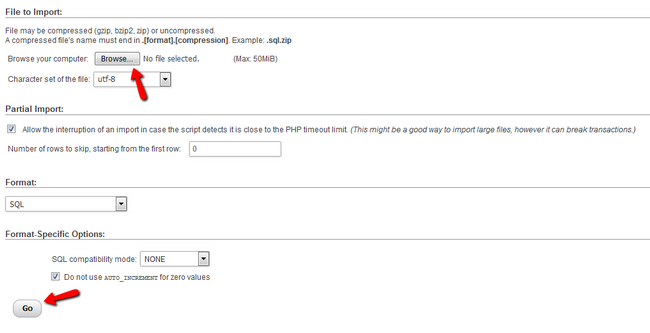
Then, you need to log into your cPanel account and navigate to the phpMyAdmin service.

Select the newly created database.

Click on the Import button at the top menu.

Select the backup file you have previously downloaded to yourpersonal computer and then hit the Go button to initiate the import.
Step 3 Link the Files to the Database
By completing both of the previous steps, you now have a directory on your account, which contains all of the files and folders of your Oxwall website. You also have a database, which is a copy of your previous database used by your website. Now, it is time to configure them. You will need to edit the the configuration file of the application and enter your new database details.
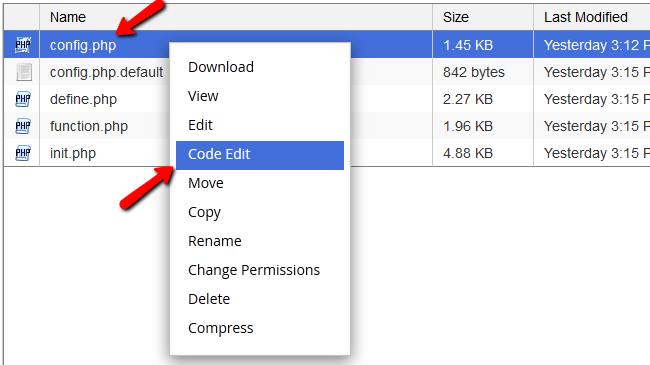
Configuration File
The configuration file for Oxwall is located in the ow_includes/ directory and is named config.php. You can edit this file using your cPanel’s File manager.
You will need to edit the first few lines that define the database parameters with your new database’s details.
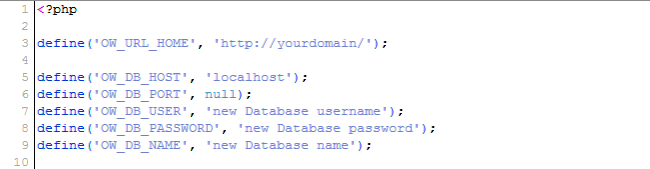
Once you are ready editing, click the Save Changes button located at the top right of the page and your website will be fully restored. Well done!

Oxwall Hosting
- Free Oxwall Installation
- 24/7 Oxwall Support
- Free Domain Transfer
- Hack-free Protection
- Fast SSD Storage
- Free Cloudflare CDN
- Free Oxwall Transfer
- Immediate Activation