How to Activate Cloudflare in Oxwall
Updated on Dec 10, 2015
Content Delivery Networks (CDN) increase the caching capabilities and make websites perform better and run faster. You can increase the loading speed of your Oxwall website by enabling the CDN Cloudflare for it.
To enable Cloudflare for your Oxwall based website, you will need to:
Step 1 Download and install the Cloudflare integration plugin
You will need to download the Cloudflare Plugin and install it in your Oxwall application. If you are unsure how to do so, please visit our How to install Plugins in Oxwall tutorial.
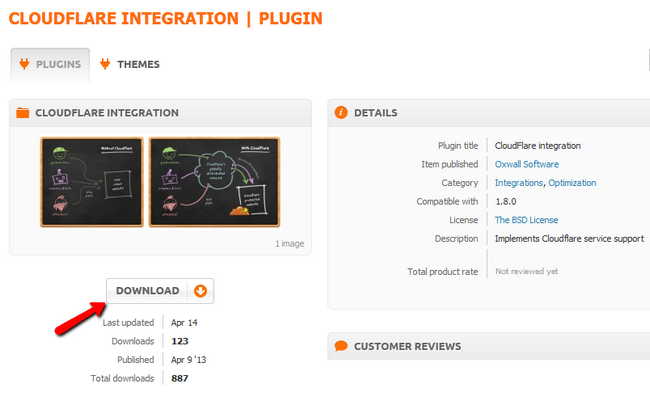
Note that this plugin will only implement the Cloudflare service to your website. You will still need to perform cache clearing, DNS configurations and other actions via your Cloudflare account.
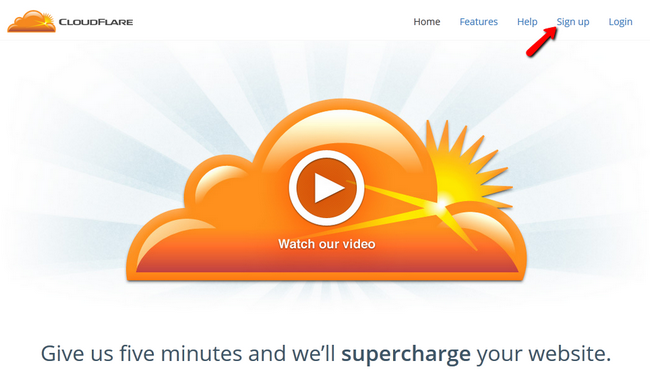
Step 2 Create an account in Cloudflare
You will need to navigate to Cloudflare using your favorite browser and click on the Sign Up button.
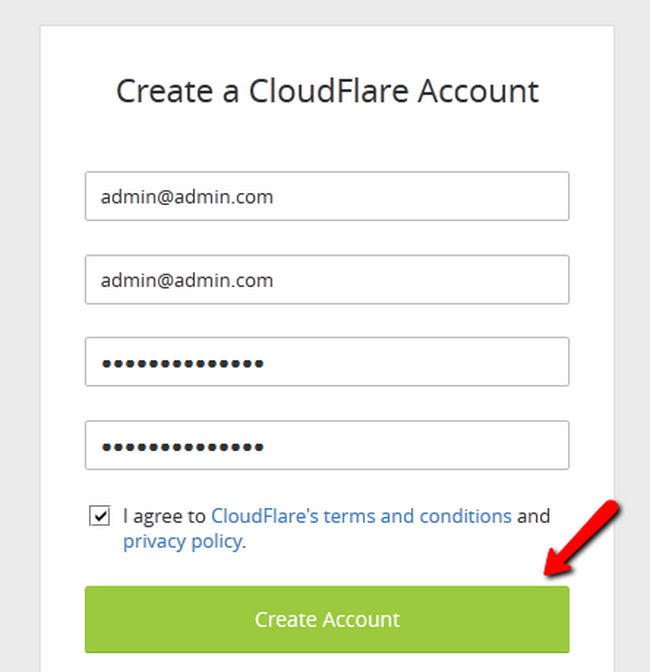
Fill out the registration form and click on the green Create Account button.
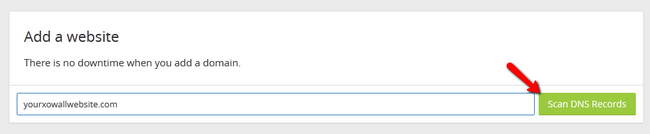
Now you will be directed to a setup page where you should add the domain on which your Oxwall website is situated. Hit the Scan DNS Records button when you are ready to proceed.
Once the Scan has been completed click on the Continue option. Now you will see all of the records for your domain. Again click on the Continue button to proceed to the plan page.
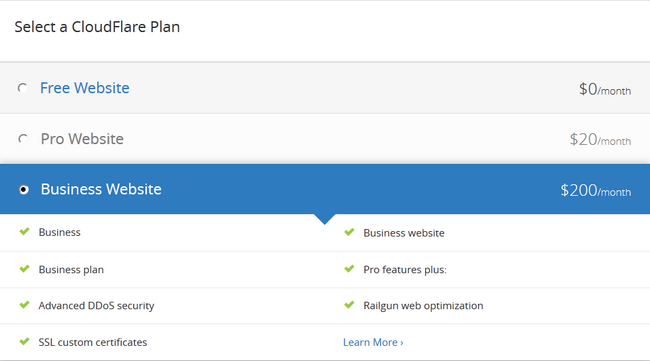
Here you can choose the plan that best fits your website’s description and your needs. Once you have chosen a plan, click on the Continue button.
Step 3 Re-configure the DNS settings of your domain
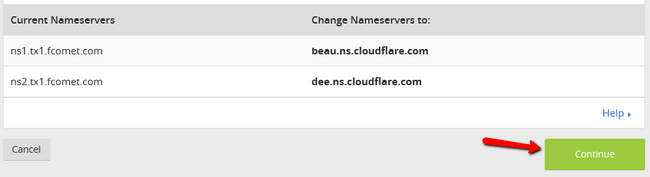
On this step of the Cloudflare setup you will see your current nameservers and the Cloudflare nameservers to which you should point your domain.
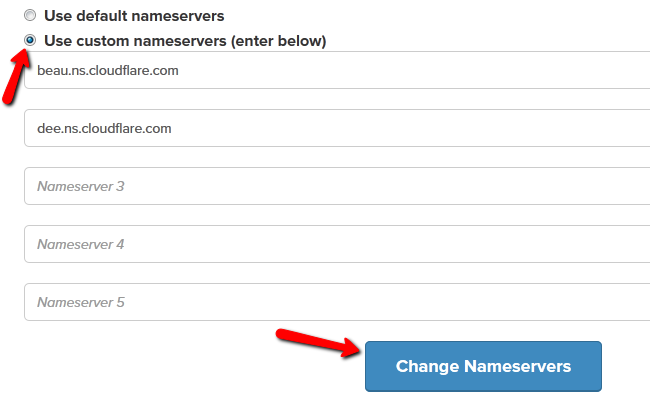
Each registrar has a different path to the Nameserver options for your domain. If your domain is wit FastComet, the change of the nameservers associated with your domain name should occur in your Client Area → Domains → Manage Domain → Manage Domain→Nameservers.
Note that the transfer process can take up to 24 hours. There will be no downtime when you switch your nameservers. Traffic will gracefully roll from your old nameservers to the new nameservers without interruption. Your site will remain available throughout the switch.
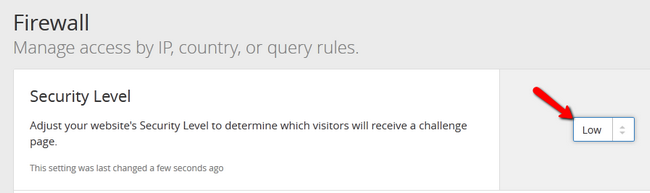
Click on the Change Nameservers button once you have changed the nameservers with the ones provided by Cloudflare. Once your domain has been marked as active by Cloudflare you can go to the Firewall menu and change your security level to low (Recommended by Oxwall).
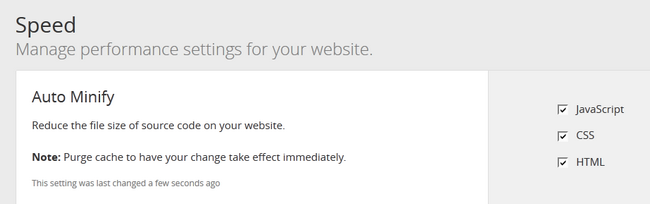
Now go to the Speed/Performance menu and enable the auto minify of JavaScript, CSS and HTML. The settings will be saved automatically as you change them.
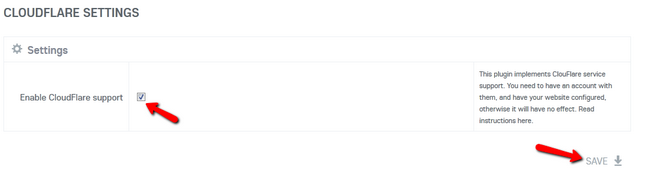
Now all you will need to do is go to login in your Oxwall Admin dashboard and navigate to Plugins→Installed Plugins→Cloudflare→Settings.

Check the Enable Cloudflare box and hit the Save button.
Note that when you make changes related to the CSS/HTML or PHP/JS code, you will need to clear the cache in Cloudflare.
Congratulations, you have successfully enabled Cloudflare for your account.

Oxwall Hosting
- Free Oxwall Installation
- 24/7 Oxwall Support
- Free Domain Transfer
- Hack-free Protection
- Fast SSD Storage
- Free Cloudflare CDN
- Free Oxwall Transfer
- Immediate Activation