How to install Oxwall via Softaculous
Updated on Nov 16, 2016
In this tutorial we will guide you through the Oxwall installation process performed via the cPanel Softaculous auto installer. Softaculous allows you to install Oxwall in just a few clicks without the need to download or upload the Oxwall install package on your hosting account.
Start an Oxwall Social Network in just 3 minutes:
To help you get started with Oxwall our Technical Support team provides Free Oxwall Installation.
- Free Oxwall Installation by our Support Team
- Free Domain Name for Life
- Optimized SSD Oxwall Hosting
- Fast and Secure Servers
To complete the Oxwall Installation, please follow these steps:
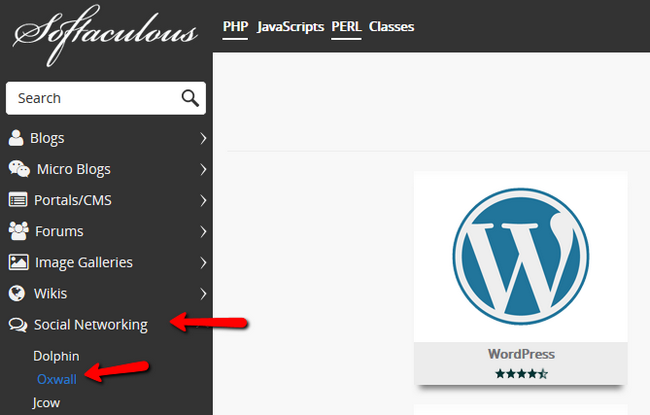
Step 1 Locate the Softaculous Auto-Installer in cPanel
To begin the installation process, login your hosting account cPanel and refer to the Softaculous icon under the Software section.

From the Softaculous Category menu click on the Social Network link to expand the available applications and select Oxwall.
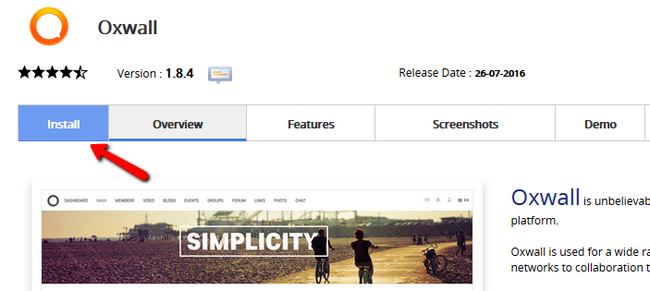
This will load the Oxwall Overview page on which you can review the Oxwall requirements as well as browse the additional tabs to find more about Oxwall features, reviews and ratings. To proceed with the installation click on the Install tab from the main navigation menu.
Step 2 Confgure Oxwall Installation Settings
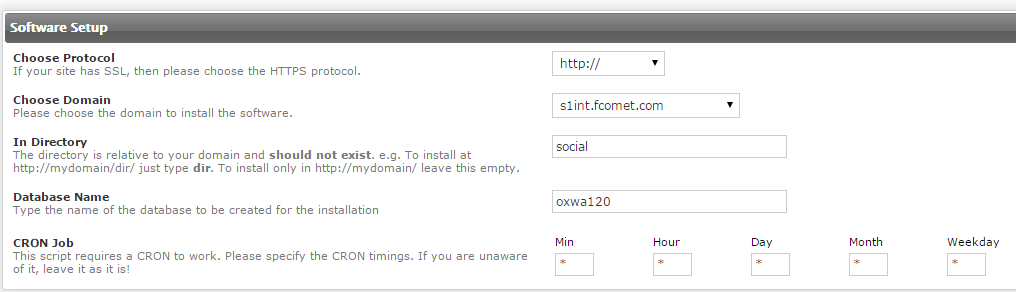
Via the Installation page you can configure the Oxwall installation properties. First, select the domain name under which you would like to have Oxwall installed. In the 'In Directory' field you should input the directory name under which Oxwall will be installed. In case you would like to have your Oxwall accessible directly via your domain name you should leave this field empty. Otherwise, please input the desired folder name to proceed.
You may leave the database name unchanged. Softaculous will create the Oxwall database automatically and configure your application to use the correct logins.
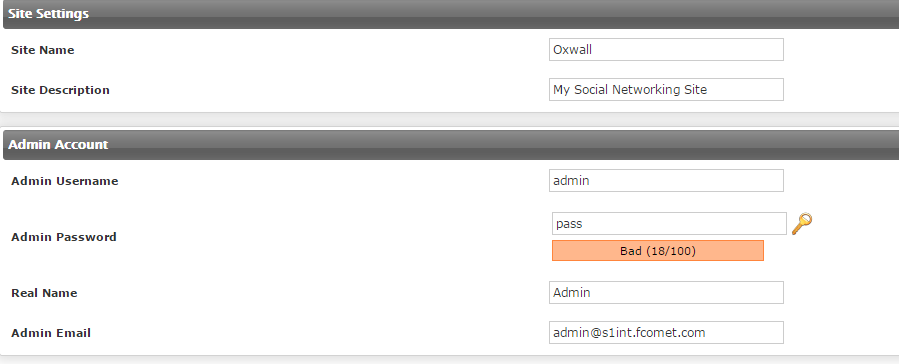
Next, you should input your Oxwall site name and description as well as your administrative username, password and admin email address.
Step 3 Complete Oxwall Installation Process
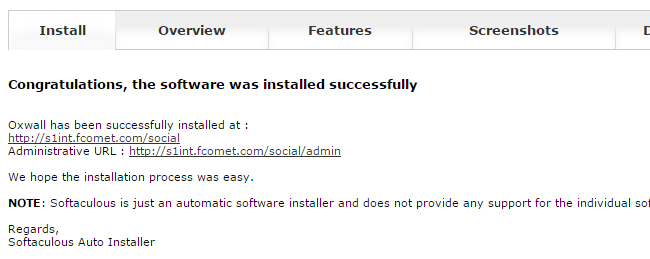
When you are satisfied with your settings click on the Install button. After a few seconds Oxwall will be installed on your hosting account. When Softaculous completes the process you will be displayed with the direct URLs to your Oxwall frontend and admin panel.

Oxwall Hosting
- Free Oxwall Installation
- 24/7 Oxwall Support
- Free Domain Transfer
- Hack-free Protection
- Fast SSD Storage
- Free Cloudflare CDN
- Free Oxwall Transfer
- Immediate Activation