How to install Drupal manually
Updated on Dec 10, 2015
This tutorial will review the process of installing Drupal manually on your account. This allows a greater control over the installation and the setup of your new website.
There are three steps to follow to Manually Install Drupal:
Download Drupal
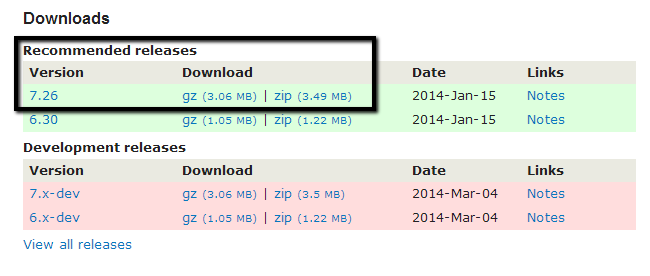
The first step is to download the latest release of the application from the official Drupal website. Make sure that you download the stable release of the script and not the development ones. You can download it in a .gz or .zip formats.
Prepare the Drupal Files
The next step is to extract the files to your personal computer. This will create a folder called drupal-x.xx with all of the contents you need to install Drupal on your account.
Once you extract the files on your local computer, it is time to upload them to your account on the server. Make sure that you upload only the files within the drupal-x.xx folder and not the folder itself. You will also have to decide where to upload those files. If you would like to install Drupal directly on the primary domain of your account, you will have to upload them to the public_html/ directory of your account. However, if you wish to install Drupal in a subfolder, you need to create it first and then upload the Drupal files in it. to your account on the server. The important thing here is to make sure that you upload Drupal into the exact location, where you wish to install it.
Upload Files
There are two ways of uploading your files to the server - using an FTP client, following our FTP tutorial, or uploading directly through your cPanel account > File Manager, following our cPanel tutorial.
Initiate the Drupal Installation
Once you complete the steps above, it is time to initiate the actual Drupal installation on your account. This can be done by accessing the location, where you have uploaded Drupal, followed by /install.php. In this tutorial, we will attempt to install Drupal into a subfolder called drupal. Thus, the actual URL that we need to access to initiate the installation is the URL to your website, followed by /install.php.
The first step is the Choose Profile option for the Drupal installation. As there are a lot of different Drupal distributions available, this is a required step that will allow you to choose the one you wish to use. With the default Drupal package, there are only two profiles - Standard and Minimal. Choose the Standard one for all of the Drupal core features.
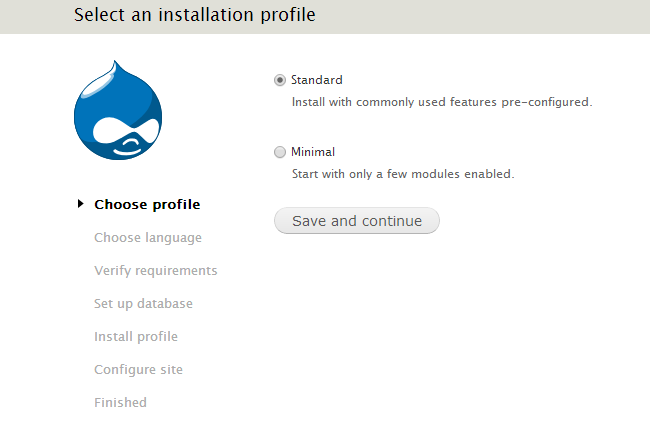
Click on the Save and continue button to proceed to the next step.
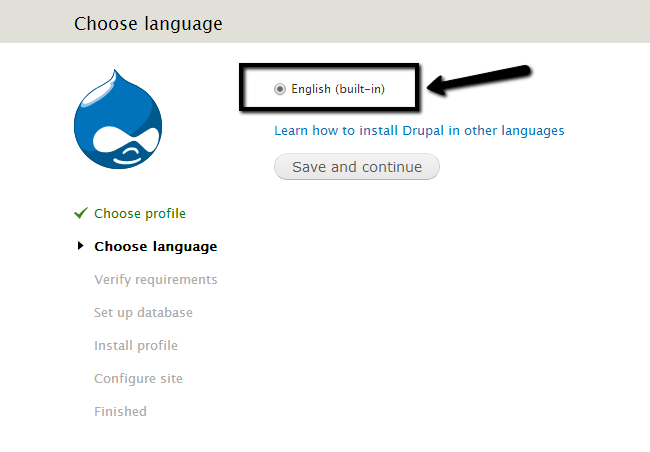
The next step is to choose the language for your new Drupal installation. By default, this is set to English but if you are installing a different Drupal distribution, you will be able to select a different language here.
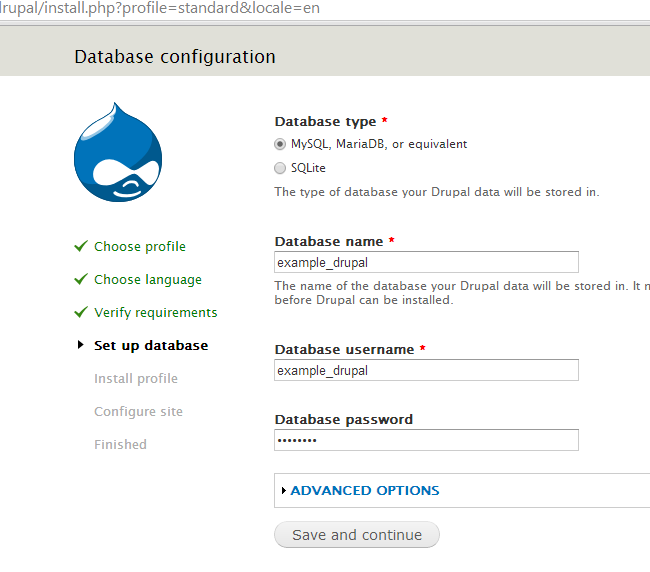
The next step is regarding the database configuration for your new website. To complete it, you need to create a clear database on your account and a user assigned to it with all privileges.
MariaDB Configuration
You can create a new database and a user assigned to it via cPanel. Simply follow our Database Wizard tutorial for information on that.
Once you are ready with the database, you can enter the following details:
- Database Type - Select MariaDB (MySQLi / MySQL-compatible)
- Database Name - Enter the name of your database.
- Database Username - Enter the name of your user.
- Database Password - Enter the password for it.
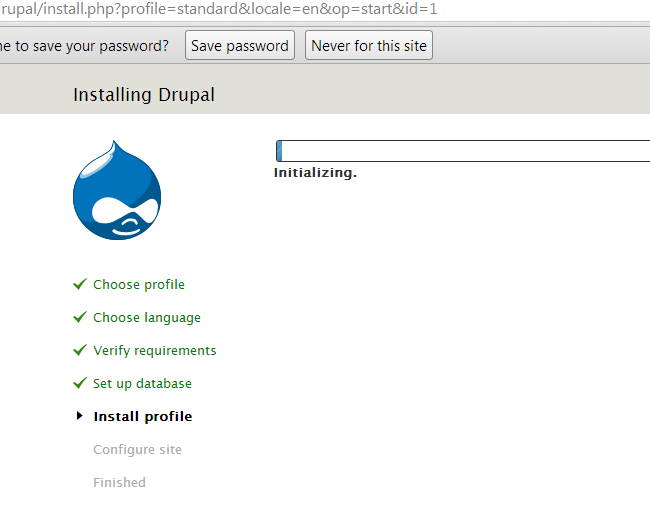
The system will initiate the installation of the selected profile in step 1. This is automated process so you will only have to allow the time for the successful installation.
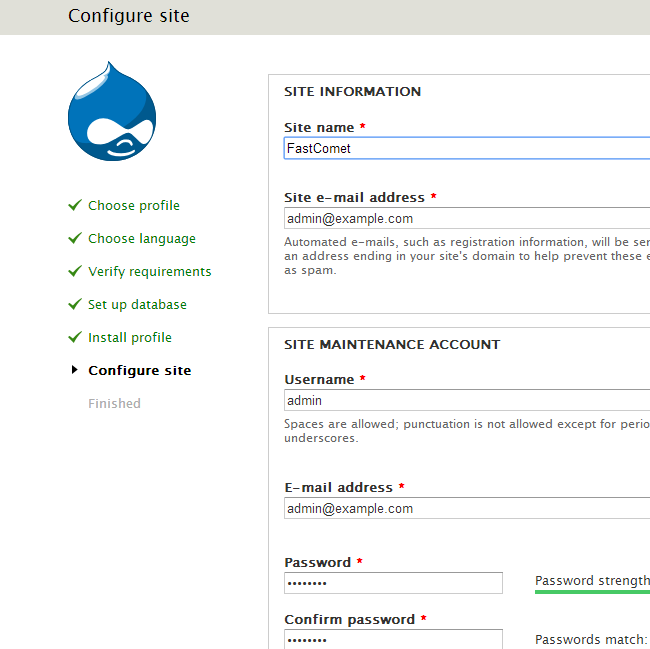
The next step is about the actual site configuration. It will allow you to configure some of the basic information for your website. Edit the following:
- Site Information - Enter the name of your website as well as the system email address to be used on it.
- Site Maintenance account - This is the root administrative account for your new website. You will use it to edit and manage your website once it is installed so enter the details carefully and keep a note of them.
- Server Settings - Select default country and timezone.
- Update notifications - Allow the script to check for updates automatically.
When you are ready with the configuration, simply click on the Save and continue button to proceed.

Once the steps above are completed, the Drupal script will be fully installed on your account. You will see a successful message and a link to your website. Congratulations, you have successfully installed Drupal.

Drupal Hosting
- Free Drupal Installation
- 24/7 Drupal Support
- Free Domain Transfer
- Hack-free Protection
- Fast SSD Storage
- Free Drupal Transfer
- Free CloudFlare CDN
- Immediate Activation