How to install a language in Drupal
Updated on Dec 10, 2015
It is important to generate a full backup of your Drupal website before any new installations or major changes on it. This way, if something goes wrong with your website, you will always have a working copy that can be restored. This is a good practice, which will allow you to edit and manage your Drupal installation without worrying that it may get corrupted.
Create a Backup
It is recommended to create Drupal backup, before making major changes on your website. This allows you to restore it to a fully operational state if something goes wrong.
If you would like to create a multi-lingual website with Drupal, there is an easy way to achieve that.
The Language Installation process in Drupal includes:
Enable Locale and Localization Update
Log into your website as administrator and access the Modules tab from the main menu.

Locate the Locale module and check it.

Scroll down to the bottom and click on the Save configuration button.
Add new Language
Click on the Configuration tab from the main menu.

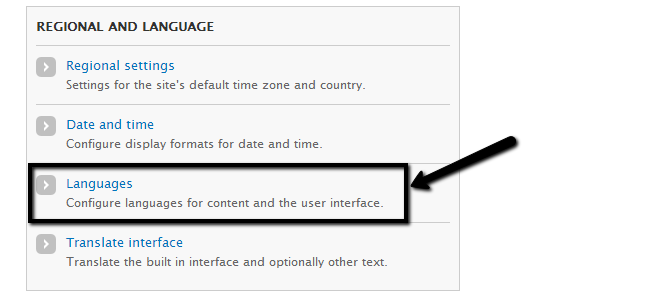
Scroll down to the Regional and Language section and select Languages.
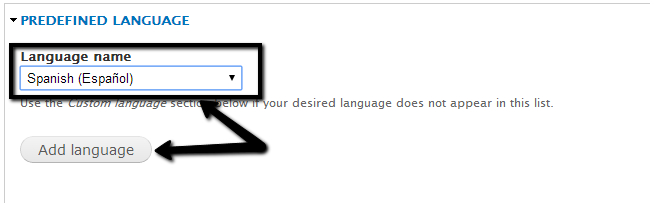
Click on the Add language button and select the one that you would like to add from the drop-down box. When you are ready, simply click on the Add language button.
Download Translation and Import a Language
You need to download the Drupal translation into the language you wish to enable on your website. You can check the available translation via the official website of the product. There is a Drupal Translations section on the website and you will be able to search for one that you need.
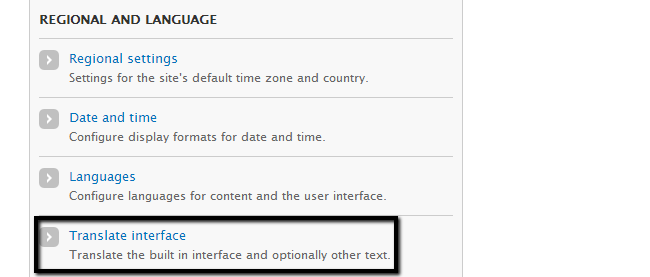
Now, navigate to the Configuration tab from the main menu and locate the Regional and Language section and click on the Translate Interface.
Select the Import tab.

Edit the following options:
- Language file - Select the language file of your translation.
- Import Into - Select your new language.
- Text Group -Built-in interface.
- Mode -Select the "All existing translations are kept, only new strings are added" option.
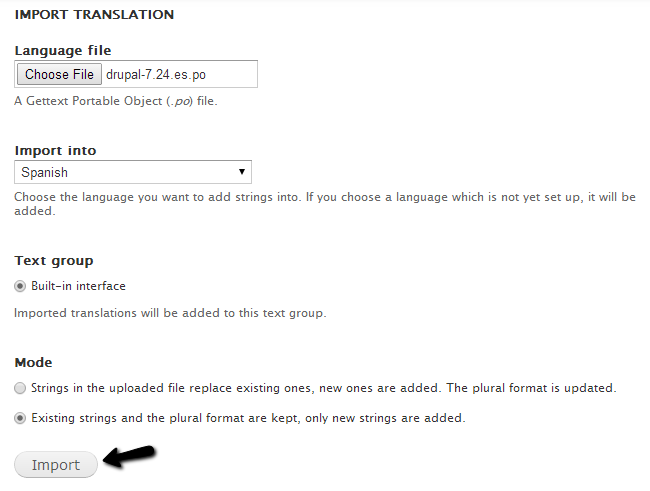
Click on the Import button to initiate the process.
Activate a Language
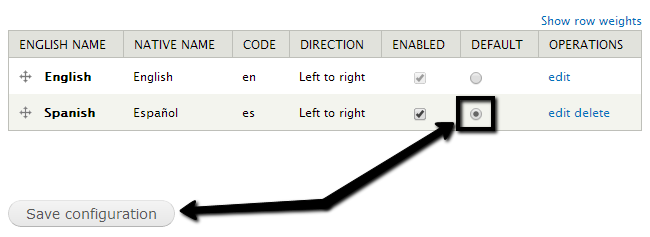
Click on the Configuration tab from the main menu and locate the Regional and Language section and click on the Languages option.

Check the new language as default and click on the Save configuration button to activate it.
You now have installed and activated a new language on your Drupal website. Good Job!

Drupal Hosting
- Free Drupal Installation
- 24/7 Drupal Support
- Free Domain Transfer
- Hack-free Protection
- Fast SSD Storage
- Free Drupal Transfer
- Free CloudFlare CDN
- Immediate Activation