How to Install Thelia via Softaculous
Updated on Dec 10, 2015
The installation of Thelia is easy with the use of Softaculous auto-installer. You will be able to complete that process with a few clicks through your cPanel account.
The automated Thelia installation includes:
Access Softaculous
To access the Softaculous auto-installer, you will first have to log into you cPanel account. Then you need to locate the Software/Services section and click on the Softaculous icon.

Locate Thelia
Once you access the Softaculous auto-installer, you will be taken to a list of all scripts it offers for free installation. They are categorized by their functionalities on the left side of the screen. Thelia is an E-Commerce software so you need to locate that category and expand it. Then, click on Thelia 2.

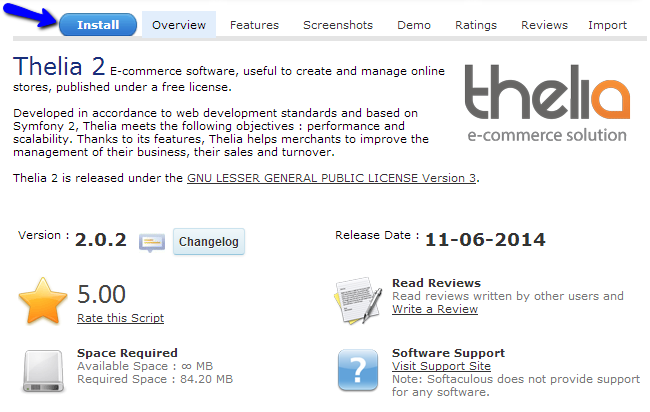
You will be taken to a brief description about Thelia 2, the current version of the script, rating and much more. You will also be allowed to test a live demo of the script, which will provide an inside look on how Thelia works. If you are happy with the script and you wish to use it for the development of your website, simply click on the Install button at the top.
Configure Thelia
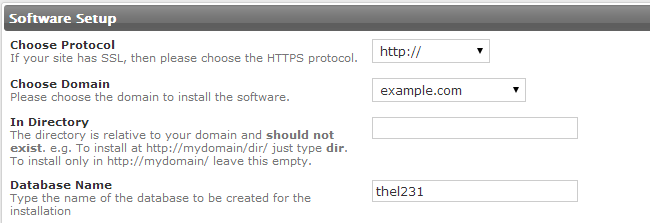
There are three main sections with options. We will review them all in order to describe what they are used for and how to set them per your needs. The first section Software Setup includes:
- Choose Protocol - This option will allow you to choose the protocol for your website. Do not use the secured https protocol if you do not have a valid SSL certificate installed on your domain by our support team
- Choose Domain - Set the domain that will be used for the new Thelia installation. If you have any subdomains or parked/addon domains, you will be able to choose them from the drop-down box
- In Directory - Set Thelia on a subfolder of your account. If you do not want to use a subfolder for the new installation, simply leave the field blank
- Database Name - Choose a name for the database that will be set on your website. Note that the system will create it automatically for you
- Site Name - The Site Settings section includes a single option for the name of your website
- Admin Username - Set the administrative username for your website
- Admin Password - Set the administrative password for your website
- Admin Email - Set the administrative email for your website
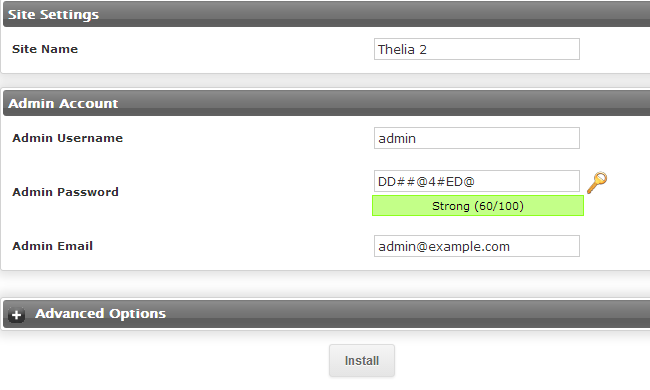
Once you are ready with the details for your new installation of Thelia, simply click on the Install button to proceed. The system will complete the rest of the process automatically for you.
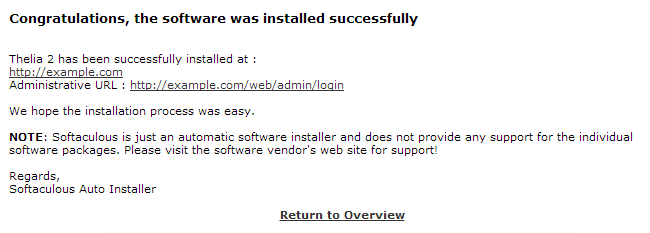
Complete the Installation
The installation of Thelia on your account is now completed. You will be presented with direct links to the front and the back end of your website. Keep this information safe as it will allow you to manage your website from now on.

Thelia Hosting
- Free Installation
- 24/7 Thelia Support
- Free Domain Transfer
- Hack-free Protection
- Fast SSD Storage
- Free Thelia Transfer
- Free Cloudflare CDN
- Immediate Activation