How to change logo in Thelia
Updated on Dec 10, 2015
This tutorial will review the process of setting up your own logo on your Thelia website. This will make your website look more professional in front of your customers.
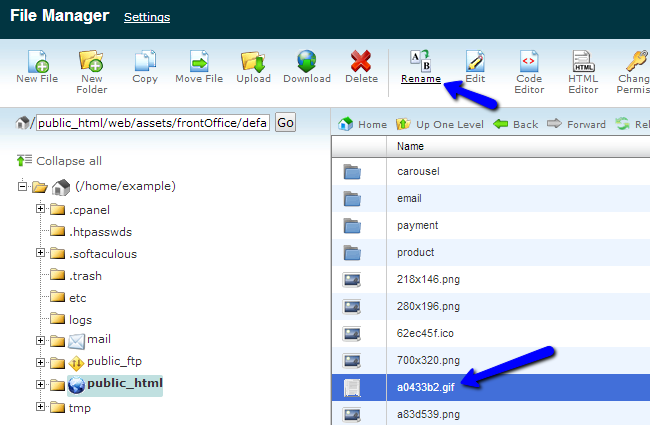
Firstly, you will have to get your own logo. You can pay a web designer to develop such a logo for your company or you can create it yourself using a large number of programs, such as Photoshop, Paint, etc. Either way, we suggest that the size of your logo is 135x75 pixels and that you name the file: a0433b2.gif .
After that, change the actual logo on your website. For that purpose, you need to upload your new logo to the exact same directory, where the default one is located. First, access the directory, where your Thelia website is installed. Then, you need to navigate to web/assets/frontOffice/default/0/img/. You will notice a file called “a0433b2.gif” and you need to rename that file first. Simply select it and click on the Rename button at the top menu, which will allow you to give it another name.
Once you rename the default Thelia logo, simply upload your own logo with the same name to the directory we have specified above.
When you complete that, simply refresh the front-page of your Thelia store.
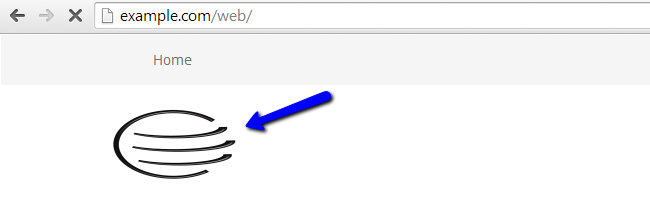
The new logo will be displayed properly at the top-left corner of the screen.

Thelia Hosting
- Free Installation
- 24/7 Thelia Support
- Free Domain Transfer
- Hack-free Protection
- Fast SSD Storage
- Free Thelia Transfer
- Free Cloudflare CDN
- Immediate Activation