How to install SugarCRM CE Manually
Updated on Mar 13, 2019
If you are more into installing applicaitons manually than using auto-installers then this tutorial is exactly for you. In the next few lines of this tutorial we will show you how easy it is to install SugarCRM on your Web Hosting account with us.
To manually Install SugarCRM, you will need to:
Let’s begin!
Step 1 Download and preparing the installation package
SugarCRM CE is available for download at the official SugarCRM website downloads section. There you will need to register and then you will be provided with the option to download the application's installation archive.Once this is done you should upload the extracted installation files on your hosting account using the FTP service for your account.
You should be able to receive more information on How to use FTP client in our related tutorials section.
Once you have uploaded all the files for your SugarCRM Installation you can move forward with the installation process of the application. This will require for you to access the location where you have uploaded the application - if it is uploaded in a subfolder of the public_html folder then you will need to access your domain name followed by the name of the subfolder (e.g. mydomain.com/subfoldername).
Step 2 Follow the Installation Wizard
When you access the folder where you have uploaded the files of your SugarCRM installation package you will be redirected to the installation page for the software. The first page is mostly informative and there you will be able to choose the language you would like to have the SugarCRM application installed: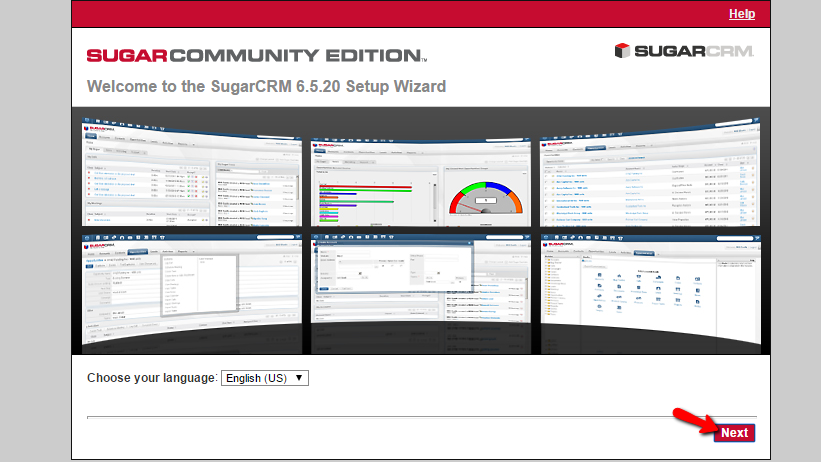
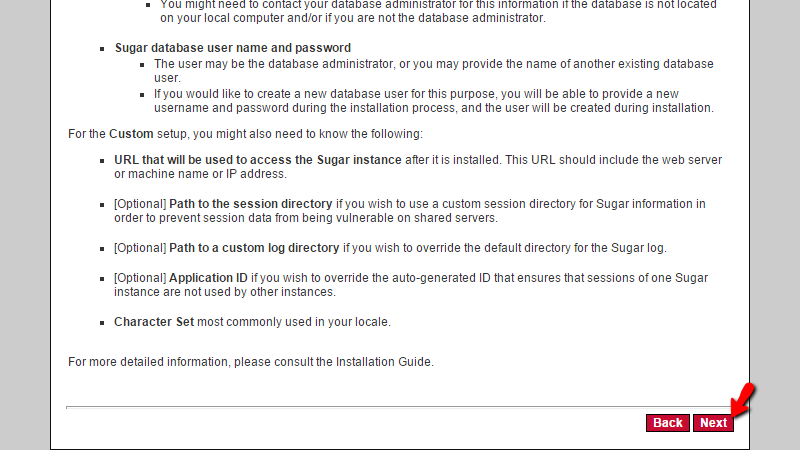
If you click on the "Next" button you will be presented with several additional lines of documentation on the installation process. Please read it carefully and press the "Next" button so you can be able to proceed.
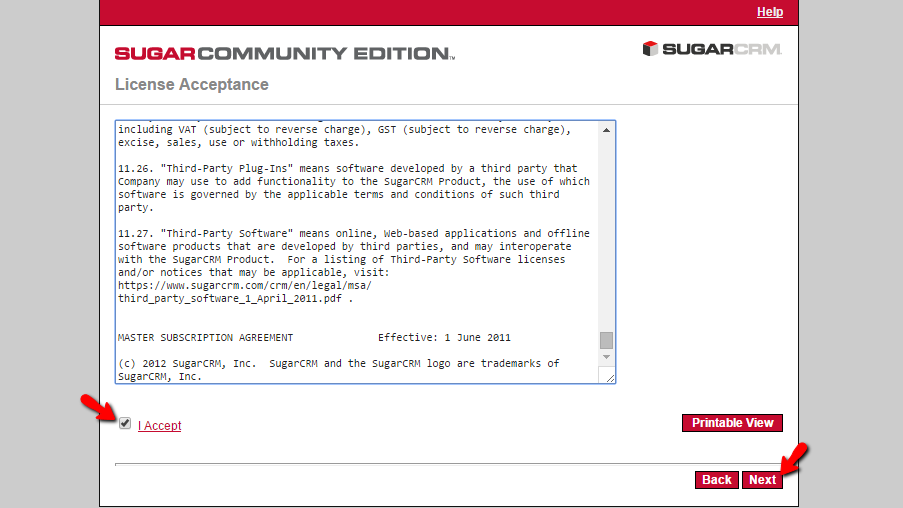
On the next page you will be presented with the main license SugarCRM CE is distributed with. Please read it and it you agree simply put a check on the "I Accept" checkbox and click on the "Next" button.
Great! We are moving on! The next page is for choosing the type of installation process you would like to use. We strongly suggest to use the "Typical Install" installation type as there you will not need to configure any additional settings. When you are ready please click on the "Next" button once again.

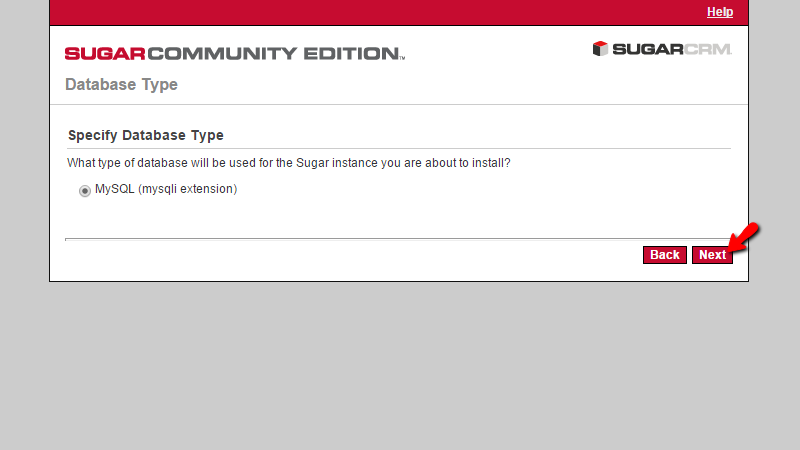
Then you will need too choose "Databases Type". Please make sure that the "MariaDB (mysqli extension)" is checked and click on the "Next" button so you can proceed with the setup.
Finally we reached the page where you will need to input the information for the database which will be used by the SugarCRM CE application. If you are not quite sure how to create a database, assign a user for the same and generate a strong user password please check our Create a Database cPanel tutorial.
When you have your new database and username created it is time to proceed with the setup. On the page you are currently at you will need to configure the following options.
- Database Name - The name of the database you would like to use.
- Hostname - The hostname of the server - usually this should be set to localhost.
- Database Administrator Username - The username of the user allowed to operate with that database.
- Database Admin Password - The password for the above used username.
- Choose Demo Data - If SugarCRM CE should populate the database with demo contents.
Once you are done with all these changes please click on the "Next" button so you can be able to proceed with the installation process.

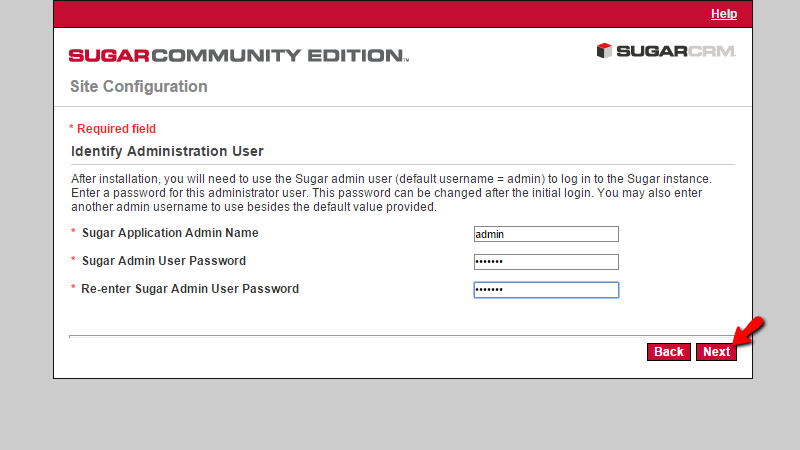
On the next page you will need to fill the information for your admin user. This will require from you admin name and admin password. Please make sure that you will use a Strong password type so you can ensure maximum security of your CRM instance.
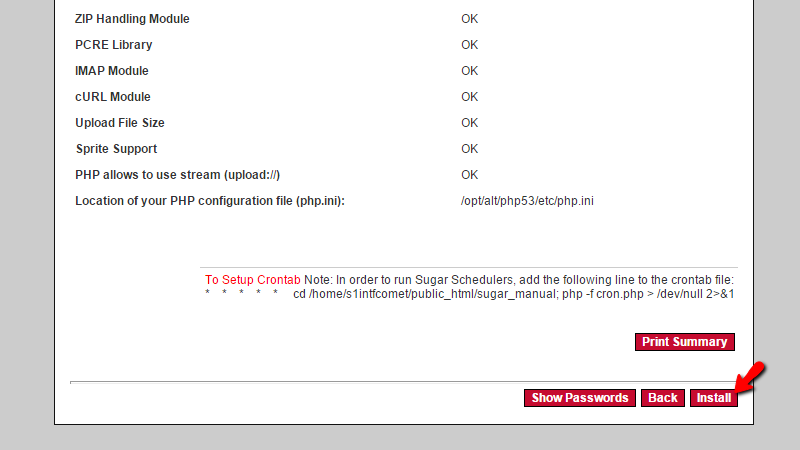
When you are ready please click on the "Next" button so you can be presented with all the installation summary. Check all the information in the provided summary and before you can proceed with the installation please add the cron to your cPanel > Cron jobs. Once the cronjob is created please return to the installer and click the "Install" button so the installation can start.
The next page will track the progress of the installation and when it is done you will be informed about that. Please click on the "Next" button so you can finalize the installation.
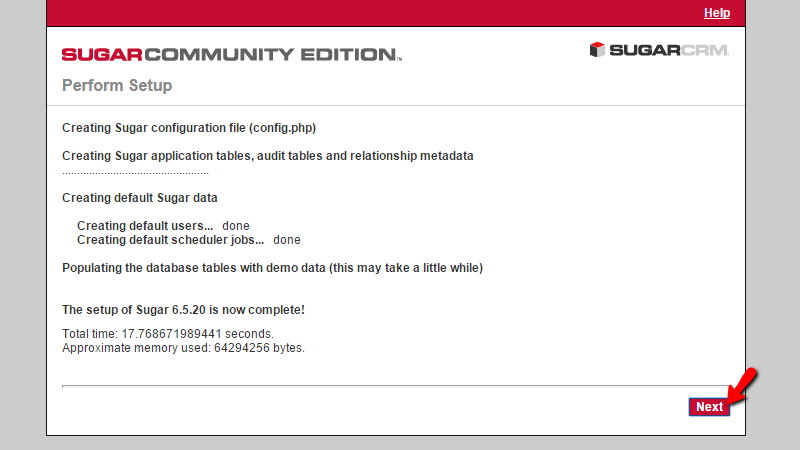
Congratulations! You have successfully installed SugarCRM CE on your website!

SugarCRM CE Hosting
- Free SugarCRM CE Installation
- 24/7 SugarCRM CE Support
- Free Domain Transfer
- Hack-free Protection
- Fast SSD Storage
- Free Ghost Transfer
- Free Cloudflare CDN
- Immediate Activation