How to Manage Employees
Updated on Mar 13, 2019
Since the purpose of the CRM platforms is to actually manage customers you will need to first learn how to manage your own employees as they will actually work with your CRM instance. In the next few lines of this tutorial we will show you how to fully manage your employees.
To manage your Employees, you will need to follow these steps:
Step 1 Access the Employees Management page
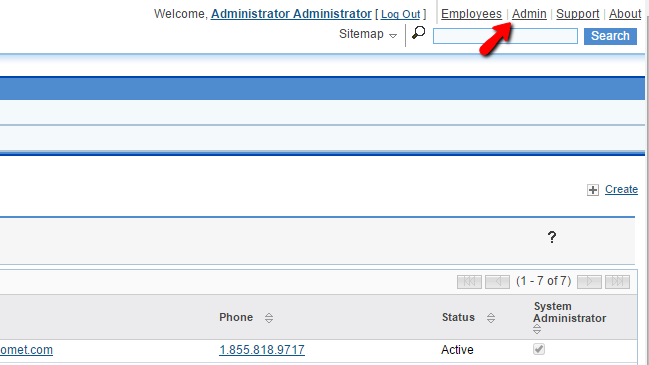
In order to access the Employees management page you will need to login into your CRM instance and in the Top Right corner you will find the Employees link.
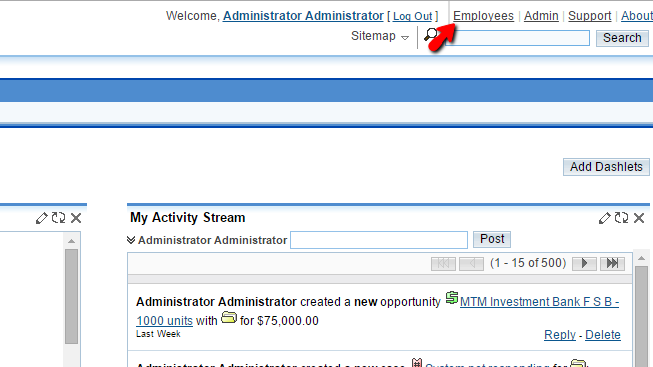
When you click on the link you will get redirected to the page where the first thing you will probably notice is the large table containing your actual employees.
Step 2 Add a new Employee
To be able to add a new employee you will need to click on the"Create link located at the right corner of that page.
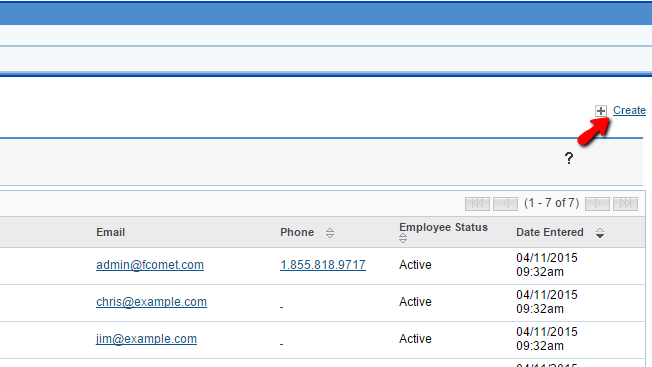
This will present you with a simple form containing large amount of fields you can configure for the new employee you will be adding. Most of them are quite self-explanatory and for the purpose of this tutorial we will discuss only the mandatory fields required for a new employee to be created.
- Employee Status - If the employee you are adding should be activated immediately.
- First Name - The first name of your Employee
- Title - The title of your Employee
- Department - The department your Employee will be working at.
- Last Name - The last name of your Employee
- Email Address - The email address your Employee can be reached. Note that you have the option to add as many as email addresses you would like to
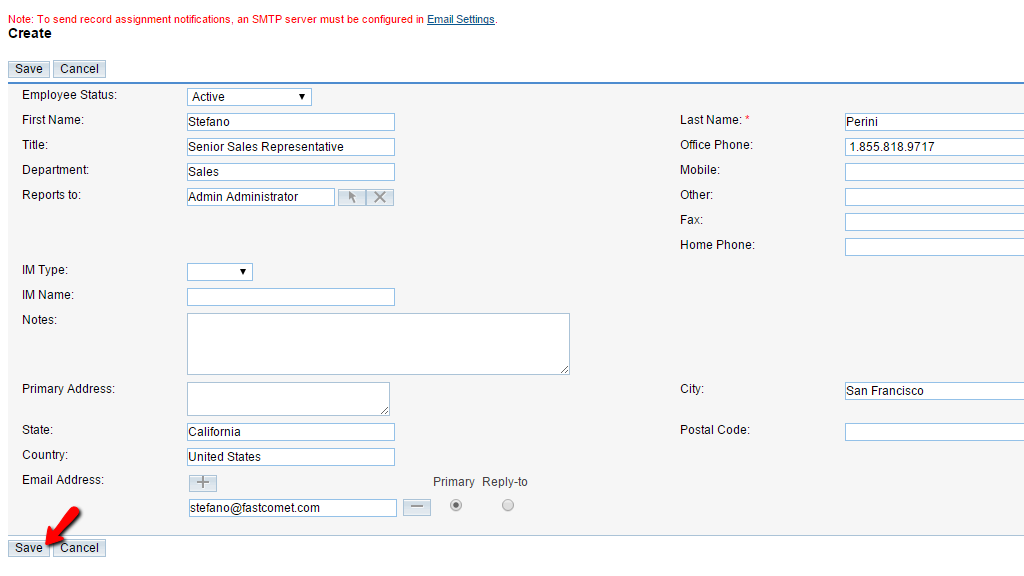
Once you are ready with all those changes you should click on the Save button in order to save them and the Employee will be created.
Step 3 Edit and Remove Employees
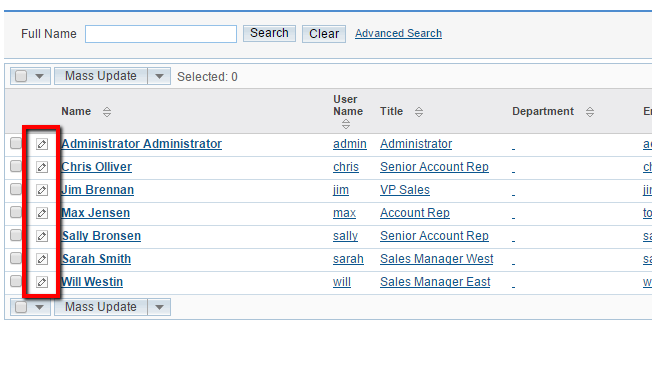
In order to edit the infromation for any of your employees you will need to return to the Employees page where you are able to see all the currently added Employees into your CRM instance. Before the Name of each Employee you will find a small pencil-like icon which can be used for editing the information for your Employee.
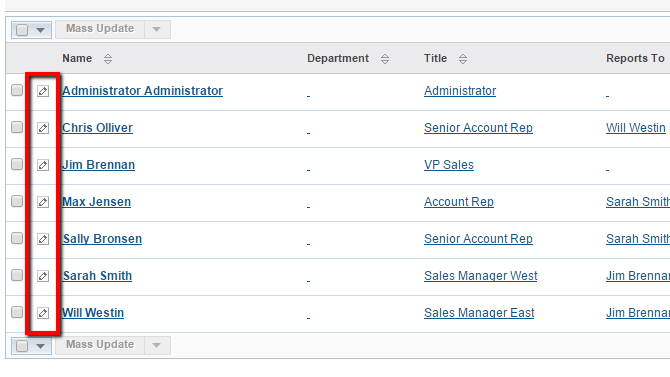
The actual editing process is relatively the same as adding a new user in terms of provided configuration options. You will need to configure the same settings as those discussed in Step 2 of this tutorial and once you are ready you should click on the Save button in order for the edits to be saved.
The final management activity we will discuss is removing an actual Employeed. Now think of your Employees like an actual users registered on your website. In order remove a user account you will need to of course manage your users and not the Employees and this is the exact case with SugarCRM CE - In order to remove an Employee you will need to actually remove the user for the same.
The users management area us located in the Admin section of your website. In order to access it simply click on the Admin link in the upper right corner of your CRM instance.
Then you will need to click on the User Management link so you can be presented with all the users. From the list of users you will need to click on the small pencil-like icon so you can edit the user you would like to remove.
Then from the Edit dropdown you should simply select the Delete option.
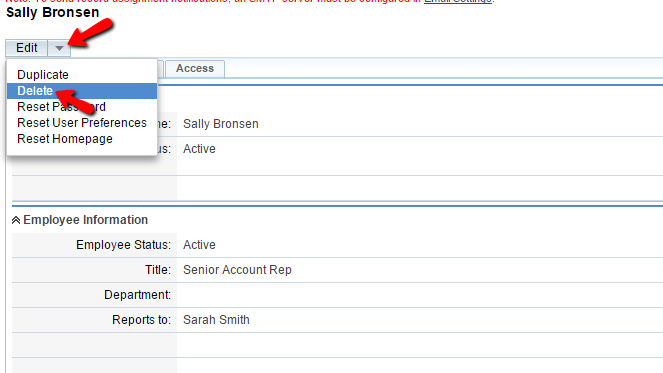
Once you confirm the deletion the user will be deleted and with this the management process of your Employees can be considered as reviewed.
Congratulations! You now know how to fully manage the Employees of your CRM instance!

SugarCRM CE Hosting
- Free SugarCRM CE Installation
- 24/7 SugarCRM CE Support
- Free Domain Transfer
- Hack-free Protection
- Fast SSD Storage
- Free Ghost Transfer
- Free Cloudflare CDN
- Immediate Activation