How to Manage the Calendar of Activities
Updated on Mar 13, 2019
The Calendar module of the SugarCRM CE application will provide you with the options the schedule certain events for your organization such as calls, meetings and tasks. In the next few lines of this tutorial we will provide more information on how this module should be used.
To be able to manage the Activities Calendar of your SugarCRM CE, you need to complete the following steps:
Step 1 Access the Activities Calendar page
In order to perform any management on your Activities Calendar you will need to know how to access the home page of the Calendar module. That page is available if you navigate to Activities > Calendar.
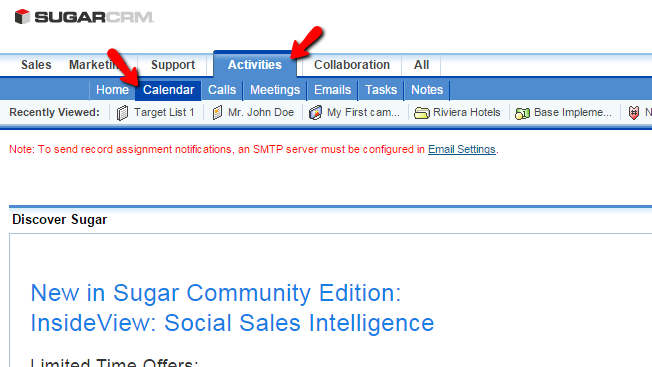
This link will redirect you to a page where you will see a large calendar with all the events you have created in it.
Step 2 Create a Meeting in the Calendar
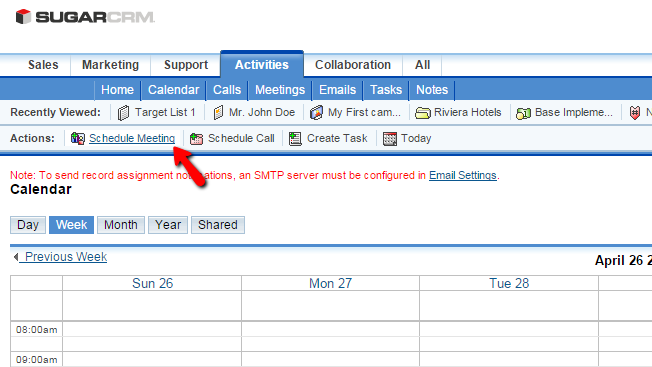
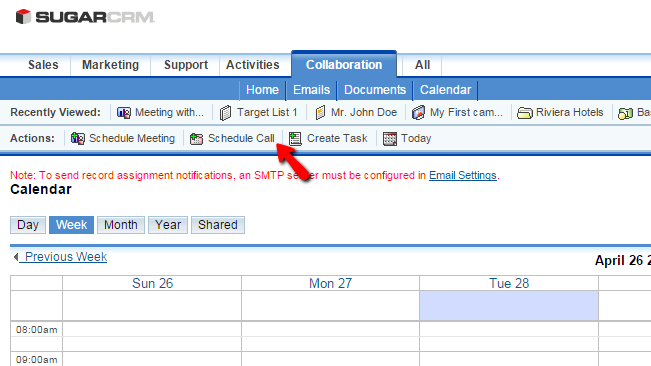
The first content type you can create in your Calendar is called Meetings and in order to create such you will need to click on the Schedule Meeting button located in the top Actions bar of the SugarCRM CE instance.
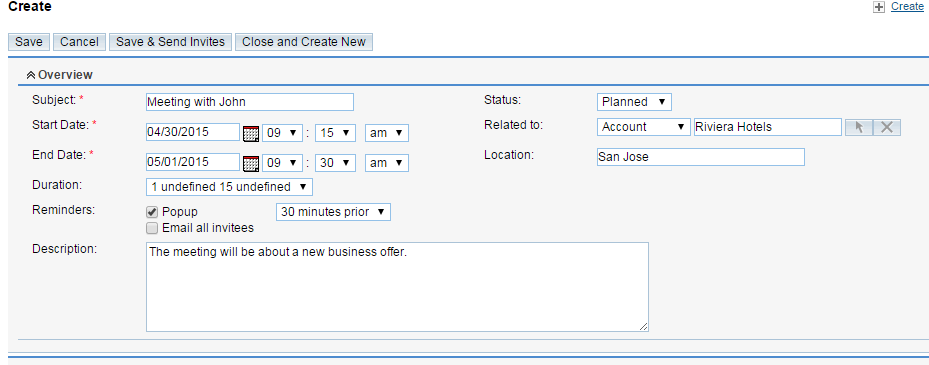
Then you will be redirected to a simple interface with three sections. The first one is called Overview and there you will be able to configure basic information for the Meeting you are currently adding such as:
- Subject - The subject of the meeting
- Status - If the meeting is planned or held already
- Start Date - The start date of this event
- Related to - Here you can choose any existing record in your SugarCRM CE instance which this meeting is related to
- End Date - The end date for this event
- Location - The location of the meeting
- Duration - The expected duration of this meeting
- Reminders - If SugarCRM should remind you for this meeting
- Description - Few words what this meeting will be all about
The next sections of settings are the Other section where you will be able to assign this meeting to a member and of course the Scheduling section where you will be presented graphically where this event precisely stand in the plan for that day.
The next sections of settings are "Create and invitee" where you will be able to create new invites to this meeting and of course the Add Invites section where you will be able to search the contacts added to your SugarCRM CE instance so you can add such to this meeting.
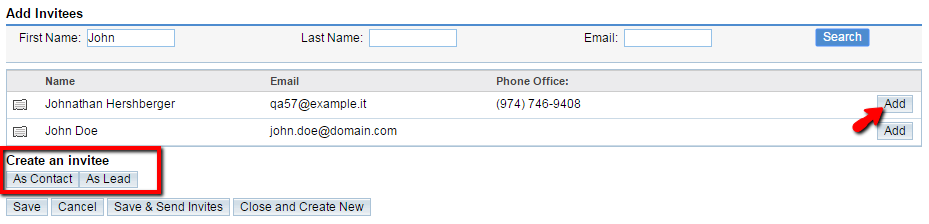
Once you are done with all these settings please click on the Save button located at the top of this page so your meeting can be created in the Calendar.
Step 3 Schedule Calls in the Calendar
In order to schedule a call on your Calendar you will need to click on the Schedule Call link from the top Actions bar.
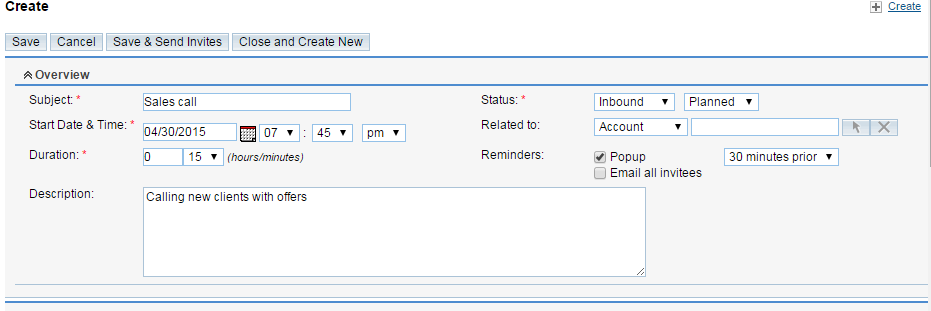
This will redirect you to a new page where you will be able to configure the Call you are scheduling. The configuration options on this page are:
- Subject - The subject of the call
- Status - The status of your call
- Start Date & Time - The starting date and time of the call
- Related to - The content from your SugarCRM CE records
- Duration - The duration of the Call
- Reminders - If the call should be reminded to the participants
- Description - Few words about what the call will be all about
The next sections of settings are Other and Scheduling. In the Other section you will be able to assign an employee to this call and in the Scheduling section you will see how the Call will be scheduled in the Calendar visually.
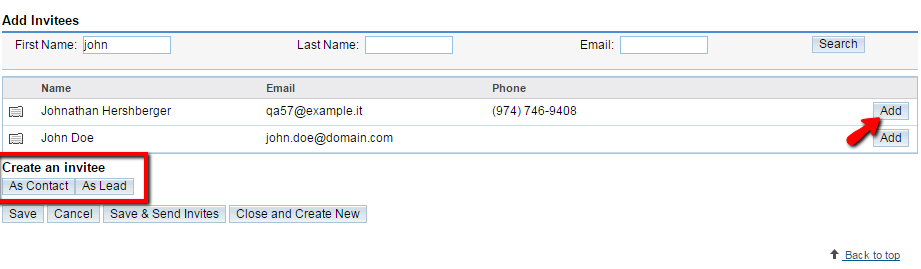
The final two sections are called Add Invites and Create an invite". In the Add Invites section you will be able to add some of the people added into your SugarCRM CE to this call. In the Create an Invitee section you will be able to create a new invite for a non-existing user.
Once you are ready with these settings please click on the Save button located at the bottom of the page so you can save these settings.
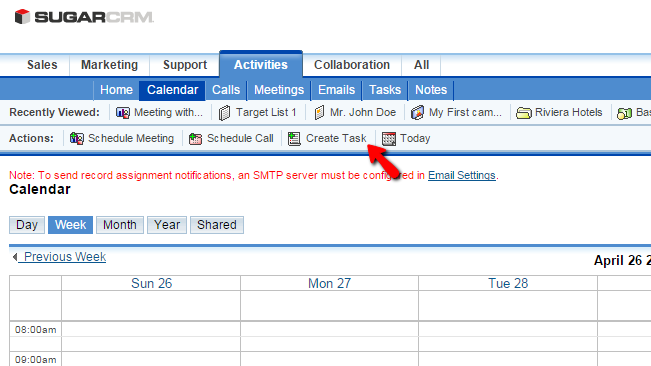
Step 4 Create Tasks in the Calendar
In order to create a Task in your Calendar you will need to click on the Create Task button located at the top Actions bar.
This will redirect you to a page where you will be able to configure the task you are adding. The available options on this page are separated in few sections. The first one is called Overview and there you will find the following settings:
- Subject - The subject of the Task you are creating
- Status - The status of the task
- Start Date - The starting date for the task
- Related to - To what the task is related
- Due Date - The due date or the ending of the task
- Contact Name - If this note should be assigned to some contact
- Priority - The priority of this task
- Description - The description of this task
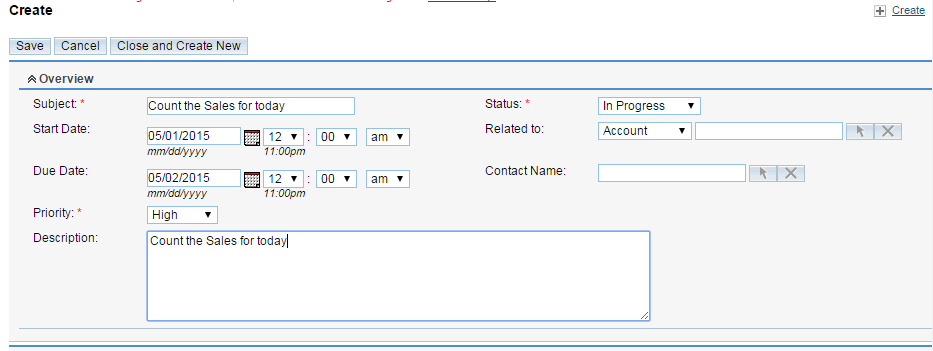
The next section of settings is called Other and there you will be able to assign this task to an employee. If you are done with these settings please click on the Save button in order to save the task and add it to your Calendar.
Step 5 Edit and Delete Content from the Calendar
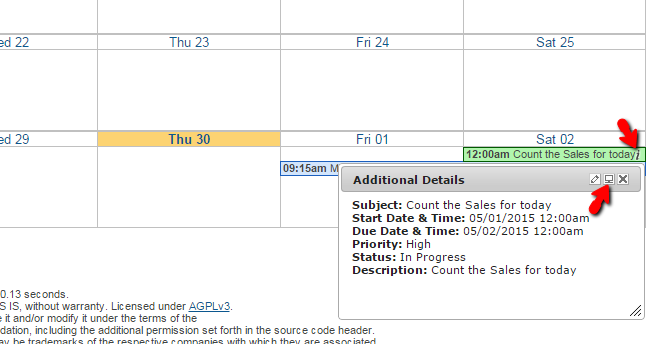
Editing and Deleting entries from your Clendar is quite an easy task. Once you find the entry you would like to Edit, simply click on the small "i" letter-like icon and then on the small computer-like icon.
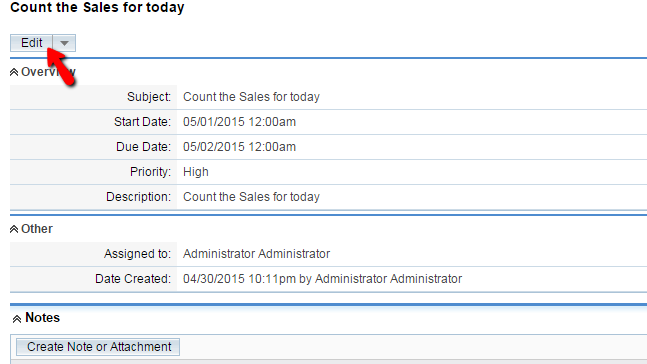
Then you will be presented with summary page of the entry you are editing. In order to edit the entry simply click on the Edit button at the top and you will be presented with the same interface you have used for adding the entry.
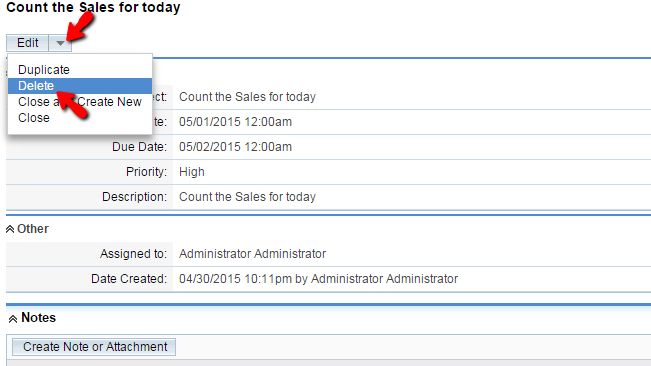
In order to delete the entry you will need to click on the small arrow-like button and to choose the Delete option.
Congratulations! You now know how to fully manage the entries in your Calendar!

SugarCRM CE Hosting
- Free SugarCRM CE Installation
- 24/7 SugarCRM CE Support
- Free Domain Transfer
- Hack-free Protection
- Fast SSD Storage
- Free Ghost Transfer
- Free Cloudflare CDN
- Immediate Activation