How to Manually Install osCommerce
Updated on Dec 10, 2015
This tutorial will review the process of installing osCommerce manually. There is an easier and automated way for osCommerce Softaculous installation. Still, the manual installation allows more configuration options during the pre-installation steps and this is intended for more advanced users.
To Manually Install osCommerce:
Download and Prepare the Files
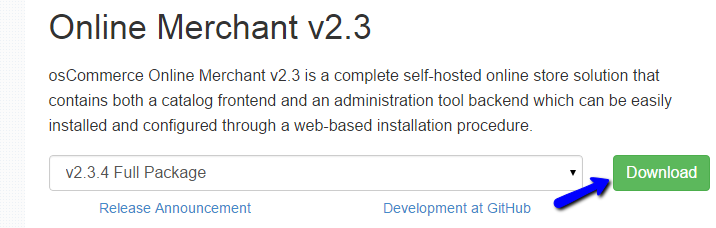
The first step of the process is to download the latest release of osCommerce on your local computer. This will ensure that the latest improvements and bug-fixes of the application are applied on your new website. You can download the scripts via the official osCommerce website.
Once you download osCommerce, you can extract the files on your local computer. This will create a folder that contains all of the installation files of osCommerce.
When you extract the files on your local computer, you can proceed with the upload of the files to your account on the server. For this purpose, you need to decide where you wish to install osCommerce. If you wish to install it directly on the primary domain of your account, you will have to upload the files to the public_html/ directory. Still, this location may be different if you are planning to install the application in a subfolder or on a subdomain.
Upload Files
There are two ways of uploading your files to the server - using an FTP client, following our FTP tutorial, or uploading directly through your cPanel account → File Manager, following our cPanel tutorial.
Initiate the Installation
The next step of the process is to initiate the installation script. For that purpose, you need to open your web browser and access the osCommerce installation files on the server. If you have uploaded them in the public_html/ directory, you will have to access the primary domain on your account, followed by /install. This will bring up the install script and it will allow you to proceed with the process.
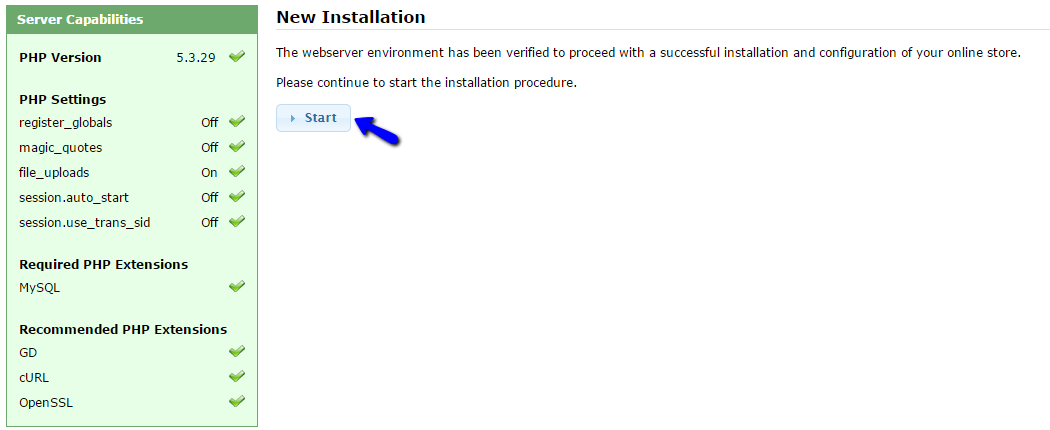
The first step is the system check. The script will check if the requirements of osCommerce are met on the server so you can proceed with the actual installation. All FastComet servers are fully optimized for osCommerce and you will have no issues go http://www.fastcomet.com/prestashop-hostingep.ing through this step. Click on the Start button to proceed.
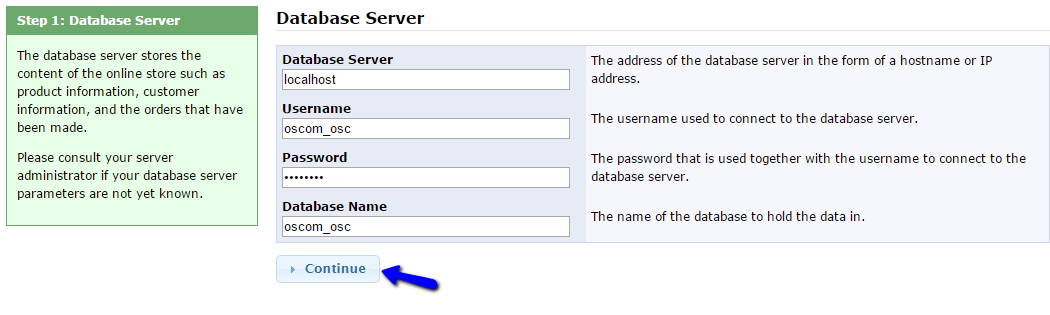
The second step is the Database Server configuration. To proceed with the installation, you need to create a new and empty database and a user assigned to it with full privileges.
MySQL Configuration
You can create a new database and a user assigned to it via cPanel. Simply follow our MySQL Wizard tutorial for information on that.
Once you get the new database on your account, you can easily proceed with the configuration on your website. Enter the following details:
- Database Server - Enter “localhost” without the quotes
- Username - Enter the user assigned to your database
- Password - Enter the password for it
- Database Name - Enter the name of your new database
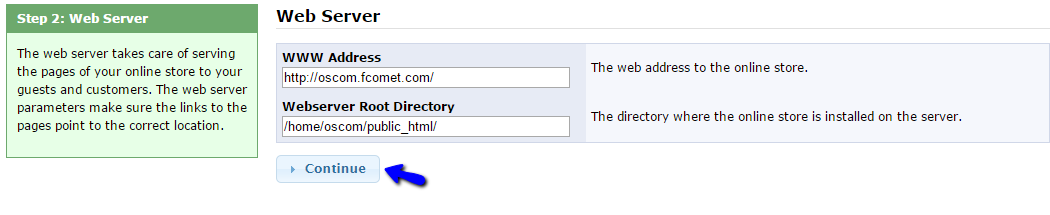
The next step will request the web server details. This will configure the domain and the path to the osCommerce installation on your server. The system will automatically detect that for you and enter the details in the appropriate fields.
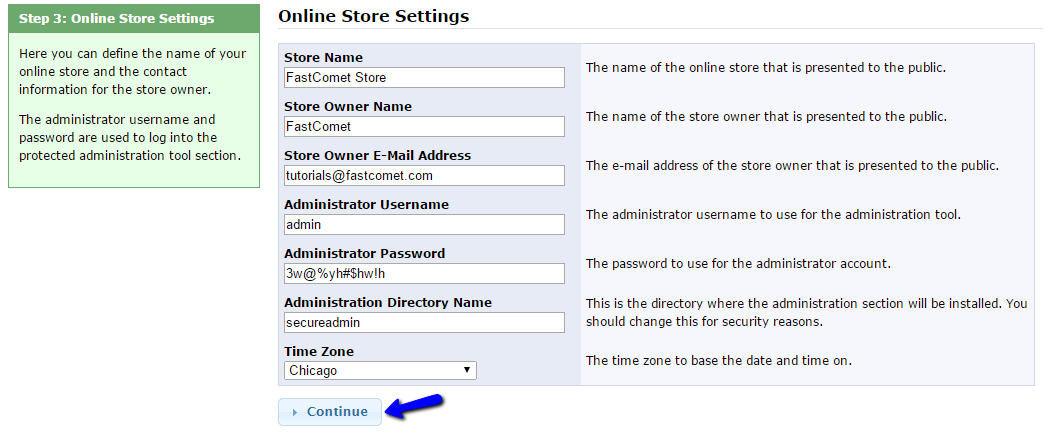
The last step of the installation process is the Online Store Settings. This allows you to set a name for your store, create admin user, etc. The fields you can edit are:
- Store Name - Enter the name of your new store
- Store Owner Name - Enter the name of the store owner
- Store Owner E-Mail Address - Enter the email of the store owner
- Administrator Username - Enter a username for the admin user on your website
- Administrator Password - Enter a password for the admin user
- Administration Directory Name - Enter the name of the directory for the administrative area. Change that as it will provide a better security for your website
- Time Zone - Enter the timezone for your store
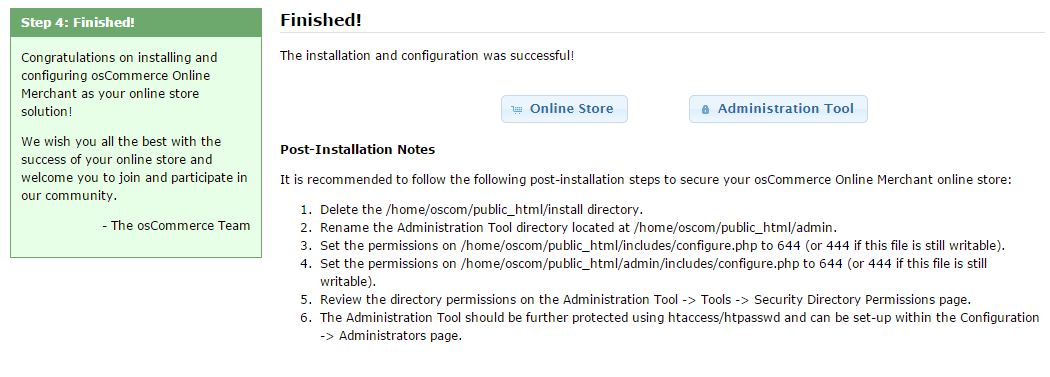
The osCommerce manual installation is now completed. The system will present the URLs for your front and back end. You will also receive some tips for securing your website better.

osCommerce Hosting - free features
- Free Install
- 24/7 Expert Support
- Free Domain Transfer
- Hack-free Protection
- Fast SSD Storage
- Free Transfer
- Free Cloudflare CDN
- Immediate Activation