How to Manage Tax Rates in osCommerce
Updated on Dec 10, 2015
This tutorial will review the process of managing the tax rates on your osCommerce website. The process will allow you to apply taxes for products on your website.
First, you will have to log into your website as administrator. Click on the Locations/Taxes option from the main menu and then Tax Rates.

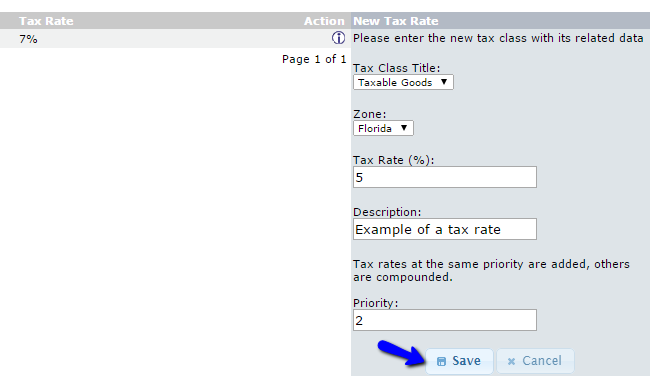
You will be presented with a list of the available tax rates on your website. To create a new tax rate, you simply need to click on the New Tax Rate button.

You will be able to edit the options for the new tax rate on the right-side section of the screen. The available options are:
- Tax Class Title - Choose a tax class for the new rate
- Zone - Choose the tax zone for the new tax rate
- Tax Rate - You need to enter the value for the new tax rate. It is a percentage
- Priority - Set the priority of the new tax rate
When ready, simply click on the Save button to create the new tax rate on your website.
Tax Classes & Zones
You can create new tax classes and tax zones the same way. Access your website's administrative area and navigate to Locations/Taxes → Tax Classes/Tax Zones.
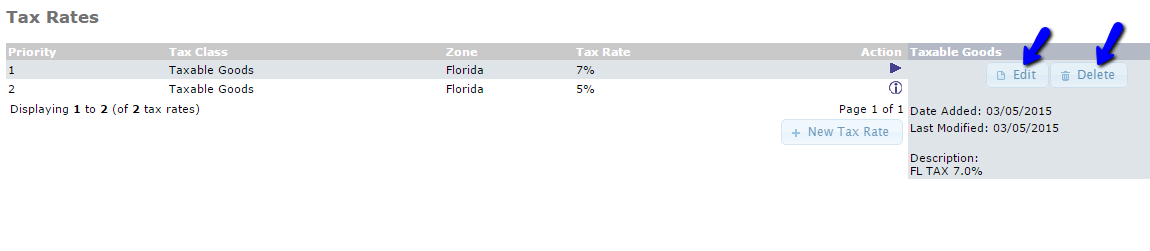
You also have the ability to manage the existing tax rate on your website. Simply access the same list again and select the existing tax rate that you wish to manage. You can then click on the Edit or Delete button on it's rate.

osCommerce Hosting - free features
- Free Install
- 24/7 Expert Support
- Free Domain Transfer
- Hack-free Protection
- Fast SSD Storage
- Free Transfer
- Free Cloudflare CDN
- Immediate Activation