Manage Banners in Arastta
Updated on Dec 10, 2015
Banners are a good method for you to attract clients that have only visited the homepage of your store by showing them part of your products there. But in Arastta the banners menu is much more. From here you can create galleries of pictures that you can later modify to slideshows and carousels via the layout menu.
To manage your banners, you need to complete the following steps:
- Step 1: Creating Banners
- Step 2: Adding Banners using the Layout Menu
- Step 3: Editing Banners in Arastta
Step 1 Creating Banners
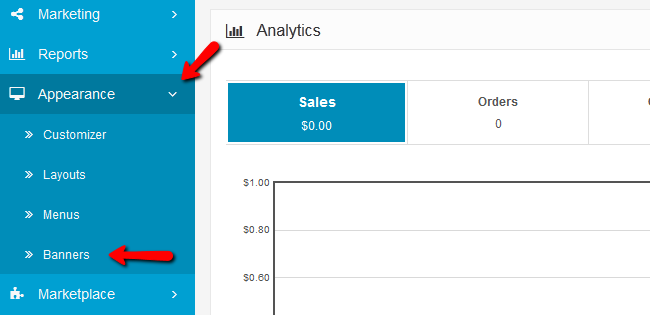
Let us create a slideshow for the main page of our store. The first thing we will need to do is get in the admin dashboard of Arastta. From there we can navigate to Appearance>Banners.
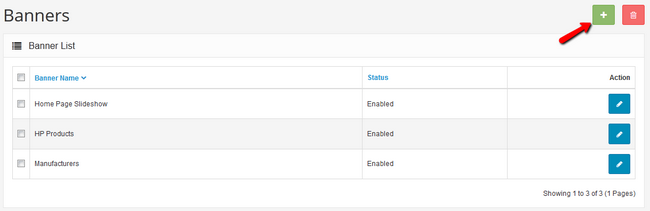
If you have added the Arastta demo during the installation of the application you will already see a slideshow on your store front’s home page and here you will see that same slideshow ready to be reconfigured. To create a new banner that we will switch the predefined one with we will need to click on the Add New button
Here you can add new items. We will add some items from our own Store, so just copy the names and the link that leads to that product and then find the image corresponding to that product from the Image manager.
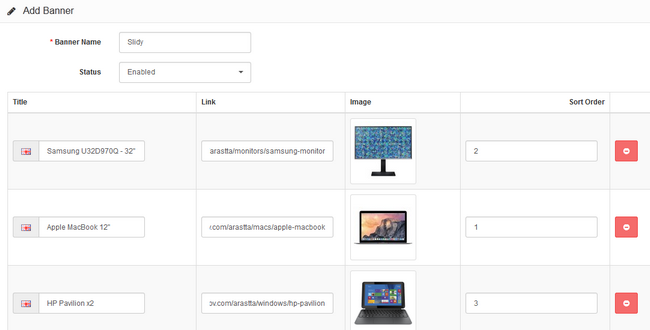
We have added 3 new items. Now we will need to click the Save button at the top of the page to save this Banner.
Step 2 Adding Banners using the Layout Menu
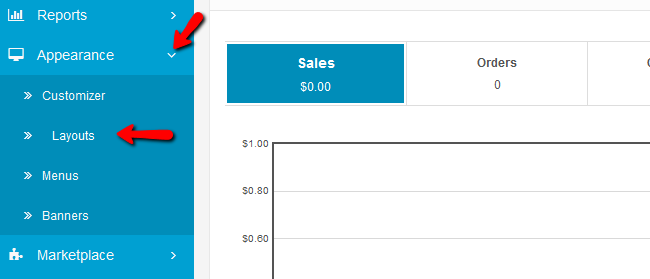
Firstly, you will need to access the Layout menu by going to Appearance>Layouts.
In the layout of the home page you can see that the top module is slideshow instead of static banner. This is because the module is using the banner but modulates it into a slideshow.
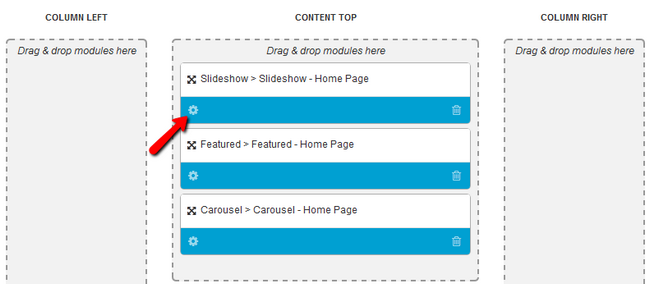
Click the Edit Module icon so we can reconfigure this module.
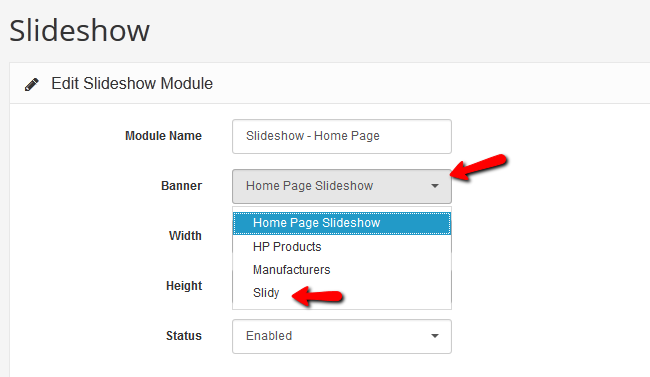
Here you can see that we can choose the newly created banner Slidy to be in the slideshow instead of the old one. After we select it and click the save button in the top right corner the Store’s front page will change to the slideshow with the 3 products we have added.
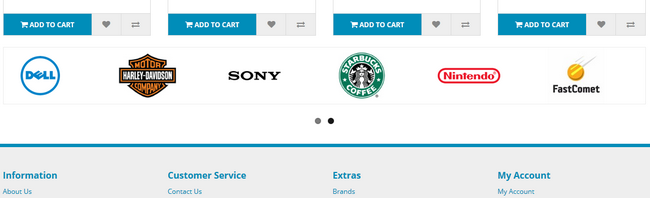
Step 3 Editing Banners in Arastta
In Arastta you can easily edit banners to your liking. In this part we will edit the Manufacturers banner from the Arastta demo and add one more company.

We will have to scroll to the bottom of the page and click on the blue Add Banner button.
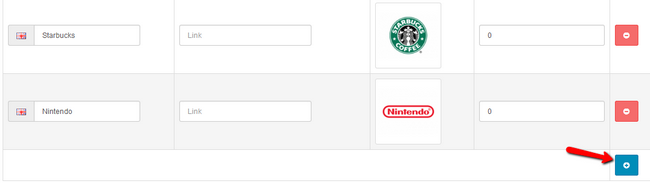
Now we will need to add a Title, link to the page of the company and an image to present it graphically to our customers. Once this is done click the Save button.
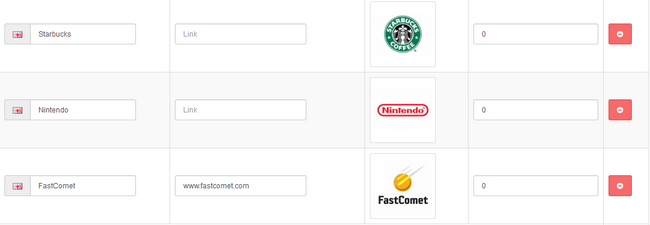
As you can see on the store’s front-end after a refresh, the new company is in the list of companies in the Banner (Carousel module in Layouts).
This concludes the Banners Tutorial. We hope this will aid you in customizing the look of your website and make it more appealing for your customers.

Arastta Hosting
- Free Installation
- 24/7 Arastta Support
- Free Domain Transfer
- Hack-free Protection
- Fast SSD Storage
- Free Cloudflare CDN
- Free Arastta Transfer