How to Change the Logo in vBulletin
Updated on Jan 6, 2016
This tutorial will review the process of changing the default vBulletin logo to a custom one of your choice. This will make your website look more profession in front of your users, placing the logo of your business brand.
The first thing you need to do is to design your own logo. You can use multiple pieces of software, such as Photoshop, Paint, etc. The important thing is to make sure that the size of the logo is adjusted properly. We do suggest a logo with 171x42 size. Also, you need to call the file “vbulletin5_logo.png”.
The second step is to upload the logo to the correct location. For that purpose, you need to access your account on the server via the File Manager service within your cPanel account or directly via FTP.
Upload Files
There are two ways of uploading your files to the server - using an FTP client, following our FTP tutorial, or uploading directly through your cPanel account > File Manager, following our cPanel tutorial.
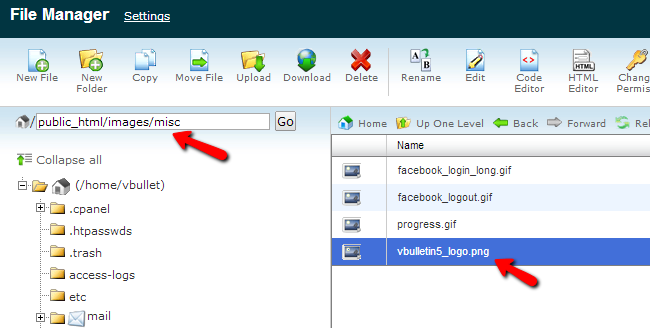
Access the directory of your vBulletin installation and then navigate to images/misc/. You will notice a file called “vbulletin5_logo.png” and you need to rename it to whatever you like. Then upload your custom logo with the same name on it’s place.
Congratulations! You have successfully changed the logo of your vBulletin website.

vBulletin Hosting
- Free Installation
- 24/7 vBulletin Support
- Free Domain Transfer
- Hack-free Protection
- Fast SSD Storage
- Free Cloudflare CDN
- Free vBulletin Transfer
- Immediate Activation