Manual Installation of OSSN
Updated on Dec 10, 2015
Open Source Social Network is officially included into the Softaculous auto installer, but you can also install the application manually. In this tutorial you will learn how to perform this successfully by following these 3 easy steps.
To manually install OSSN, you will need to complete the following steps:
Step 1 Download OSSN Installation package
The first thing you need to do is to download the current version of OSSN from the official website.
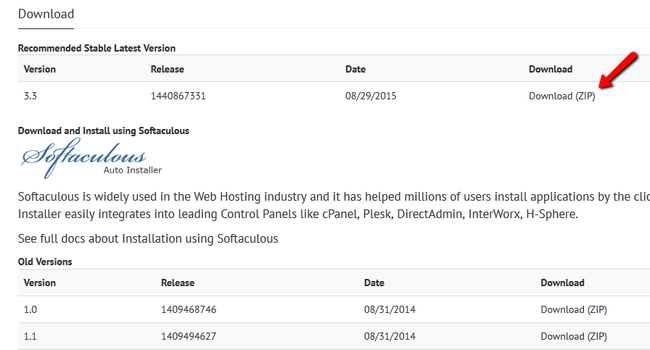
As you can see from the previous screenshot, the most recent version of OSSN at the time of writing this tutorial is 3.3 but you have the option to download previous versions of the application. Please note that we highly recommend you to use the latest stable version available.
Step 2 Upload the Installation Files
After you have downloaded the installation archive, you can either upload and unzip it directly into your account via the File Manager that your hosting provider supports or use your favorite FTP client.
Upload Files
There are two ways of uploading your files to the server - using an FTP client, following our FTP Tutorial or uploading directly through your cPanel> File Manager, following our File Manager tutorial.
If you would like your social network to be accessible directly via your primary domain (http://example.com) then you should upload the Open Source Social Network files in the public_html directory of your account. If you would like your website to be reached via a subdomain (http://socialnetwork.example.com) or a subdirectory (http://example.com/socialnetwork/), then you should first create the desired subdomain/subdirectory if you have not already done so and upload them there.
When you have the files placed in the desired account folder, you should proceed by creating a database and a user for the same database via your hosting account control panel. If your hosting provider is using cPanel you can follow our Database creation tutorial.
Step 3 Follow the OSSN Installation Wizard
The next thing you need to do is access your website address (http://example.com/socialnetwork). This will load the first page of the installation process to check if you meet all the installation prerequisites.
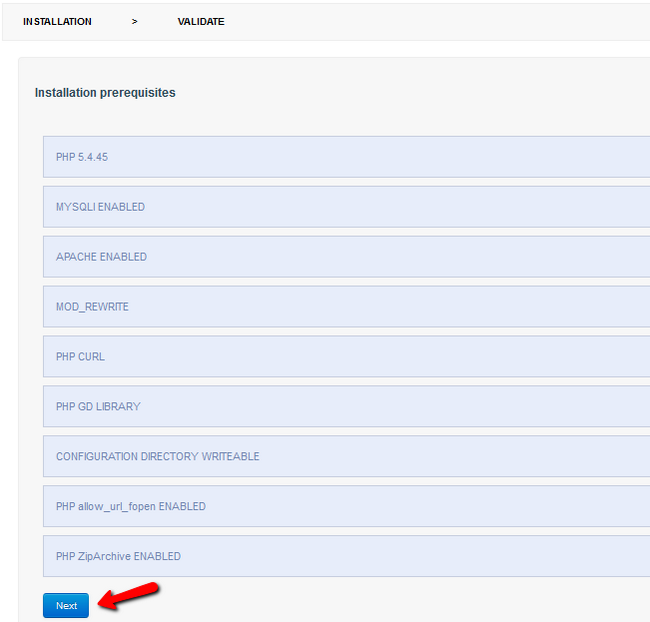
If you do not have any of the PHP modules enabled, you should consult your hosting company to check if they support them. If you are a FastComet customer you can activate them by going to your cPanel > PHP Version. For more information on the matter you can visit our PHP Version tutorial.
On the next page you should input your database name, user and password as well as your OSSN website URL and name. If you are not sure what is your database host, you should contact your hosting provider for the settings or check your control panel for the same. If you are a FastComet customer, you should set this setting to “localhost”. When you are done with the input of your site settings, you should continue by clicking the install button.

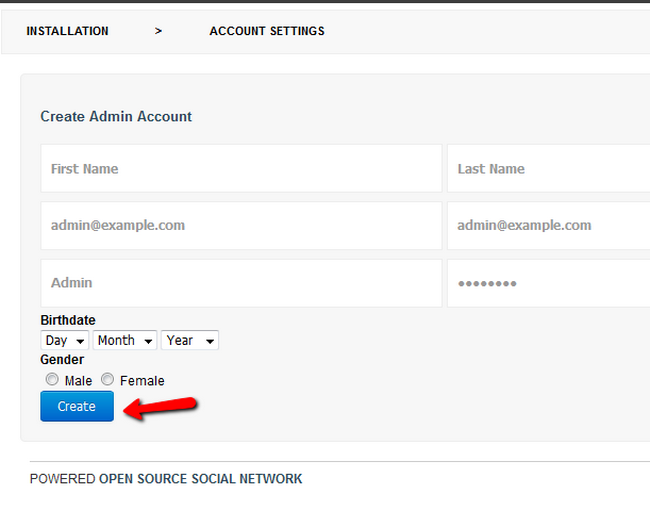
This should redirect you to the next page where you need to add your admin login credentials.
In the end of the installation process, you will be redirected to the last page of the setup. From here you can access your newly created Open Source Social Network website admin dashboard by clicking Finish.
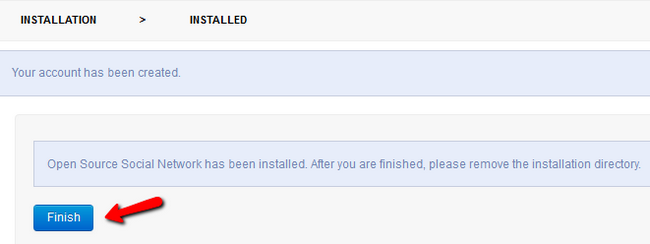
Congratulations! You have successfully installed Open Source Social Network.

OSSN Hosting
- Free Installation
- 24/7 Support
- Free Domain Transfer
- Hack-free Protection
- Fast SSD Storage
- Free OSSN Transfer
- Free Cloudflare CDN
- Immediate Activation