How to Manually Install Subrion
Updated on Apr 14, 2016
In this tutorial we will guide you on how to install Subrion on your hosting account using FTP and following the Subrion installation wizard.
To manually install Subrion, you need to:
Download and Prepare the Subrion Files
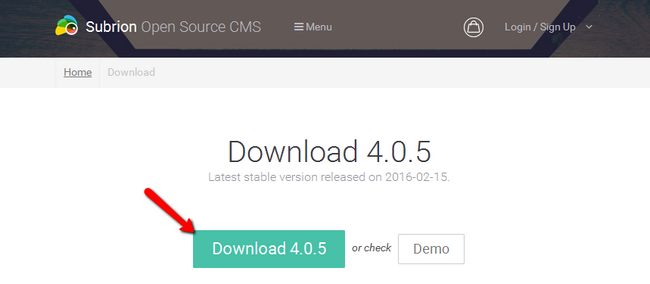
To manually install Subrion on your hosting account you will have to download the latest version of the application which you can find by visiting the official download page. Click the Download button and an archived version of the installation will be saved on your local computer.
Start your favorite FTP client and connect to your hosting account. First thing you should decide before uploading the archive is under which folder of your account you would like to have Subrion installed.
I you would like to have your CMS accessible directly via your domain name http://example.com you should use the public_html directory to upload the file. In case you would like to have your store setup into a subdirectory such as /blog/ and have it accessible via http://example.com/blog/, you should create a directory called blog under the public_html folder and upload the file there.
Upload Files
There are two ways of uploading your files to the server - using an FTP client, following our FTP tutorial, or uploading directly through your cPanel account > File Manager, following our cPanel tutorial.
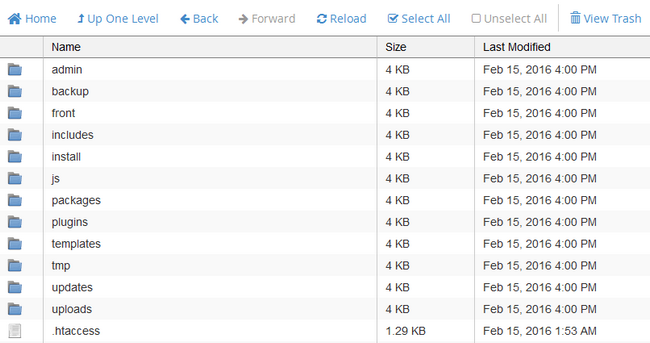
It might take up to a few minutes to upload the archive. Once uploaded right click on it and select the extract option. If you refresh you should see a Subrion folder structure similar to the one below.
Create a Database
Before we start the installation process, you will need to create a database in which all of Subrion’s SQL entries will be kept. We will use this in a few moments.
Create MariaDB Database
For more information on how to create a MariaDB database and username, please check our cPanel tutorial on How to create MariaDB Database.
- Database type -Choose MySQL as a database type
- Database server host name - The hostname for you database is localhost by default
- User name - Enter the name of your user
- Password - Enter the password.
- Database name - Enter the name of your database
Follow the Installation Wizard
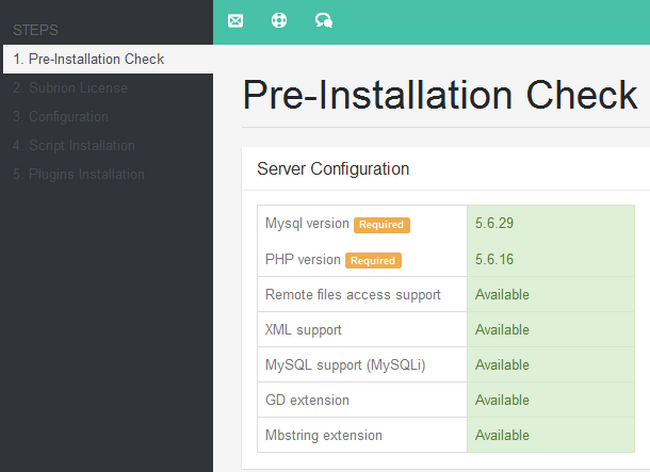
Open your favorite browser and navigate to the directory where you uploaded the files. This will open the Subrion Installation Wizard. The first page will notify you of the server requirements which you shouldn't worry about as we have you covered.
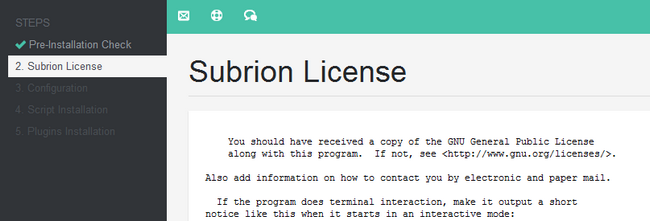
Scroll down and click on the Next button. The second installation step includes the License which you should read and agree to (if you actually agree to it of course). After you agree you will be able to click on the Next button.
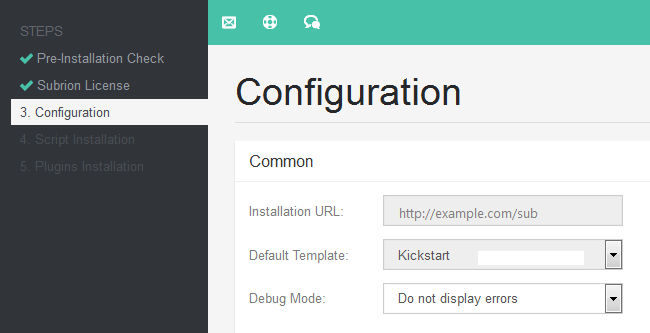
Step 3 covers the configuration of the installation and here you will have:
- Installation URL - The folder on your hosting account on which the installation is present. Note that you will not be able to change this field and it is provided only for information purposes
- Default Template - Usually you will only see one available template which is the starting one
- Debug Mode - Here you can choose whether or not you wish from Subrion to show errors in a special box (helpful for debugging)or not show errors at all
The MariaDB Configuration part includes:
- DB Hostname - This is the hostname for your database. In our case the database is also hosted by FastComet so we will leave this at localhost
- DB Username - The name of the user attached to this database
- DB Password - The password for the database
- DB Name - The name of the database
- MariaDB Port - The port on which the database will make the connection to the server. This is 3306 by default
- Table Prefix - The table prefix is useful when you have multiple Subrion instances sharing the same database and is what defines them as separate application entries
- Drop Tables - If you want to drop the existing tables from the database checkmark this option

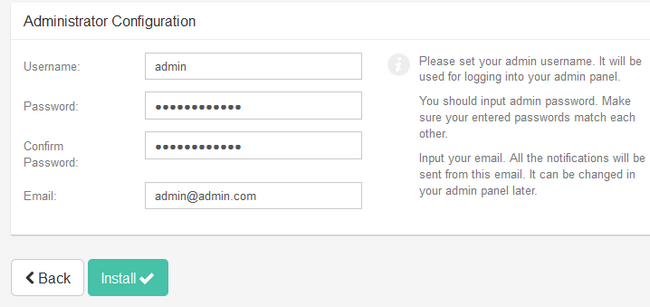
The Administrator Configuration is fairly simple and requires the standard elements such as Username, Password and Email Address. Once you have filled out the required information click on the Install button.
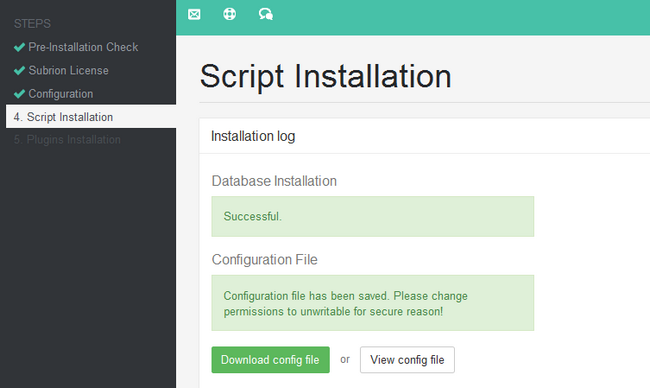
Step 4 of the Installation process will show you if the installation is successful or not. If you have mistyped something in the previous step you will be able to return and fix it in order to install the script correctly.
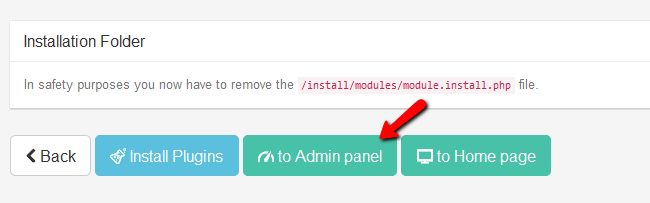
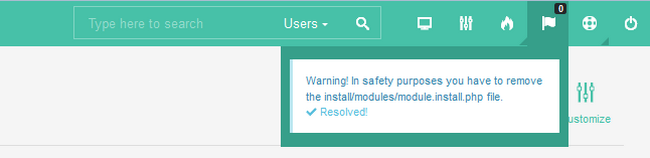
At the bottom of the page you will see a Security reminder to remove the install folder from your hosting account. This is very important as the install.php can be used to overwrite your entire website at any given point if not removed. However, you do not need to do manually remove the folder. Click on the Go to Admin panel button and you will log into the admin area of your website.
Here you will see a notification in the upright corner about the install folder. Click on the link in that notification and you will receive a confirmation that Subrion has removed the folder for you.
Congratulations! You have successfully installed Subrion and you are ready to start configuring and fine tuning your website.

Subrion Hosting
- Free Installation
- 24/7 Subrion Support
- Free Domain Transfer
- Hack-free Protection
- Fast SSD Storage
- Free Cloudflare CDN
- Free Subrion Transfer