How to Manage Plugins in Subrion
Updated on Apr 14, 2016
Plugins allow Open Source applications to have a much bigger life spawn as new features are constantly added to them without necessarily having to implement them in the core version.
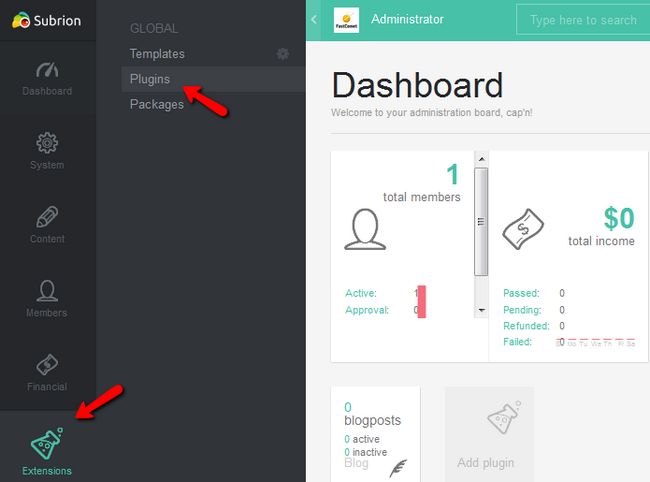
To install a new plugin in Subrion you will have to login to your admin area and navigate to the Extensions → Plugin section from your main admin panel.
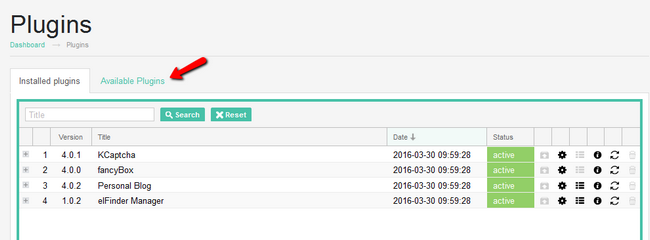
Here you will see all of the currently installed plugins, their status, configuration options and additional information as well as update and deletion possibilities. Click on the Available Plugin tab to switch to it.
Initially, you will not be able to see any plugin when you are in local mode unless you download a plugin from the Subrion market via a web browser and then upload it in the plugin folder of Subrion located on your hosting account. Simply change the mode to Remote and you will be able to see all of the available plugin right from your CMS.
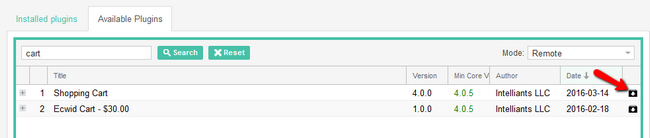
Select or search for a specific plugin and click on the most right icon to download and install it.
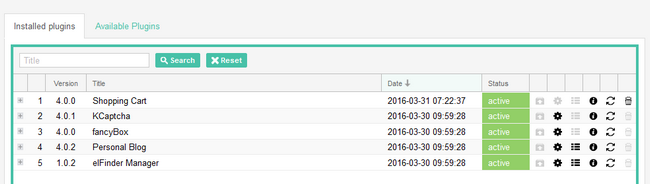
The plugin is now installed and ready to use. If there are available options you can access them from here by clicking on the cogwheel or from the System → Miscellaneous section. Even if you remove the plugin, a copy of it is now on the server (local) and will stay there for a fast future installation.
Congratulations! You now know how to search for and install plugin in Subrion.

Subrion Hosting
- Free Installation
- 24/7 Subrion Support
- Free Domain Transfer
- Hack-free Protection
- Fast SSD Storage
- Free Cloudflare CDN
- Free Subrion Transfer