How to integrate Disqus Comments with Ghost
Updated on Jul 13, 2018
In this tutorial we will show you how to integrate Disqus comments with your Ghost blog. By default, Ghost does not support post comments but you can easily integrate the third party service Disqus comments.
Free Disqus Integration
FastComet Technical Support provides full Ghost support including free Ghost Installation, Transfer and Disqus Integration services. View More
To add Disqus comments to your Ghost blog, you will need to follow these steps:
Create a Disqus Account
First, you will need to create a Disqus Account. Simply input the desired username, your password and email address to create a free Disqus Account.
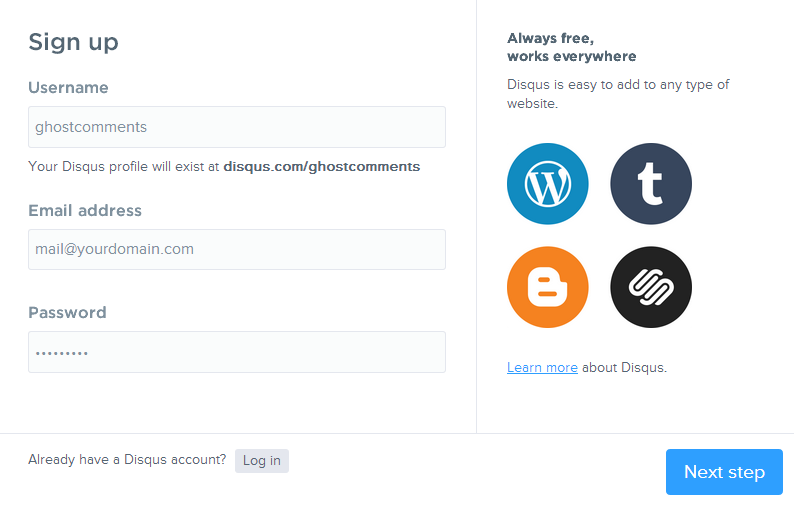
On the next page, fill in your Ghost blog name and select a category which best match your blog content. When you are ready, click on the Finish Registration button.

On the next page, you will be displayed with several integration options. In order to integrate Disqus with your Ghost blog you will need to obtain the Disqus integration code by clicking on the Universal Code icon.
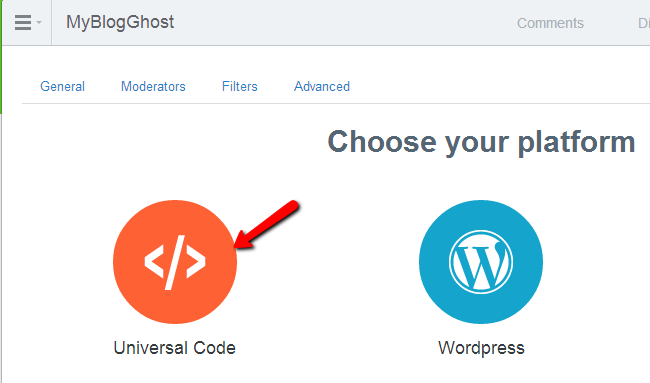
From the Setup Instructions you will need to copy the Disqus code.
Integrate the Disqus Code
When you obtain the Disqus code, the next step will be to integrate the code into your Ghost post.hbs file. The post.hbs is located under your Ghost theme folder. In this guide we will provide instructions on integrating the Disqus code into the default Ghost Casper theme. Most other themes use similar post.hbs syntax thus you should be able to integrate Disqus into any theme.
To access the post.hbs file either edit it directly on your server via any text editor or download it on your local computer with your favorite FTP client. The post.hbs file should be located under:
[YourGhostDir]/content/themes/casper/
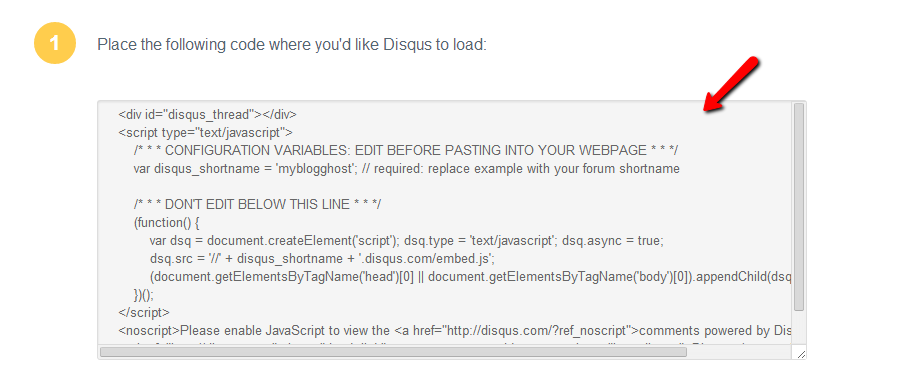
Copy the Disqus code and paste it to your post.hbs between {{/post}} and </article> tags. You can see an example of post.hbs with Disqus code integrated here.Please make sure to change.
var disqus_shortname = 'myblogghost'
to your actual shortname provided by Disqus.
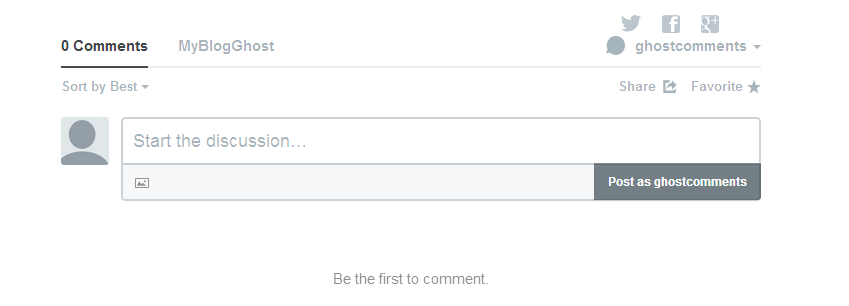
When you are ready save your post.hbs file and upload it to your server by overwriting the original file if you have edited the post.hbs locally on your computer. To apply the changes restart your Ghost blog process and the Disqus comment section should be displayed under your posts.
By default Disqus uses the URL as identifier to differentiate posts. Still, this might be problematic because two different URLs might lead to one and the same post such as:
https://www.exampleblog.com/my-post/ and https://exampleblog.com/my-post/
However, Disqus will display different comments depending on the URL. To resolve this you may add an additional line into your Disqus code just after your Disqus short name:
    var disqus_shortname = ' yourdisqusshortname '
    var disqus_identifier = '{{post.id}}'
Congratulations, you have successfully integrated the Disqus Comment System to your Ghost blog.

Ghost Hosting
- Free Ghost Installation
- 24/7 Ghost Support
- Hack-free Protection
- Fast SSD Storage
- Free Domain Transfer
- Free Ghost Transfer
- Immediate Activation
- Free Cloudflare CDN