How to install Bolt via Softaculous
Updated on Dec 10, 2015
The easiest way to install Bolt on your account is via the Softaculous auto-installer. The process requires a few clicks only and you can get a fully featured installation in no time. We will review the steps for the Softaculous installation of Bolt on your account, so you can get a better understanding of the process.
The Softaculous installation of Bolt includes:
Find Bolt in the Softaculous Installer
First and foremost you must login with your cPanel account details. Once inside your cPanel you can find and the Softaculous tool two ways. The first option is to use the search bar on the left.

The second option is by scrolling down and locating the Software and Servicestab.
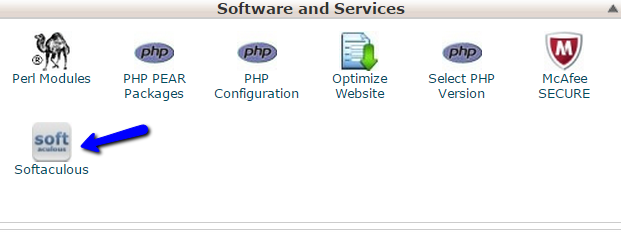
When you locate the Softaculous icon, click on it. This will open the app installer tool and you will be able to proceed with the installation from there.
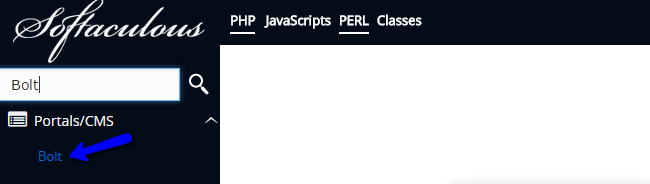
Fortunately we can use Softaculous's search bar to ease the process of locating Bolt among the various CMS scripts. What we need to do is just type Bolt in the search bar and it will immediately appear. Click on the application's name to proceed further.
Configure the Installation Details
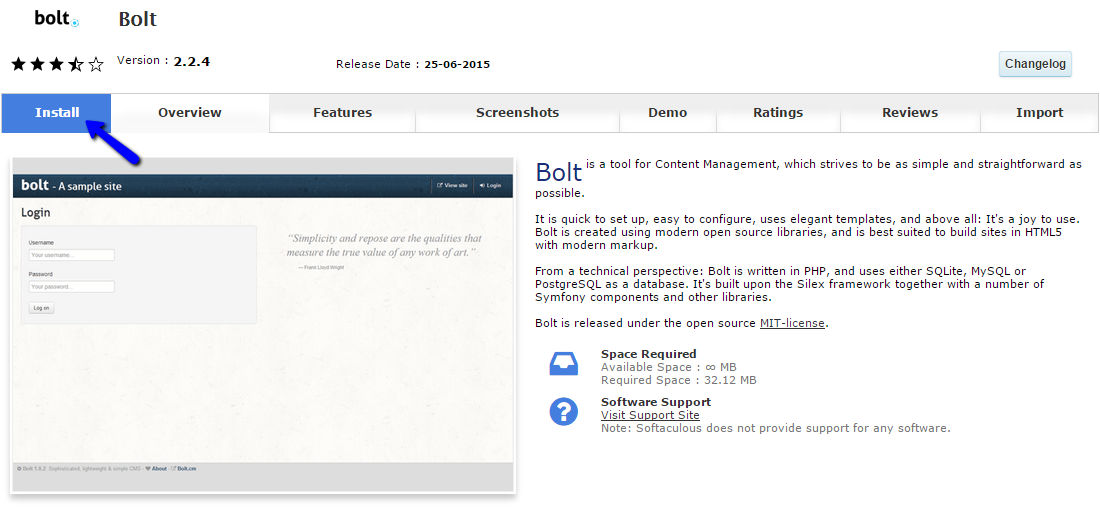
When you access the Bolt overview via Softaculous, you will be able to get more details about the application, such as a demo, reviews, ratings, comments and more. This will help you decide if this is really the app that you wish to use for the development of your website. If so, click on the Install button at the top to proceed with the setup of Bolt on your account.
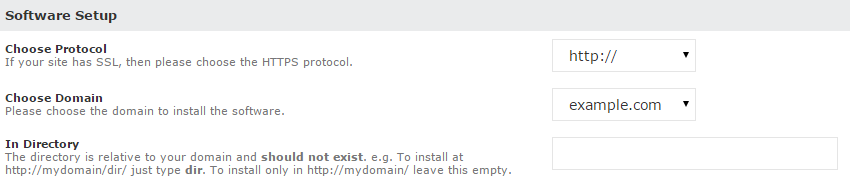
This will present us with the various installment configurations that we can choose from before installing the script. Let us review the options in the Software Setup section first:
- Choose Protocol - Select the protocol for the new installation. Do NOT use the secured HTTPS protocol, if you do not have an SSL certificate installed on your domain by our technical support team. This is a paid service that you can purchase via your Client Area.
- Choose Domain - Select the domain to be used for the new installation. This is usually the primary domain of your account, but if you have any addon/subdomains, you will be able to select them here as well.
- In Directory - If you wish to install Bolt in a subdirectory, you can specify it's name here. If you wish to install the application directly on your domain, leave this field blank.
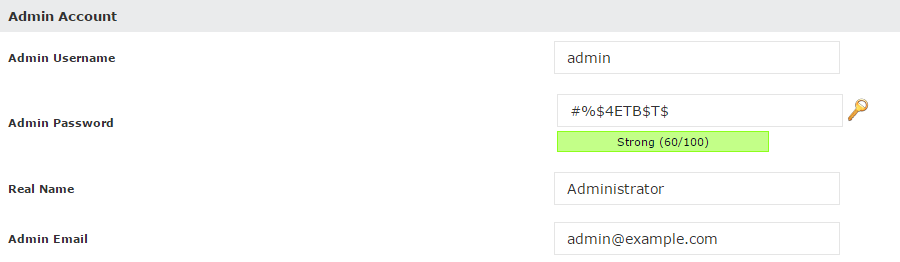
The second section is called Admin Account. You can set up the administrative user for your new website. Keep this information safe as you will need it later. The details you need to enter are:
- Admin Username - Enter a username for the administrative user on your new website.
- Admin Password - Enter a password for the admin user.
- Real Name - Enter the real name of the administrator.
- Admin Email - Enter the email address of your administrator.
When you are ready with the configuration options for your new Bolt website, simply click on the Install button at the bottom of the page and the system will do the rest for you.
The installation will take few seconds for completion. Once ready, it will provide you with a message saying that the installation was completed along with the administrative URL that you must use in order to enter Bolt's backend.

Congratulations! You have successfully installed Bolt on your website by using the Softaculous one click installer.

Bolt Hosting
- Free Bolt Installation
- 24/7 Bolt Support
- Free Domain Transfer
- Hack-free Protection
- Fast SSD Storage
- Free Bolt Optimization
- Free Bolt Transfer
- Free Cloudflare CDN