How to Install Phalcon on Shared Hosting
Updated on Jan 27, 2025
Phalcon is a full-stack web framework for PHP that stands out from the rest with its speed and efficiency. Unlike other frameworks written wholly in PHP (Laravel, for example), Phalcon is implemented as a C extension. That particular deviation from the norm gives Phalcon an edge in performance since C extensions are known for being optimized for speed. Because of that, Phalcon can handle high-traffic applications while keeping the overhead low.
Even though it is technically a PHP extension, Phalcon still behaves as a typical PHP framework during development. You can work with Phalcon and PHP code as you would with any other framework.
This post includes:
What is Phalcon?
As with all frameworks, Phalcon has several key features that outline its capabilities.
- Low-level Architecture - Because Phalcon is written in C as an extension, it can bypass some of the typical PHP framework overhead. Since the extension is a compiled component, it runs directly on the server, eliminating the need for the PHP engine to interpret it. That gives the framework a significant boost in performance when executing tasks;
- ORM - Like many other frameworks, Phalcon utilizes Object-Relational Mapping, making its interactions with the database fast and easy without unnecessary load on the server;
- Template Engine - The framework uses Volt as its templating engine of choice. Volt is a fast and lightweight engine that is also written in C for PHP, allowing developers to create views with ease;
- MVC Architecture - The Model-View-Controller architecture Phalcon uses allows developers to structure their applications clearly. Since each component in the architecture performs a specific task, it is very easy to distinguish between and, therefore, keep the code clean.
Because of those features, Phalcon offers excellent performance without burdening the server’s resources too heavily. The only downside is that it has to be installed at a root level because it is technically a PHP extension. Once done, it can be enabled like any other PHP extension.
Fortunately, that is not an issue on our Shared Hosting servers because Phalcon is available to all of them.
How to Install Phalcon on Shared Hosting?
Installing the Phalcon PHP framework on a Shared Hosting server is actually extremely easy. Assuming the extension is already installed on the server, you only need to enable it! Of course, how that works depends on the control panel you have access to, so we will give you an example of how it works on our services.
Simply log into your cPanel account and look for the Software section. You will find the Select PHP Version tool in it.
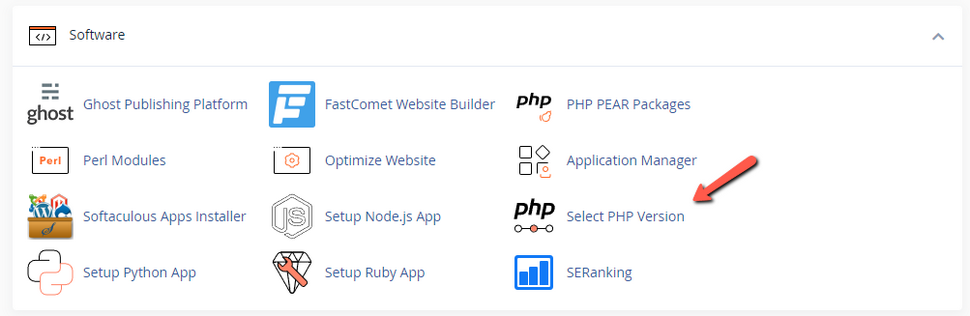
You can change the PHP version your cPanel account uses and a bunch of extensions. Find and enable the Phalcon one (typically Phalcon followed by a number depending on the installed version).

And that is it! You have successfully “installed” Phalcon on your Shared Hosting account.
If you are a Shared Hosting server administrator looking for a way to install Phalcon on the server itself, this is how you do it.
- Log into your server as a root-level user and ensure that it has at least PHP 7.2 installed. The newer, the better;
- Install the PSR extension as Phalcon requires it;
- These are some optional extensions that you might end up needing, depending on what your application or PHP components need:
- curl
- fileinfo
- gettext
- gd2
- imagick
- json
- PDO
- OpenSSL
- Mbstring
- Memcached
- Once you have all the prerequisite extensions installed, use one of the following commands to install Phalcon as per the OS you are using:
- Pecl for Windows, Linux and MacOS: pecl install phalcon
- Debian: sudo apt-get install libpcre3-dev
- RedHat: sudo yum install pcre-devel
- Mac/Osx Using Brew: brew install pcre
- MacOsx Using Mavericks: brew install pcre
As you can see, even installing it as a server administrator is very easy! All that is left is to begin programming.
Example Application
Now that Phalcon is successfully installed and enabled on your Shared Hosting environment let us create a quick and simple application to show off its functionality MVC capabilities. The application is a to-do application and the process is straightforward.
Firstly, we need to install the Phalcon Devtools in the root directory of our application. The Devtools are an amazing utility that will allow us to install a skeleton Phalcon application, saving us a lot of time. Since we are working on a Shared Hosting environment, we have to install the Devtools locally since we do not have root access to install it on the entire server. That is not an issue though. To begin, open the Terminal tool in your cPanel then navigate your project’s directory. If you are installing it on the primary domain of your cPanel account that directory would be public_html. We will use it for this example. You can get there with this command.
cd public_html
When in there install the Devtools.
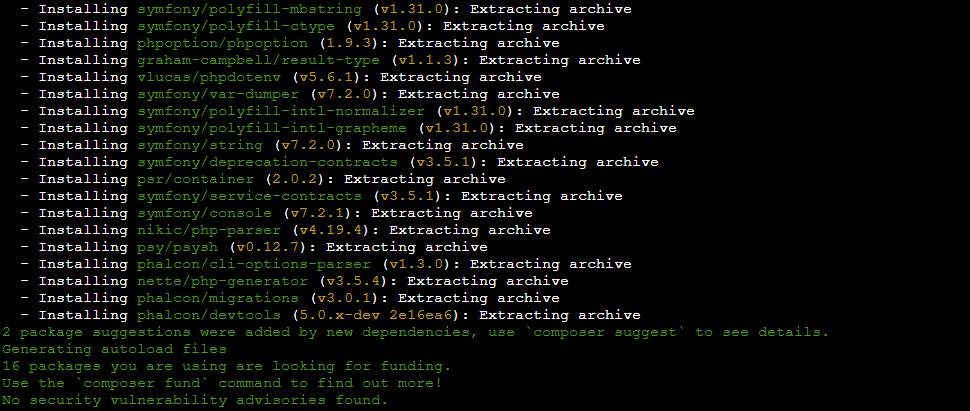
composer require phalcon/devtools:"^5.0@dev" --dev
As you may have noticed we are using Composer, which is fully supported by our services and always kept up to date. This will install the Devtools for this project only and it will look like this when the process is over.
Now that we have the Devtools we can use them to install a baseline application upon which we will build our own. This is the command.
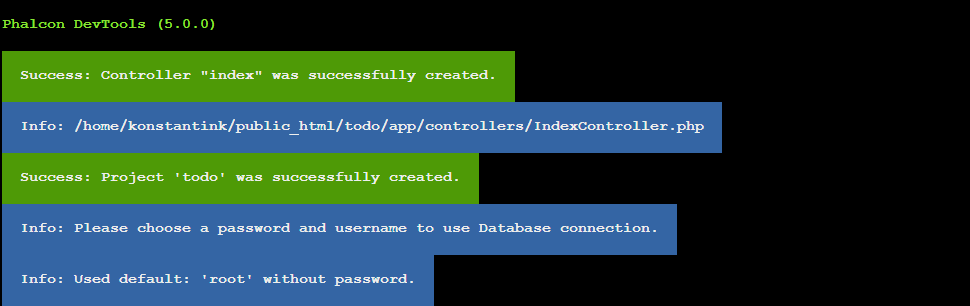
php vendor/bin/phalcon create-project todo
The reason we have to use php vendor/bin in front of the phalcon command is because we installed the Devtools locally. This will create a new project in the todo directory. When the process is done you should see this.
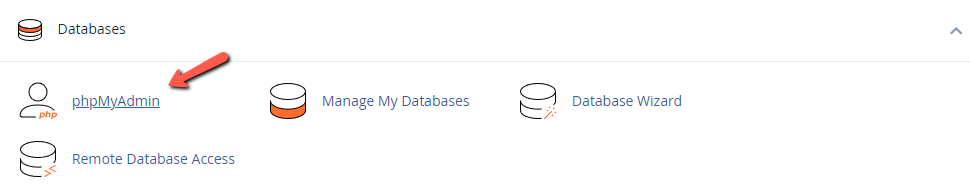
Next, a database. You can check out our tutorial here on how to create one. Once the database is ready, find phpMyAdmin in your cPanel. It is in the Databases section.
Open it and click on your database. It should be completely empty. Then, click on SQL. In the empty field, write this code and then click on Go.
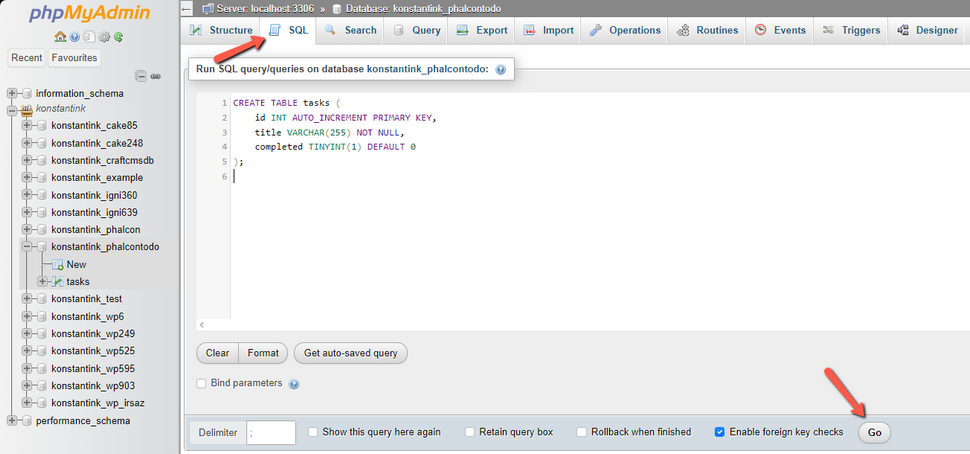
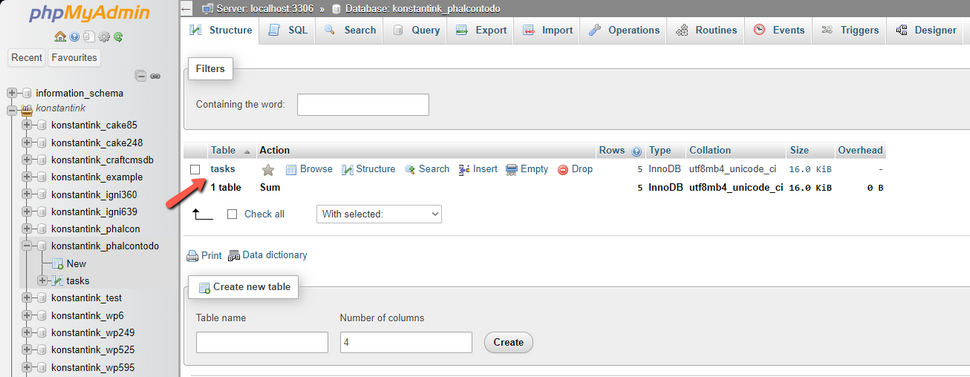
That will create a table for the tasks in our to-do list. It will look like this.
Now that the database is created and we have the necessary table in it we have to add it to our project. Go to the todo/app/config/config.php file and find the database section. In it, place your database name, user and password.
    'database' => [
        'adapter'     => 'Mysql',
        'host'        => 'localhost',
        'username'    => 'konstantink_phalcontodo',
        'password'    => '3uI4qOcWsfqB',
        'dbname'      => 'konstantink_phalcontodo',
        'charset'     => 'utf8',
Next, we have to create a model, a view and a controller. This is as easy as creating a few new files. Let us begin with the model. In todo/app/models, create a file Tasks.php file and place this code in it.
Tasks.php
<?php

use Phalcon\Mvc\Model;

class Tasks extends Model
{
    public $id;
    public $title;
    public $completed;
}
Then, the view. In the todo/app/views/tasks directory create an index.phtml file. This code goes in it.
index.phtml
<h1>To-Do List</h1>
<form action="/tasks/create" method="post">
<input type="text" name="title" placeholder="Add a new task" required>
<button type="submit">Add Task</button>
</form>
<ul>
<?php foreach ($tasks as $task) { ?>
<li>
<form action="/tasks/update/<?= $task->id ?>" method="post" style="display:inline;">
<button type="submit"><?= $task->completed ? 'Unmark' : 'Mark' ?></button>
</form>
<?= $task->completed ? '<s>' . $task->title . '</s>' : $task->title ?>
<form action="/tasks/delete/<?= $task->id ?>" method="post" style="display:inline;">
<button type="submit">Delete</button>
</form>
</li>
<?php } ?>
</ul>
Finally, the controller. Same as the other two. In the todo/app/controllers directory create a TasksController.php file with this code in it.
Tasks.php
<?php

use Phalcon\Mvc\Controller;

class TasksController extends Controller
{
    public function indexAction()
    {
        $this->view->tasks = Tasks::find();
    }

    public function createAction()
    {
        if ($this->request->isPost()) {
            $task = new Tasks();
            $task->title = $this->request->getPost('title', 'string');
            if ($task->save()) {
                $this->response->redirect('/tasks');
            }
        }
    }

    public function updateAction($id)
    {
        $task = Tasks::findFirst($id);
        if ($task) {
            $task->completed = !$task->completed;
            $task->save();
        }
        $this->response->redirect('/tasks');
    }

    public function deleteAction($id)
    {
        $task = Tasks::findFirst($id);
        if ($task) {
            $task->delete();
        }
        $this->response->redirect('/tasks');
    }
}
Then we have to route everything properly. For that we must create a few routes in the todo/app/config/routes.php file. Like this.
Tasks.php
$router->add('/tasks', [
    'controller' => 'tasks',
    'action'     => 'index',
]);

$router->add('/tasks/create', [
    'controller' => 'tasks',
    'action'     => 'create',
]);

$router->add('/tasks/update/{id:[0-9]+}', [
    'controller' => 'tasks',
    'action'     => 'update',
]);

$router->add('/tasks/delete/{id:[0-9]+}', [
    'controller' => 'tasks',
    'action'     => 'delete',
]);

return $router;
The final step is to instruct the web server to use the public directory of your application as the entry point. That is necessary, because Phalcon works out of that directory. Go back to the root directory (public_html in our case) and create an .htaccess file. Place this in it.
RewriteEngine On
RewriteRule ^(.*)$ /todo/public/$1 [L]
And that is it! Ensure all your files are saved and then go to the URL for your application. Specifically the tasks subdirectory (example.com/tasks). That will open the to-do application and it should look like this. You can add, remove and mark tasks.

As you can see, the application works without issue as should any other Phalcon applications on our Shared Hosting services.
We hope you find this article useful. Discover more about FastCloud - the top-rated Hosting Solutions for personal and small business websites in four consecutive years by the HostAdvice Community!

SSD Cloud Hosting
- Free Domain Transfer
- 24/7 Technical Support
- Fast SSD Storage
- Hack-free Protection
- Free Script Installation
- Free Website Transfer
- Free Cloudflare CDN
- Immediate Activation