How to Perform a full backup of your website manually
Updated on Mar 13, 2019
In order to ensure you will be protected against data loss or other errors with your Open Atrium based website you will need to perform regular backups at least once a month of the files and the database of your website. In this tutorial we are going to show you how to perform the whole backing up process.
The Backup creation process, includes:
Step 1 Backup the Files of your website
The best way to backup the files of your website is to download all of these manually on your local computer. In order to do so you will need to connect to the FTP service for your account. The connection should be performed using an FTP client such as Filezilla.
If you are not familiar with the FTP service for your account we would like to recommend you checking our FTP tutorial series.
Once you are connected to the FTP service for your account you should access the folder where the files for your website are located into. That folder is usually the public_html folder if your website is directly accessible with your domain name (with no subfolder at the end of the URL – yourdomainname.com) or any subfolder inside the public_html if your website is accessible with your domain name and a subfolder suffix at the end of the URL (yourdomainnam.com/subfolder).
In order to select all of the files please use a keyboard combination of ctrl+a. Then you will need to right-click on the selected files and choose the Download option so your FTP client can start downloading the files.
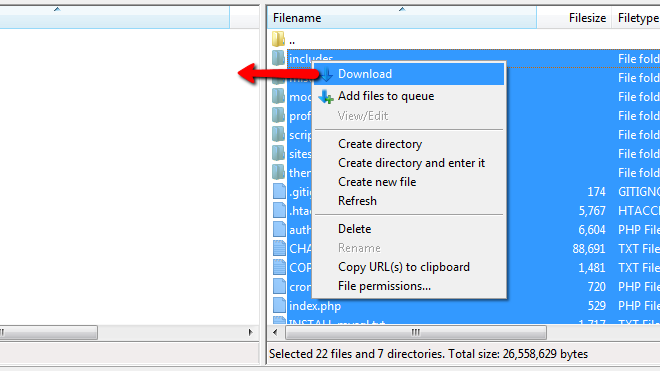
Then the files will begin to download to the local folder you have selected for the left view of your email client. Once the files are downloaded you can proceed to the Step 2 of this tutorial.
Step 2 Generate a Database Backup
Let’s assume that you are performing the backup of your website’s database for the first time. Then you will need to find which database your script is using. This task is relatively easy as you will need to simply check the configuration file of your website.
In order to do that you will need to access your cPanel service and click on the File Manager icon so you can access the file manager feature. Next you will need to navigate to the folder where your website is installed at. If the website is accessible with yourdomainname.com without subfolder sufix this folder is the public_html folder. In case your website is installed and accessible within a subfolder you will need to find that subfolder within the public_html folder of your account.
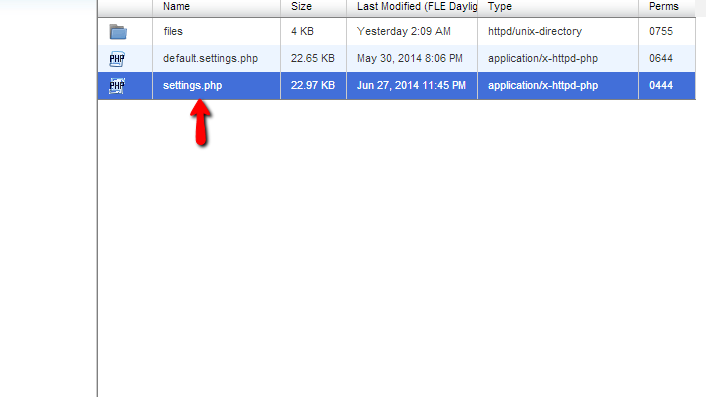
Once you are located in the correct folder you will need to navigate to the sites/default folder where you will be able to find the settings.php file.
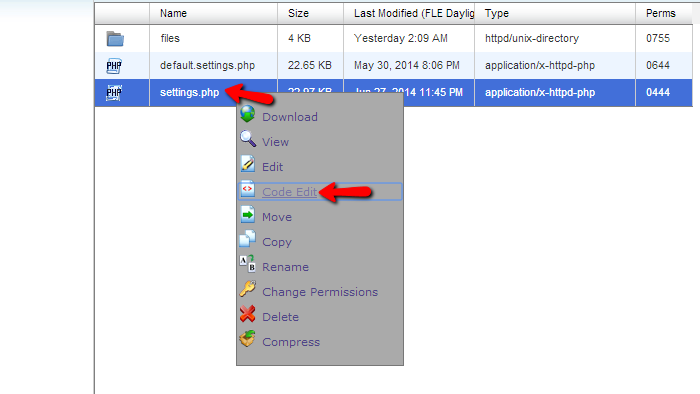
Please right-click on that file and choose the Code Edit option which will allow you to edit the code of this file live on the server hosting your account.
Near the 218, 219 lines you will find the following pieces of code:
 'database' => 'example_database',
 'username' => 'example_user',
Now the line which begins with database is the actual line where you will be able to find the database name which in our case (considering the above provided lines of code) is example_database.
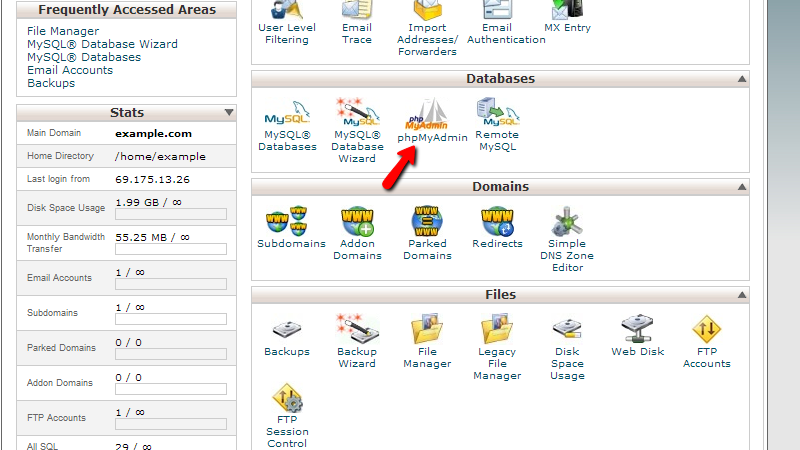
Now that you have the name of your database it is time to export it. Please close the code edit page WITHOUT saving the changes and go back to the home page of your cPanel service. There you will need to find the “phpMyAdmin” icon and access the related service.
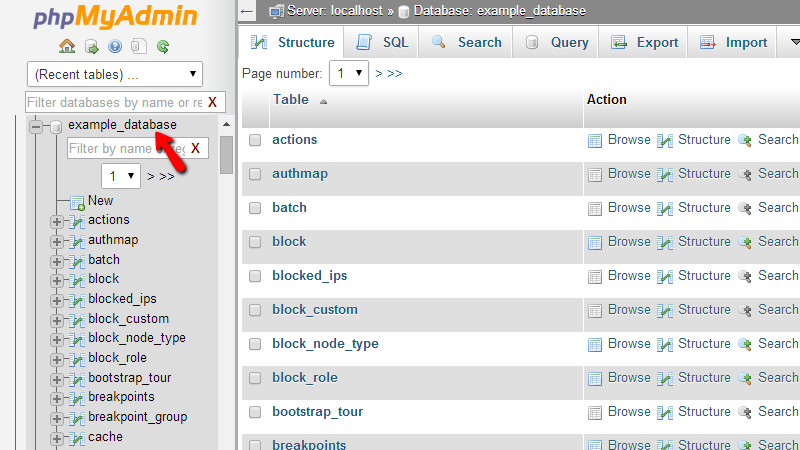
You will be then redirected to the phpMyAdmin service where you will be able to see a list for all of your databases in the left horizontal navigation section. Please click on the database name you have just retrieved from the settings.php file so the tables of that database can be displayed in the central section of the phpMyAdmin feature.
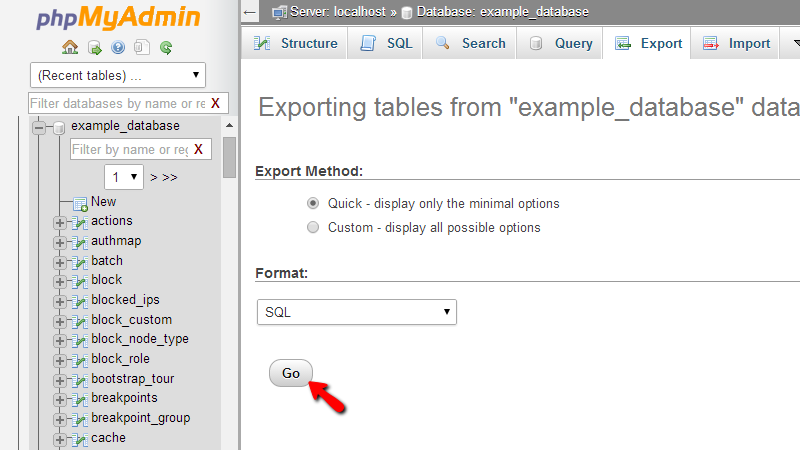
Now that you have chosen the database please click on the Export button from the top horizontal menu.

On the next screen simply press the Go button so the database can begin exporting on your local computer.
Once the exporting process is finished the database .sql file will be automatically downloaded on your local computer by the web browser you are using.
Congratulations! You have successfully performed a full manual backup of your website!

Open Atrium Hosting
- Free Open Atrium Installation
- 24/7 Open Atrium Support
- Free Domain Transfer
- Hack-free Protection
- Fast SSD Storage
- Free Cloudflare CDN
- Free Open Atrium Transfer
- Immediate Activation