Install Loaded Commerce via Softaculous
Updated on Dec 10, 2015
The installation of Loaded Commerce is easy, when you use the Softaculous automated process. We will review the steps for that and all of the options you have using this method. This will provide an inside look on how to complete the process yourself.
The steps for Loaded Commerce installation via Softaculous are:
Access Softaculous
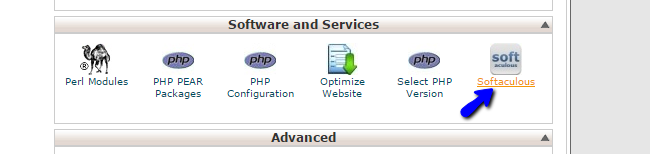
The first step of the process is to access the Softaculous auto-installer. For that purpose, you need to log into your cPanel account and locate the Software and Services section. Click on the Softaculous icon to proceed.
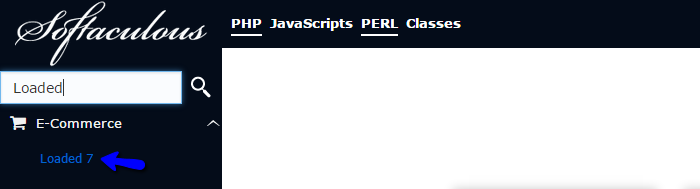
You will be presented with a list of all available applications for free installation. The list is located on the left-side of the screen and the available scripts are grouped by their functionality. Search for Loaded 7 and select it.
You will be taken to the Loaded Commerce overview page of Softaculous. It will provide valuable information about the script and what it is designed to do. You will also be able to see a live demo, reviews and many other options. If you wish to proceed with the installation, click on the Install button.

Configure the Installation Options
The system will initiate the install script for Loaded Commerce. You will have a few options for a proper set up of the application on your account. We will review all of the available options so you can make sure that Loaded Commerce is configured properly on the server.
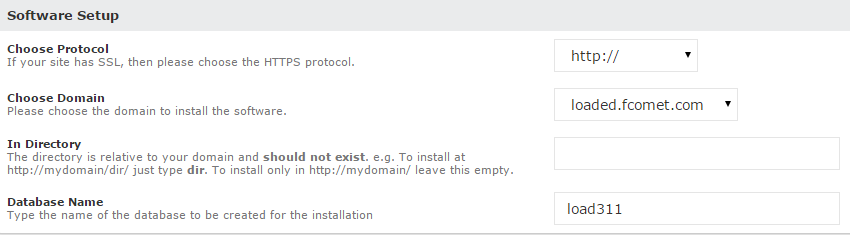
The first section is called the Software Setup and the options you have are:
- Choose Protocol - You can choose the protocol to be used on your new installation. Make sure that you do NOT select https, if you do not have a valid SSL license for your domain. This is an extra service that you can get via your Client Area.
- Choose Domain - Choose the domain to be used for the new installation. If you have any addon, parked or subdomains, you will be able to choose them here.
- In Directory - Choose the directory, where you wish to install Loaded Commerce. If you do not want to install it in a subfolder, simply leave this field blank.
- Database Name - Set the name of the database to be created for your website. The system will automatically add it to your account.
The second section is called Site Settings and you have the following option in it:
- Site Name - Enter the name of the new store. This is optional only and you will be able to easily change the name later

The third step is the Database Settings section configuration. It provides the following option:
- Table Prefix: Set a prefix for the tables on your database. If you are using existing database with data in it, you may specify any prefix, which allows you to easily locate the tables for this new installation.

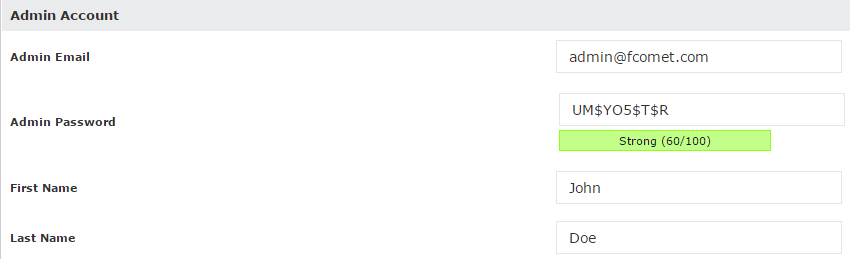
The last section is the Admin Account configuration. The options are:
- Admin Email - Set the administrative email account for your website;
- Admin Password - Set the password for the administrative account on your website;
- First Name - Enter your first name;
- Last Name - Enter your last name.
When you are ready with the configuration described above, simply scroll down to the bottom of the page and click on the Install button. The system will automatically initiate the process for you.
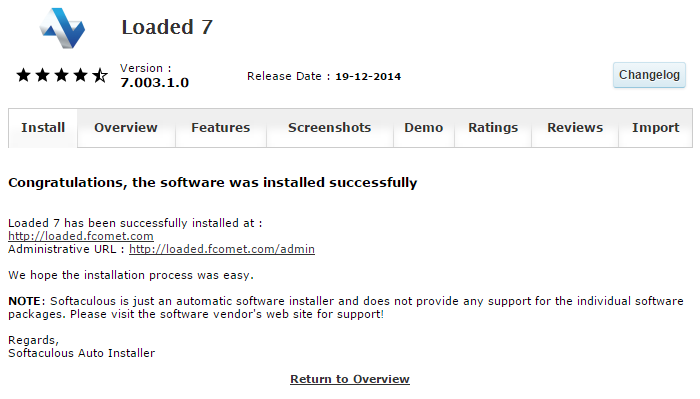
Complete the Installation
The installation may take a few seconds to get fully completed. Once this process is over, you will be presented with details about your new website, which includes the home page URL, as well as the one for the administrative area. Enjoy!

Loaded 7
- Free Installation
- 24/7 Tech Support
- Free Domain Transfer
- Hack-free Protection
- Fast SSD Storage
- Free Cloudflare CDN
- Free Website Transfer
- Immediate Activation