How to use the Backup Manager in Loaded 7
Updated on Dec 10, 2015
This tutorial will review the Backup Manager of Loaded Commerce and how it works. The feature provides an automated creation and restore of backups for your website. However, note that those backups are only for the database on your website and not the files. If you are customizing any of the files of your website, we do not recommend using this option.
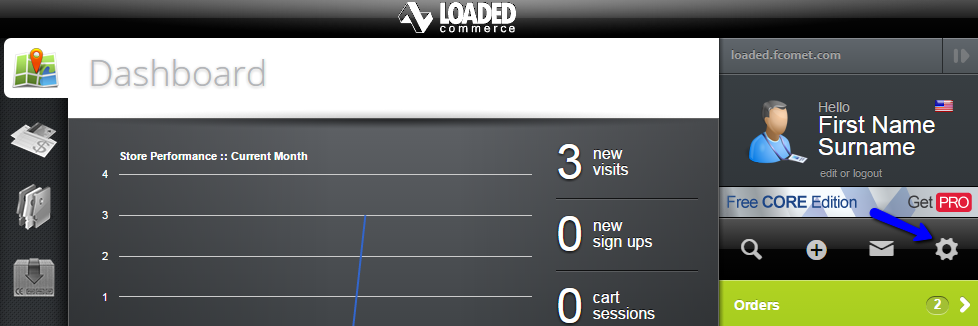
To access the Backup Manager feature, you need to access the administrative dashboard of your website first. Click on the Settings button on the right-side menu.
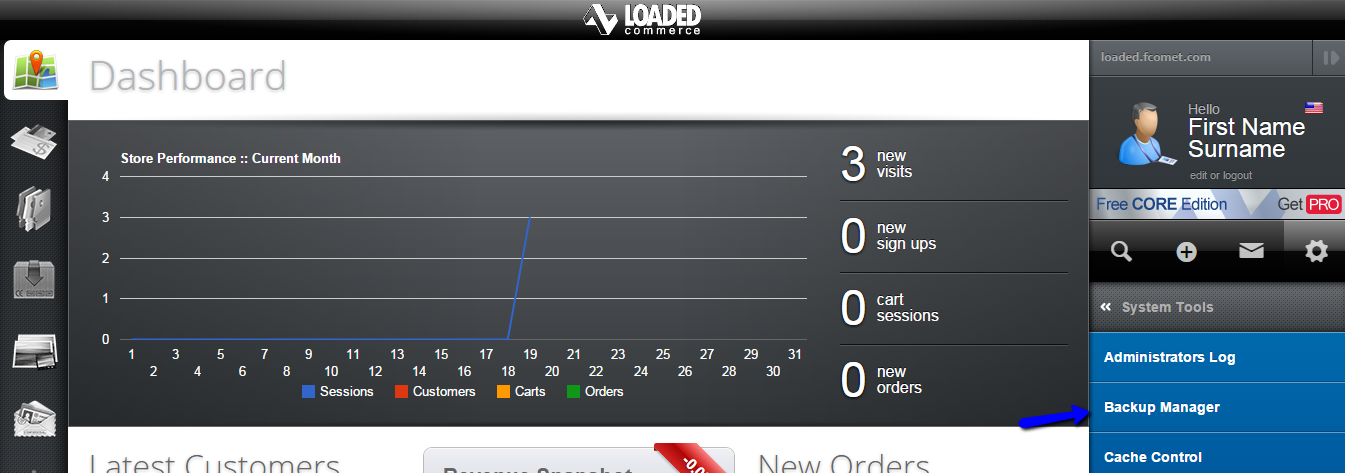
Click on the System Tools option and then Backup Manager.
The Backup Manager allows you to:
Create Backup
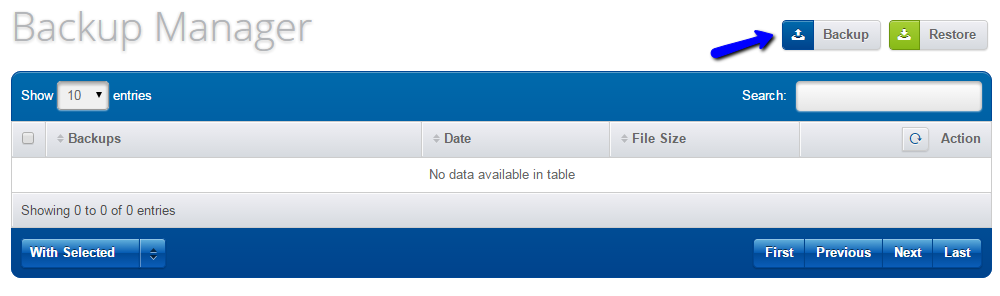
Once you access the backup manager, you will be able to see a list of all available backups of your website's database. To create a new backup, simply click on the Backup button at the top.
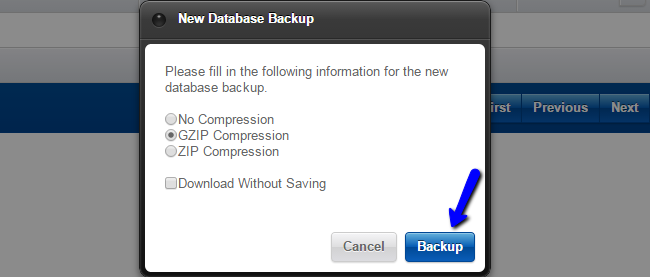
The system will request more information about the new backup. Choose the compression for the new backup and if you would like to instantly download it on your local computer. Then hit the Backup button to proceed.
Restore Backup
To restore a backup that you have created of your website, you need to access the Backup Manager again. Click on the Restore button at the top and select a backup copy from your local computer.
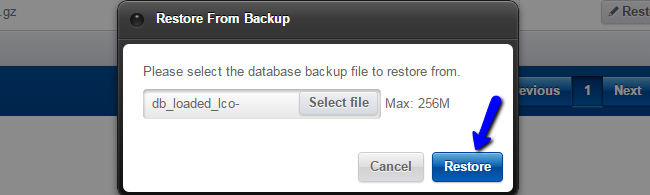
Click on the Restore button and allow the time for the process to get completed successfully.

Then, you will see a successful message to confirm that the restore is completed.

Loaded 7
- Free Installation
- 24/7 Tech Support
- Free Domain Transfer
- Hack-free Protection
- Fast SSD Storage
- Free Cloudflare CDN
- Free Website Transfer
- Immediate Activation