How to Create a Table of Contents in WordPress
Updated on May 20, 2020
User Experience (UX) is one of the most important things you should consider when creating a post, an article, or a tutorial. That’s why it’s always a good idea to include a table of contents (ToC), especially in long-form content that includes more than 3 Headings. Formatting your content with anchor points, also referred to as jump menu links or table of contents, to scroll down to specific content makes navigating and prioritizing content a lot easier and makes your text more accessible. This will even give you a slight advantage in Google. In this post, we will show you how to create your ToC in WordPress, both via a plugin and manually.
We will cover:
What is a Table of Contents?
Simply put, a table of contents acts as an outline of the content you can expect to find on any given post or page. In the case of WordPress posts, you can compose one out of the subheadings you use for each section.
What are the Advantages of Having a Table of Contents?
-
Provides better user experience - When your visitors stumble upon one of your posts, they would like to know what it’s all about as quickly as possible. With a table of contents that is right in front of them, the readers will know roughly what order they can find information in and they can easily click on one of the ToC links and go the part of the content which is most interesting or helpful to them. When using a ToC, it’s less likely for visitors to get bored in the first 5 seconds and simply decide to continue on with their web browsing.
-
Provides quick answers for quick questions - Table of contents not only allows readers to find the exact section they’re interested in but also your content will also appear more structured and well-formatted. It gives the reader a little break after they have read your introduction, while also providing an instant short summary of the entire post.
-
Improves website accessibility - Structuring your documents properly assists screen readers as it enables them to navigate the document using headings.
-
Makes it easier to share direct links to different sections within an article - You can provide users an easy way to share links to a particular section they might be interested in.
-
Helps increase CTR - When headings are used correctly in a post, the added benefit of having a table of content is also that it helps increase the change of getting a featured snippet, or a position zero in the SERP (Search Engine Results Page). When users search for specific long-tail phrases and keywords in Google, featured snippets may display links to an anchor link part of your Table of contents. Google generates structured links in search results when the search keyword is part of a sub-title (if done as a table of contents). Sometimes, Google automatically adds a jump to section link next to your site in search results.
Where to Add a Table of Contents to Your WordPress Posts?
The location of the entire table (table of contents) must be before the first subheading. The table of contents should be in a hierarchical structure (eg using headings 1 through to 6). In other words, Table of contents follows the arrangement of the Heading tags. Content points should be short, contain long-tail keywords, and briefly describe the thesis in the paragraph itself.
Creating a Table of Contents in WordPress via a Plugin (Beginner)
There are more than a few WordPress plugins that can offer an easy table of contents creation, such as Fixed TOC, Ultimate Blocks, CM Table of Contents, Thrive Architect, etc. In our guide, we will show you how to set up and use the Easy Table of Contents plugin.
Here is what you do:
-
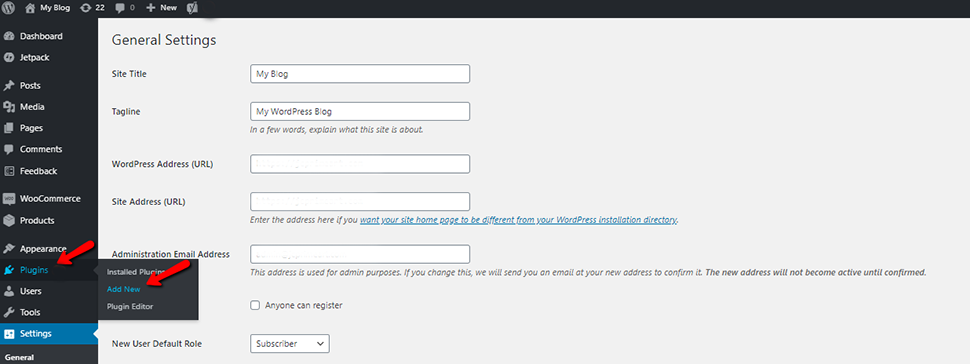
Log into your WordPress Administrator dashboard → Plugins → Add new:
-
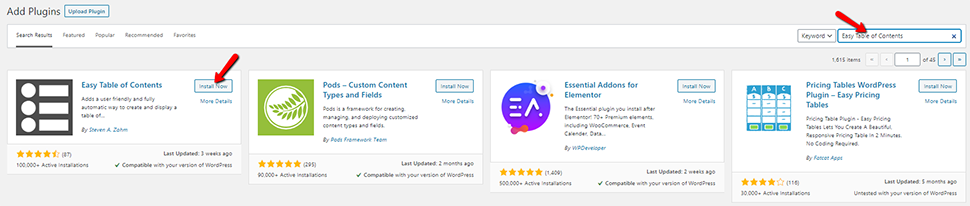
Type Easy Table of Contents in the search bar of the WordPress repository:
-
Install and activate the plugin;
-
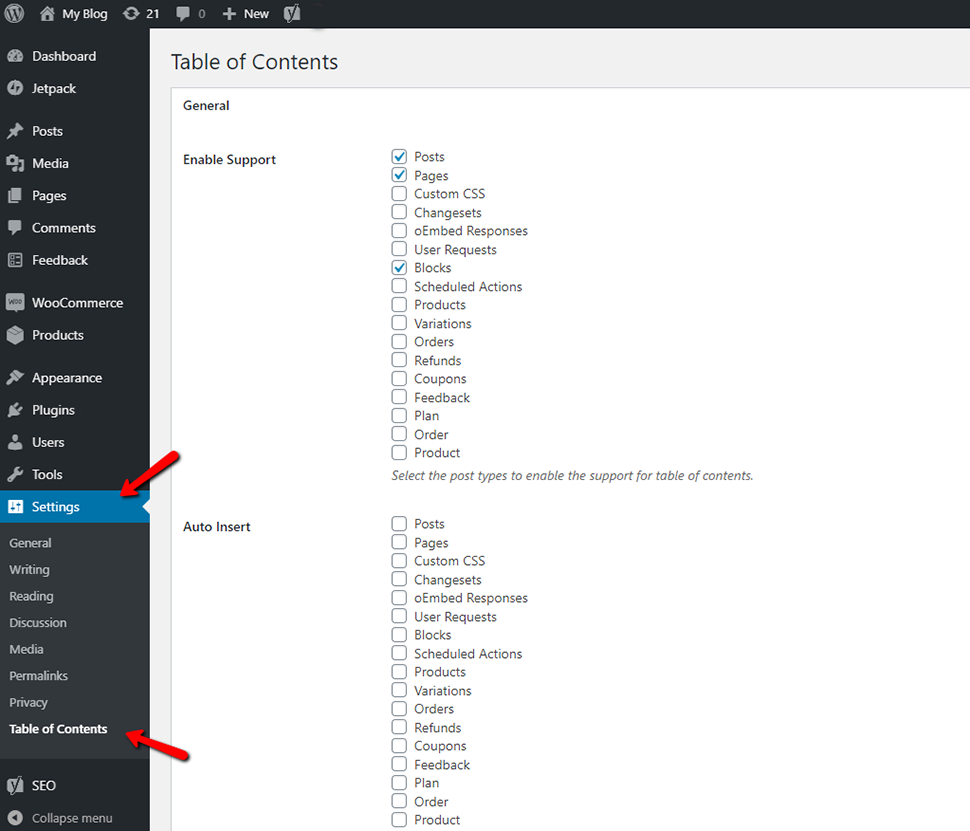
Go to Settings → Table of Contents:
-
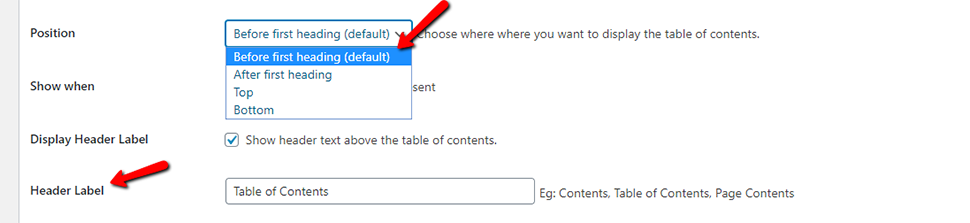
Manage the general settings of your table of contents. You can select the position and choose a title for your ToC container:
You can enable auto-insertion of your ToC for the different types of content on your site, with your posts being enabled by default. It’s recommended to use a table of contents only on longer posts. Using the default settings, which are for posts with 4 or more headings, fits great. If you scroll down, you can also change your table of contents box.
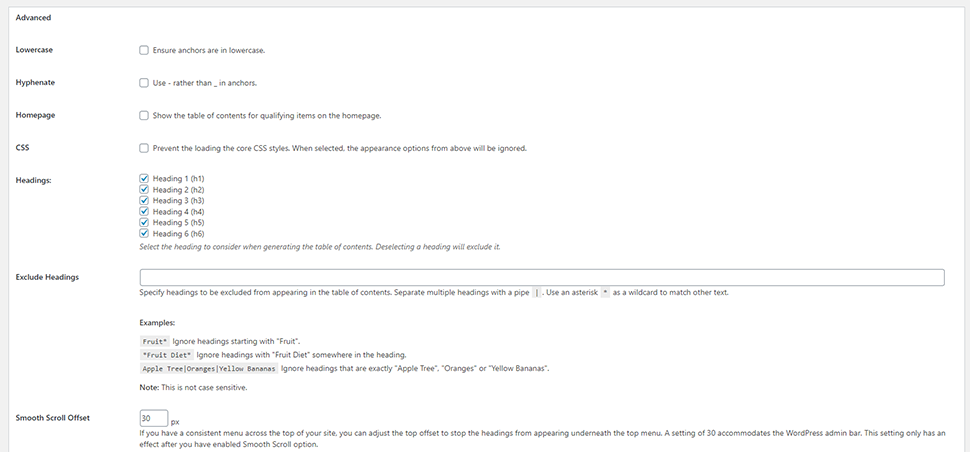
There is also an Advanced settings section, where the default options should work for the majority of websites.
When you are ready with your preferences, don’t forget to store them by clicking Save Changes. By default, your automatic Table of Contents will be placed right before your first heading.
Creating a Table of Contents in WordPress Manually with HTML (Advanced)
If you want to skip the use of plugins for your table of contents, you can do it manually, but you will have to write some HTML lines. It’s actually not too hard, as long as you follow a little guide:
-
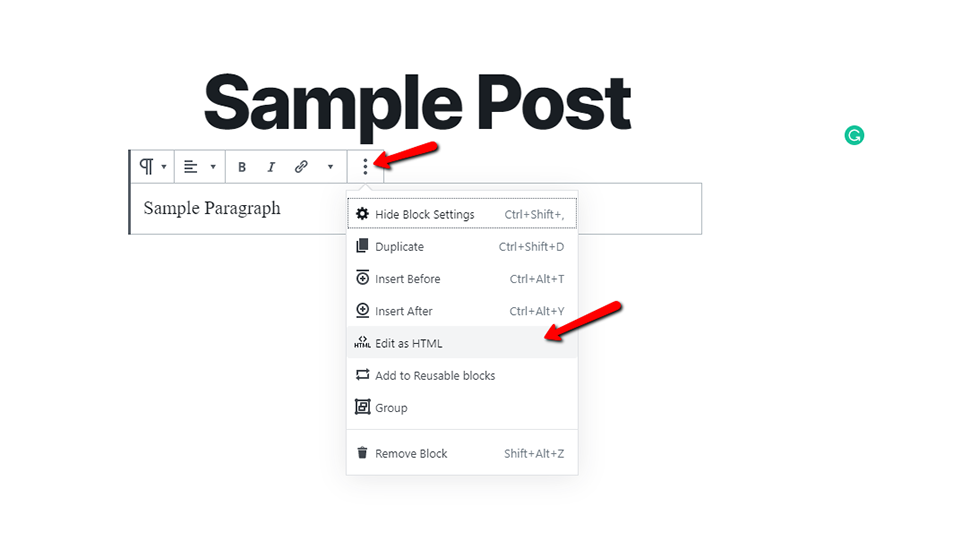
In the block editor, after your intro, and before the first heading, insert a block and choose the option Edit as HTML:
-
Inside the block, use the following template for your table of contents:
<ul class="nav-list">
<li><a href="#your-h2-heading-here">Your H2 Heading Here</a></li>
<ul>
<li><a href="#your-h3-heading-here">Your H3 Heading Here</a></li>
</ul>
<li><a href="#your-h2-heading-here">Your H2 Heading Here</a></li>
</ul>
For your headings, insert the actual text that your headings consist of. Also, when you go higher in heading levels, notice that you have to open a <ul>, and close it with a </ul> when you go back.
Include all your headings inside your table of contents, or at least the ones that you think are most important (H2 and H3).
Next, you will have to make sure your headings are linked to your table of contents so that when someone clicks on a link, it would lead them to that particular part of your post or article. To do that, you need to:
-
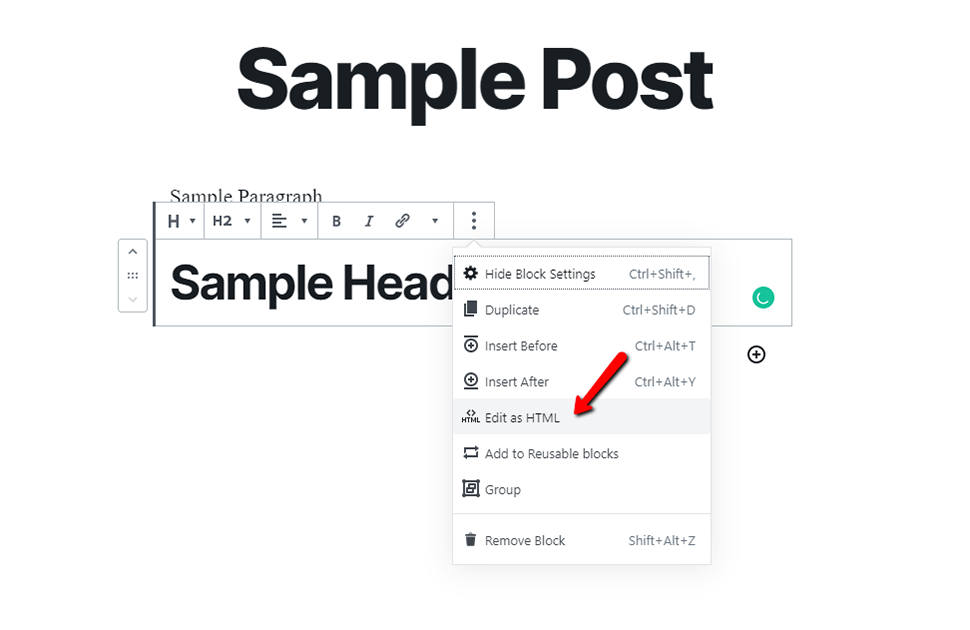
Convert your heading blocks to HTML:
-
Insert HTML, so that your heading looks like this:
<h2 data-role="contents-nav-item" id="your-h2-heading-here">Your H2 Heading Here</h2>
After you go through all your headings and insert the code, while also copying the specific ID so it goes along with your table of contents HTML, you can turn all the HTML back to blocks if you want: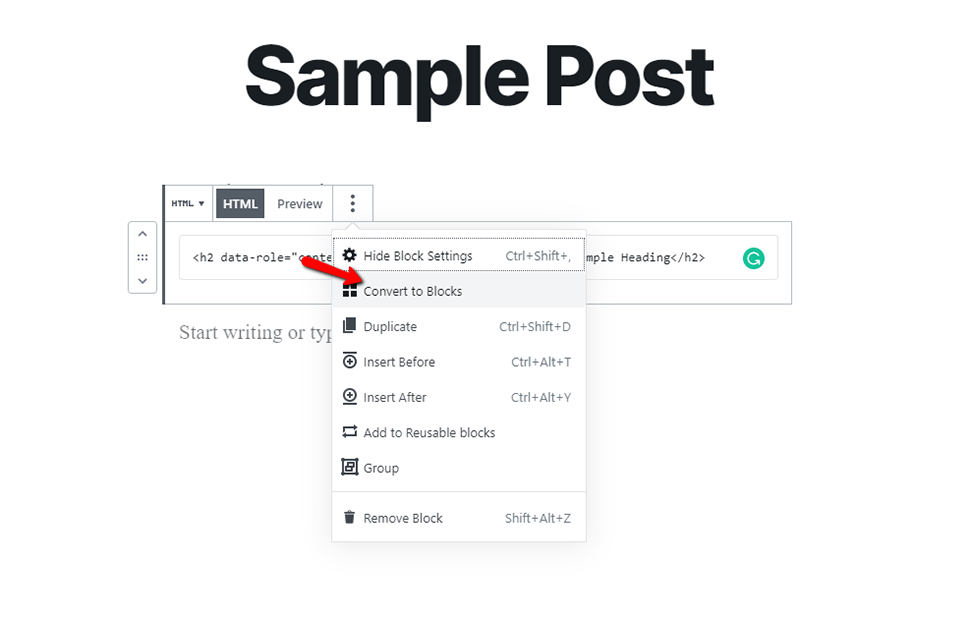
-
Go into Preview and test if the Table of Contents is working properly.
That’s all you have to do. If you choose this method, we recommend that you save the samples you found here and have them at your disposal for every post.
Creating a table of contents may seem like something unimportant for some, but it’s actually essential, especially for large posts with a lot of headings.
We hope you find this article useful. Discover more about FastCloud - the top-rated Hosting Solutions for personal and small business websites in four consecutive years by the HostAdvice Community!
Related articles

WordPress Hosting
- Free WordPress Installation
- 24/7 WordPress Support
- Free Domain Transfer
- Hack-free Protection
- Fast SSD Storage
- Free WordPress Transfer
- Free CloudFlare CDN
- Immediate Activation