How to Restore your WooCommerce Store
Updated on Dec 8, 2022
If you maintain a regular backup generation procedure and you reach a point when you need to restore one of the generated backups then most probably you wonder how to perform the backup restoration. In the next few lines of this tutorial, we will provide you with more information on how you should be able to handle the entire restoration process on your own.
Just in case you have no backups generated for your website, our WooCommerce Hosting package provides weekly backups, which you can get restored if you simply contact our Technical Support Team.
To restore a backup of your Store, you need to complete these steps:
Restore the Files
This step can be skipped if you are sure that the issue you have experienced is related only to your website's database. In case you would like to restore the files here is what you will need to do.
Considering that you have the files, you have backed up previously on your local computer you will need to login into the FTP service for your account using an FTP Client. If you are wondering where to find the login credentials for that service, you can check the welcome email you received after purchasing your hosting package.
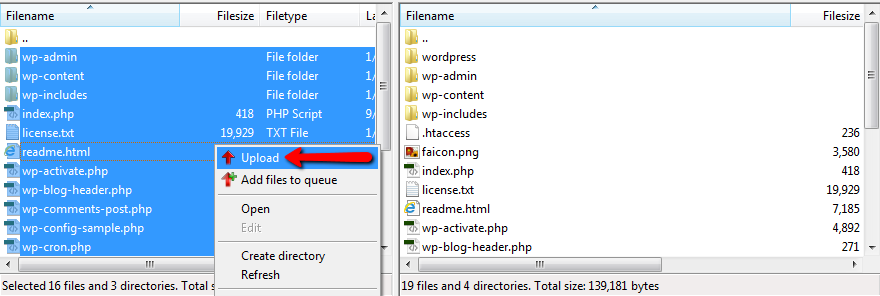
Assuming that you have connected to the FTP service for your account, you should start uploading the files. We recommend selecting all of the files from your local computer (by clicking on a single file and pressing the key combination of CTRL + A) and uploading them by right-clicking on the selected files and choosing the Upload option.
This will prompt a warning that you are about to overwrite some existing files, and this is normal since you are uploading the backed-up files over the currently existing files. Thus, you should overwrite the files by selecting the "Overwrite" option and then the "Always use this action". Next you will need to click the "Ok" button so the upload can start.

Once the upload is finished the files will be overwritten appropriately, and with that, the restore of those can be considered complete.
Restore the Database
Now that you have restored the files, it is time to restore the database. For this to happen first, you will need to have a brand new database, username, and password which you can receive following our Create cPanel Database tutorial.
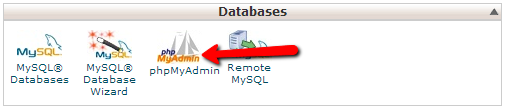
Once you have a database name, username and password you are ready to proceed with the restoration. Since you most probably have the .sql file, you would like to restore the prepared on your local computer you will need to access the newly created database via the phpMyAdmin application. It is accessible under the Databases section of your cPanel. Thus, you should be able to find it easily once you login into the cPanel service for your account.
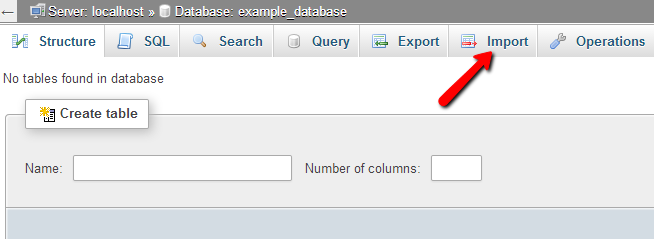
You will need to find the database name in the list of databases positioned vertically in the left section of the page you will be presented with. Once you access the database, you will see no tables or data in the same, and because of that, you will need to simply click on the Import button. If you see some tables when you access the database, please make sure that you are accessing the correct database, as the one you have just created should not have any tables.
The Import button will redirect you to a new page where you will be able to find the Choose File button, which you should use to point to the .sql file you would like to be restored for your database from your local computer. Once this is achieved, please click on the Go button so the file can be uploaded and then imported into the new database.
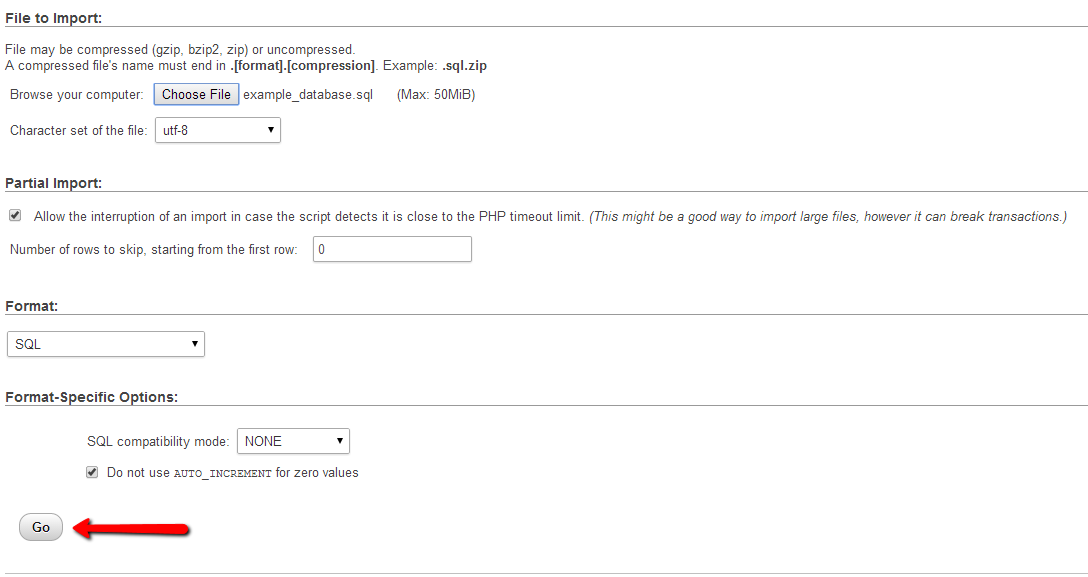
The process should be completed with a message indicating that the import was successful.
Configure WordPress with the Database you have restored
You are almost done! Now that you have both the files and the database restored, you will need to connect the restored version of your website with the restored database. This is quite easy to achieve, and the only thing you will need to do is to edit the code of the wp-config.php file.
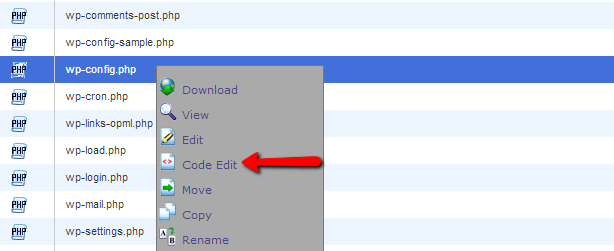
To edit the code of that file, you have quite a lot of options, but let's review the easiest one. In your cPanel, you will find a feature called File Manager. Click on the icon for this feature to access the folder where WordPress is installed and where the wp-config.php file can be found. Once you see the file please right-click on the same and choose the Code Edit option.
Now that you see the code of the file, you will need to search for the following line:
define('DB_NAME', 'example_database');

/** MySQL database username */
define('DB_USER', 'example_username');

/** MySQL database password */
define('DB_PASSWORD', 'someStrongP@SSw0rd!');
Here you should change the code appropriately and put the database name, username and password of the newly created database which you have imported the .sql backup file into. When you are ready, simply press the Save Changes button located at the top right corner of the page so you can save the changes and finalize the whole restoration process.
Congratulations! You have successfully restored a complete backup for your WooCommerce Online Store!

WooCommerce Hosting
- Free Installation
- 24/7 WooCommerce Support
- Free Domain Transfer
- Hack-free Protection
- Fast SSD Storage
- Free WooCommerce Transfer
- Free Cloudflare CDN