How to Restore phpMotion from a local Backup
Updated on Dec 10, 2015
In case of emergency with your website you might want to restore a backup you have previously performed for your website. In this tutorial we are going to show you how to restore a complete backup from your local computer on your hosting account with us.
To restore your phpMotion Backup, you need to complete these steps:
Step 1 Restore the Files of your website
In order to restore the files for your website you will need to upload those and to replace the old “Broken files” directly on your hosting account with us. For this purpose you will need to connect to the FTP service for your hosting account and to prepare the folder where you will be uploading the files from your local computer.
Let’s assume that your phpMotion website is storing its files in the public_html folder. Then you will need to access that folder. Then you will need to go back to the files on your local computer by navigating to their folder via your FTP client. Once you have the files located on your local computer displayed on the left side of your FTP client and the files currently hosted on your hosting account in the right side of your FTP client it is time to proceed.
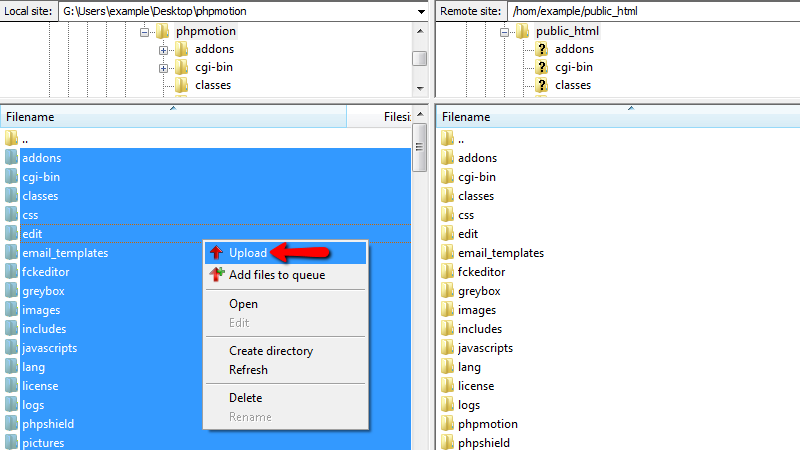
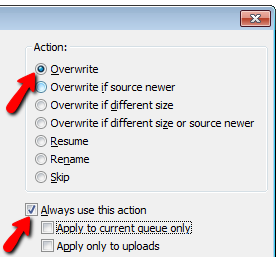
Please select all of the files from your local computer and right-click on them. Next you will need to select the “Upload” action which is the first one from the list. Since the files already exist you will be prompted with message that some of the files already exist. Please make sure that you will select Overwrite and also “Always use this action” options before you proceed with the upload by clicking on the Ok button on the prompted window from your FTP client.
Please allow some time for the files to be uploaded especially if you are also restoring the uploads folder.
Step 2 Restore the Database of your website
The database restoration process can be performed differently depending on your personal needs. However the process we will describe in the next few lines of this tutorial happens to be the most reliable one ensuring no data loss for the restored database and also for the old broken database. In order to restore the database first you will need to create a new database.
Create MySQL Database
For more information on how to create a MySQL database and username, please check our cPanel tutorial on How to create MySQL Database.
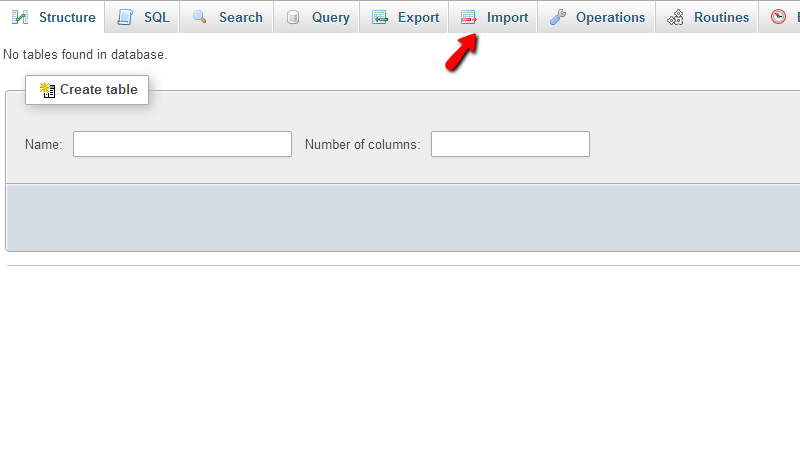
Let’s assume that you have created a new database with the name of “example_database2”. Then you will need to access that database via your cPanel > phpMyAdmin feature and you will probably notice that the database is empty. In order to upload the backup of the database you have on your local computer you will need to use the Import feature of the phpMyAdmin application.
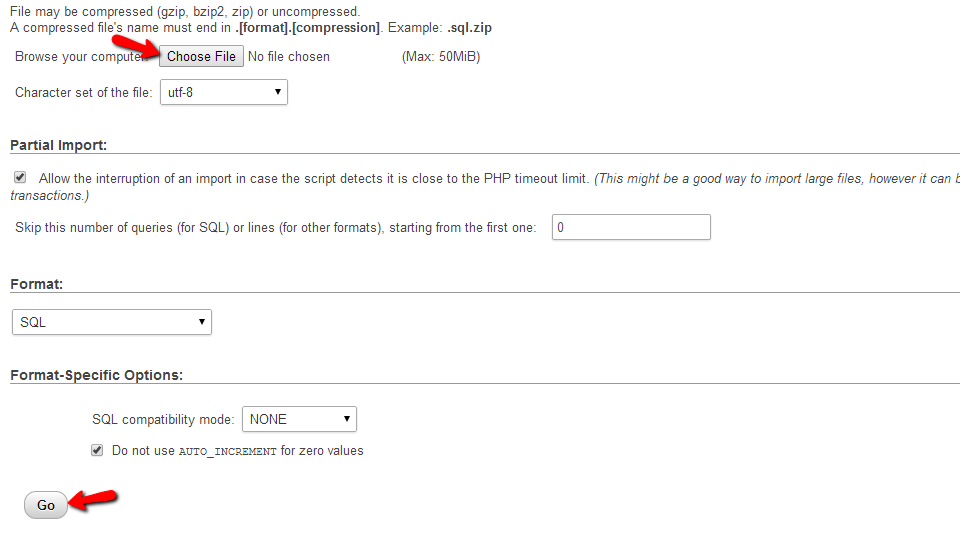
Then you will be presented with the option to select the database sql file in order to upload and restore it. The import page is relatively simple and there you will need to simply point the sql file on your local computer by pressing the Choose File button and then hitting the Go button at the bottom of tht page.
Once the import process is finished you will be presented with a status message indicating the finalization.
Step 3 Link the Database and Files
The last thing you will need to do in order to finish with the restore is to reconfigure your application with the new database credentials. In order to do that you will need to access again your cPanel > File Manager and to access the “classes” folder where the mysql.inc.php file can be found.
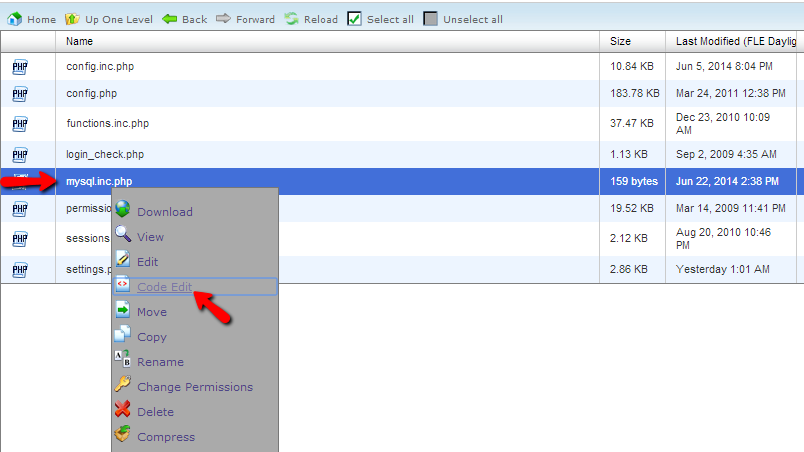
Next you should select the file and right-click on the same so you can then select the “Code Edit” option. This option will present you with convenient code editing tool directly into your browser and you will be able to edit the database information on that file by changing the database name, username and password.
For example if your database name is example_database2 and the database username is also example_database2 with password pass123 you will need to ensure that the code will be edited in order for the same to look like that:
$config["dbusername"] = "example_database2";
$config["dbpassword"] = "pass123";
$config["dbname"] = "example_database2";
Then you will need to save that file by clicking on the Save Changes button and then to simply refresh your website. There should be no errors on the website and it should display the content it was displaying when you have taken the backup previously.
Congratulations! You now know how to fully restore your website from a local backup you have previously created!
On this page...

phpMotion Hosting
- Free Installation
- 24/7 phpMotion Support
- Free Domain Transfer
- Hack-free Protection
- Fast SSD Storage
- Free phpMotion Transfer
- Free Cloudflare CDN
- FFmpeg Support