Restore Pimcore Backup
Updated on Mar 13, 2019
If some of the implementations you have performed on your Pimcore website are resulting in some dramatic errors and other issues with the functionality of your Pimcore website then most probably you would like to restore a backup performed prior those changes so you can restore the normal operational rate of your website.
In the next few lines of this tutorial we will show you how to restore a local backup you might have performed earlier on your live website.
In order to Restore a Pimcore Backup, you will need to:
Restore the Files and Folders
Assuming that you have a copy of all the files and folders your Pimcore website was using, let's upload those on your hosting space. But before you can do that, you will need to remove the new broken files. This can be done either via the FTP service or via your File Manager service. Since however you will be uploading the backed up files via the FTP service we will use it for this purpose also.
Now, please login into the FTP service for your hosting package. You should have received all the required information for the configuration of your FTP client in the welcome email you have received right after you have signed up with us.
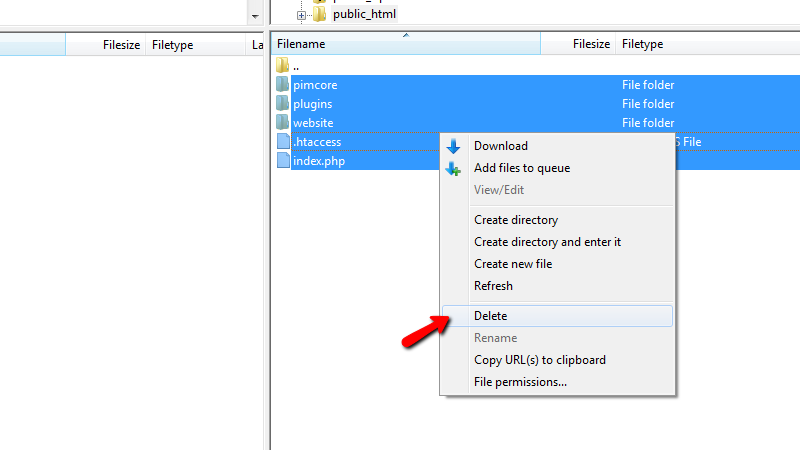
Once your FTP client is connected to the FTP service of your web hosting account with us you should navigate to the folder where currently the files of your Pimcore are stored.
Then you should select all those files and from the right-click menu you should select the Delete option and after you confirm the deletion those files will be deleted.
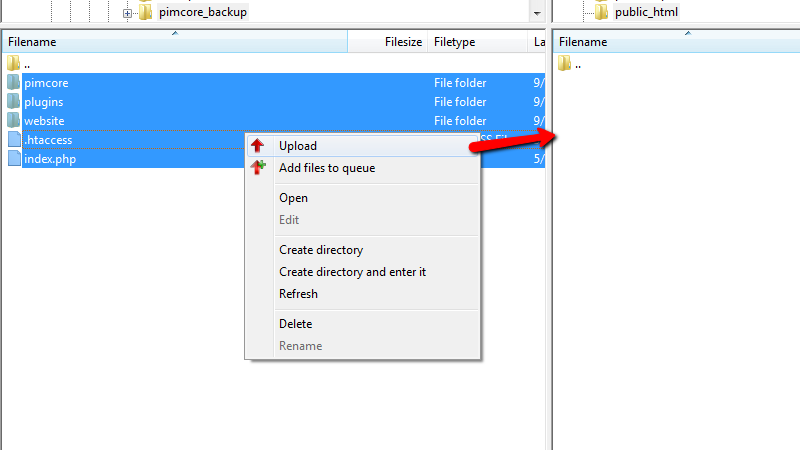
Ok great! Now you have cleared the old broken files and you are ready to upload the backup of the same files. In order to do so you will need to navigate to the backup folder on your local computer where you will be able to find all those files.
Once you have selected them all please right-click on them and select the Upload option from the menu you will be presented with.
The upload process can take from few up to several minutes depending on the size of your website. Once the process is finished you will be able to access your website again if of course it was using the same database as the backup copy you have just uploaded.
Restore the Database
Now that you have uploaded all the files and folders it is time to also import the database backup you have into a new database and then reconfigure your Pimcore website with the new database.
Let's begin with the importing process. In order to import the .sql file you have as backup on your local computer you will need to create a new database and add a user to the same. This can be easily achieved by using the Database Wizard feature of the cPanel service as there you will be able to create a new database and to add a new user to the same with few clicks.
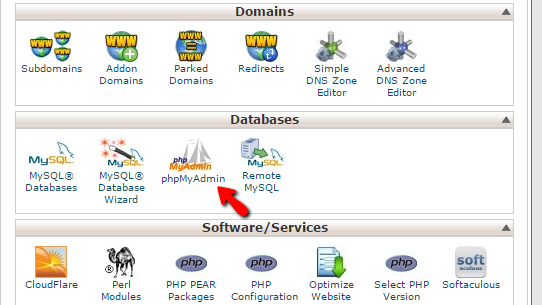
Assuming that you have the database name and username at hand it is time to import the .sql file. For this purpose you will need to access the phpMyAdmin application via your cPanel service.
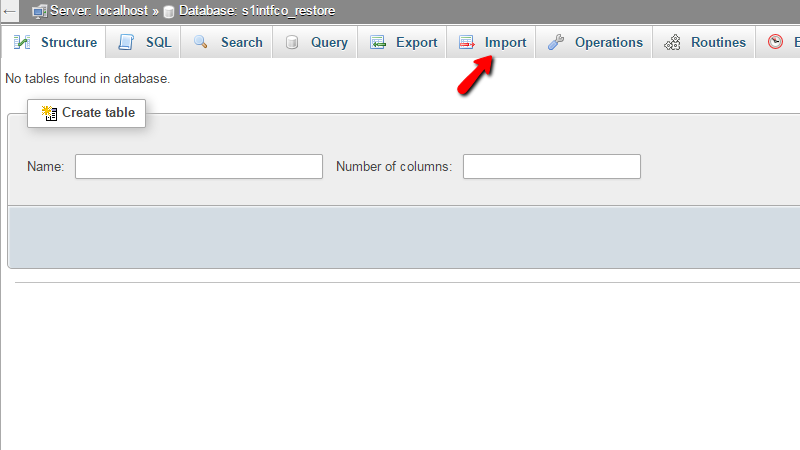
Then you will need to find the newly created database into the database list presented in the left vertical menu. In our case the database name which we will use is s1intfco_restore. Once you click on the database name you will notice that there are no tables in your new database which is normal and you should not worry about it.
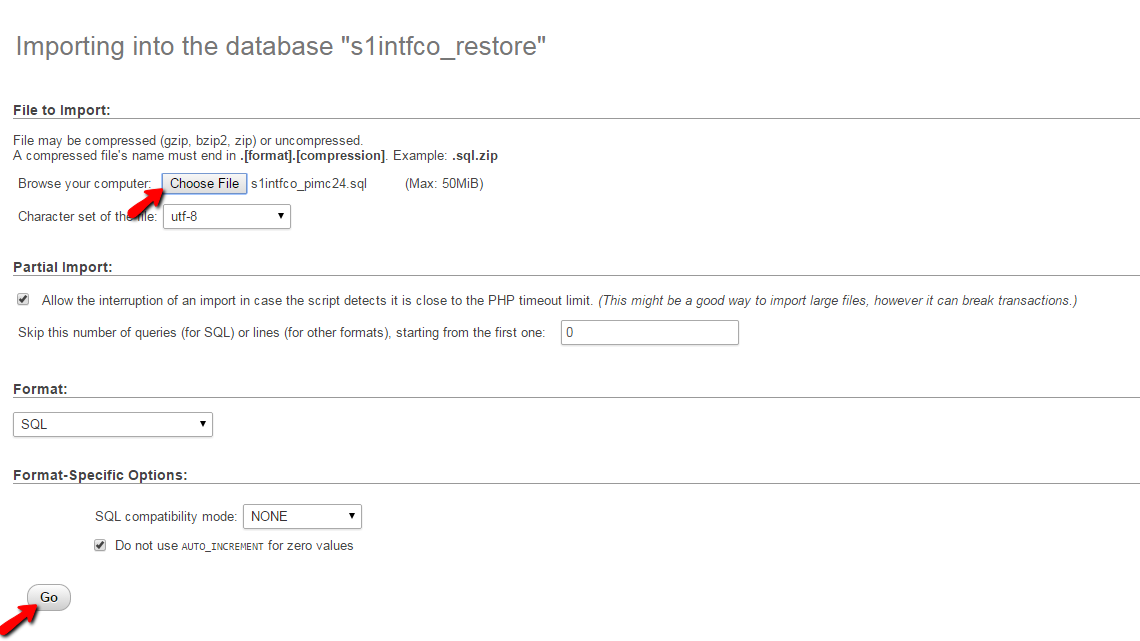
Now, let's import the database backup you have. Once you are in the table view of your new database please click on the Import link located in the top horizontal menu.
Then you will need to choose the .sql file from your local computer using the Choose File button and once this is done you will need to simply press the Go button on the same page.
Alright! You have successfully imported the database and the only thing left is to configure your Pimcore application to use that new database.
Link the Database and Files
In order to do so you will need to edit the configuration file of the application with the credentials for the new database. This can be achieved easily via the File Manager feature of the cPanel service.
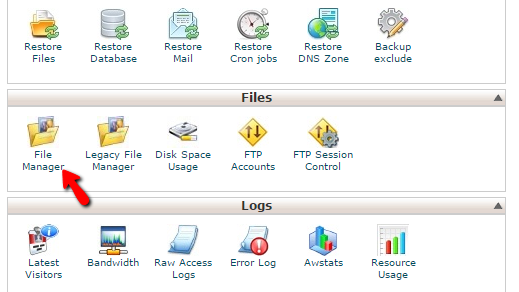
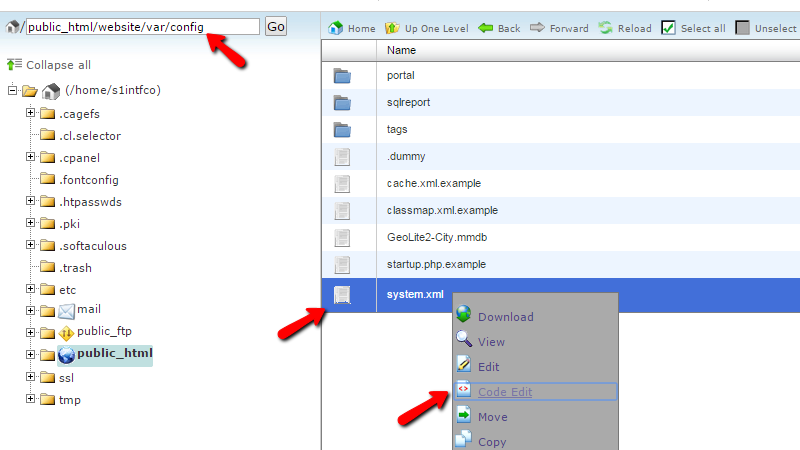
Once you access the File Manager feature please navigate to the folder where your Pimcore application is installed (the one in which you have just uploaded all the files and folders) and from there you will need to navigate again to the website/var/config/ folder where you will be able to find the system.xml file.
In order to edit the code of that file please right-click on the same and choose the Code edit option.
Between the 13th and the 20th line you will notice the following piece of code:
<params>
      <host>localhost</host>
      <username>s1intfco_pimc24</username>
      <password>pass123</password>
      <dbname>s1intfco_pimc24</dbname>
      <port>3306</port>
</params>
This is the code you will need to edit. The lines you will need to edit are the:
- 15th - username
- 16th - password
- 17th - dbname
With the respectful values - Database username, Database Username password and Database name. Keep in mind that here you will need to replace the old database credentials with those you have just created before you import the database earlier.
Once the edit is finished please save that file using the Save Changes button located in the top right corner and refresh your website so you can ensure that the restore is successful.
That's it! Congratulations, you can now restore any local backup you have on your live website!

Pimcore Hosting
- Free Installation
- 24/7 Support
- Free Domain Transfer
- Hack-free Protection
- Fast SSD Storage
- Free Transfer
- Free Cloudflare CDN
- Immediate Activation