Installing Pimcore manually
Updated on Mar 13, 2019
Pimcore is one of the best Content Management Systems(CMS) currently available under Opensource licenses. If you have chosen the application and you are wondering how to install it, in this tutorial we will cover the basic manual installation procedure in few easy to follow steps.
To complete the Pimcore Installation, please follow these steps:
Download and Prepare the Installation Files
As every Opensource product these days the code of the Pimcore platform can be found on their official download page. Once you land there please select the second (middle) package from the available for download packages.
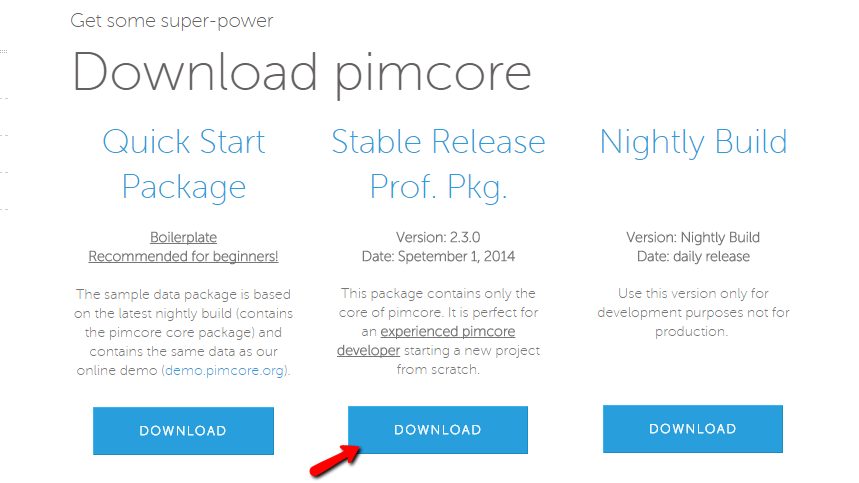
If you would like to install the Quick Start package simply download the first package from that list labeled the same way.
Once the package is downloaded please extract and upload the contents of the package on your hosting space using your favorite FTP Client.
Note
Pimcore can be installed only on domain or a subdomain. In other words the application should be uploaded either in the main folder of your primary domain (public_html) or in the subfolder of your subdomain (public_html/subdomainfolder).
Once the files and folders of the Pimcore application are uploaded on your hosting space please access that location via your Internet Browser.
Initiate the Installation Process
Once you access the location where the files were uploaded via your Internet Browser you will be presented with the default installation screen of the Pimcore platform.

There you will need to configure few simple dependencies mostly related to the database of the application such as Database Adapter, Host, Username, Password, Database name and Database Port.
As an additional options under the Admin User section you should enter the isername and the password you would like to use.
All the information you need can be retrieved when you create a new database via your cPanel → Database Wizard. The default MariaDB port is 3306 and you should leave it as it is or fill it with that value.
If you have created your database via your cPanel then most probably right after you click on the Install now button you will get an error message indicating that "Database Charset is not UTF-8".
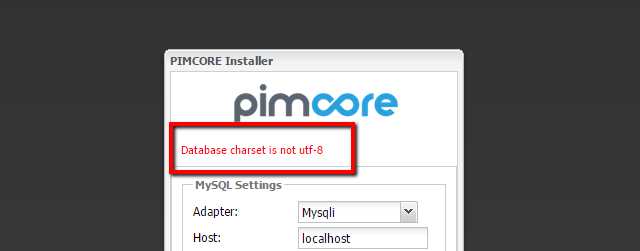
This mean that you will need to change the Character set of the database you have created and in the next step we will explain in details how this can be achieved.
Change the Character Set of a MariaDB database
Assuming that you have created your MariaDB database you will need to access the phpMyAdmin feature of your cPanel and to find the newly created database in the list of available databases for your cPanel account displayed in the left vertical menu of the phpMyAdmin feature.
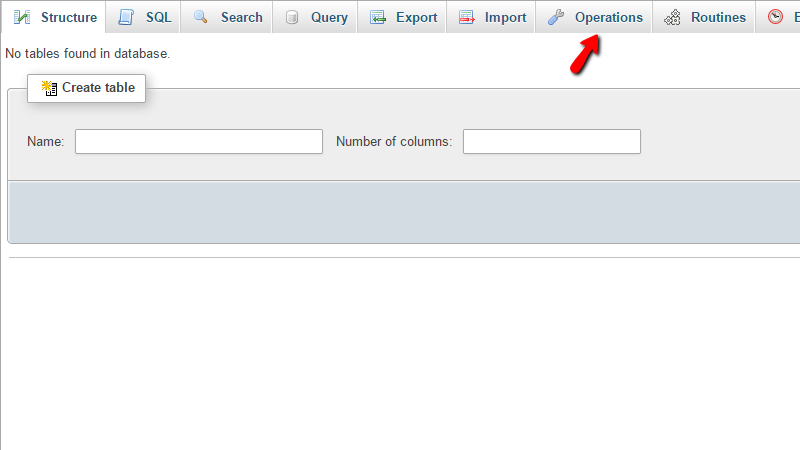
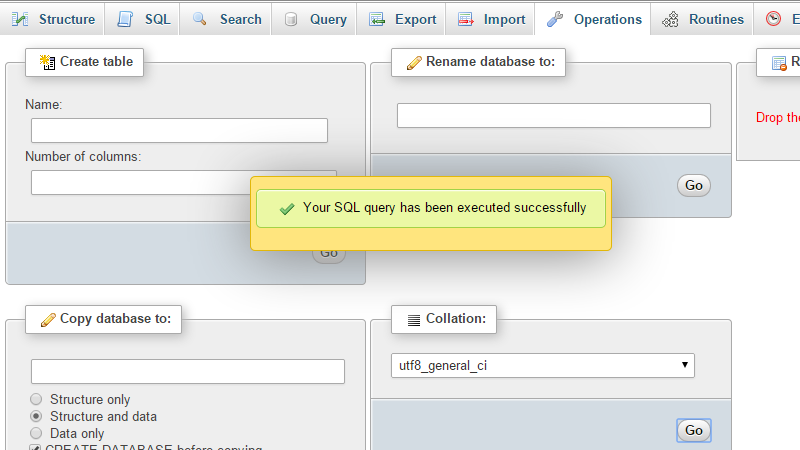
Once you locate the database please click on the same so you can be presented with the tables view of the database. Don't worry if that view is empty. Actually since this is a newly created database it should be empty. Then you will need to click on the Operation button in order for the available actions on the database can be presented for you.
On the newly displayed page under the Collation section you will be able to find list of the available collations and from that list you will need to select utf8_general_ci as collation your database should be using.
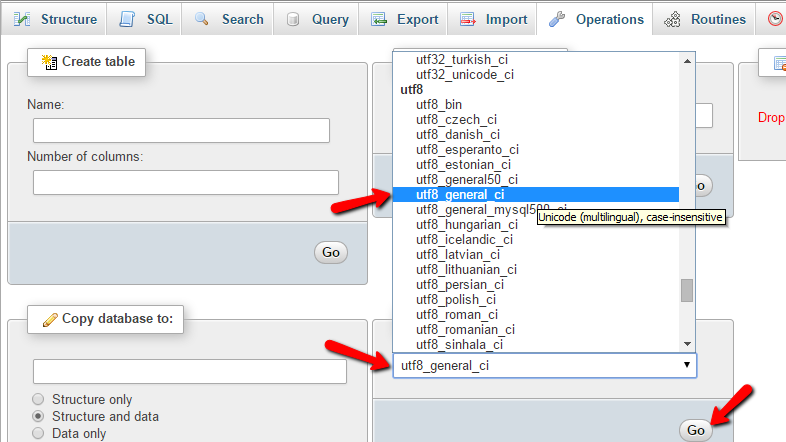
Once the correct collation is selected please press the Go button so you can apply the change. Then you will be presented with a message that the operation has been performed on your database successfully.
And finally if you go back to the installation page of your application and press the Install now button you will be able to have a fully functional installation of Pimcore in just few seconds.

Once the Pimcore platform is installed you will be redirected to the admin area where you should enter the username and the password you have chosen earlier in the installation procedure.
Congratulations! You have successfully installed the Pimcore application.

Pimcore Hosting
- Free Installation
- 24/7 Support
- Free Domain Transfer
- Hack-free Protection
- Fast SSD Storage
- Free Transfer
- Free Cloudflare CDN
- Immediate Activation